Are you tired of the same old store-bought shirts? Is your closet a sea of boring basics, a place where “personal style” goes to die? Do you crave a wardrobe that truly reflects your personality?
Creating your own DIY shirts is the “ultimate power move” to stand out, showcase your creativity, and stop blending in. This isn’t just about making clothes; it’s about crafting a wearable extension of your vibe.
This is your creative playbook for transforming an ordinary, five-dollar shirt into an extraordinary fashion statement that will have everyone asking, “Where did you get that?!”
We’ll explore iconic designs, decode the secrets to a professional, long-lasting finish, and walk through the practical steps to bring your vision to life.
By the end, you’ll see a plain blank tee not as a boring basic, but as a “masterpiece in waiting.”
Before You Begin: The Creator’s Mindset
The most legendary DIY shirts start with an idea, not just a technique. Before you spill a single drop of paint, let’s lay the groundwork for a design that is clever, cohesive, and “unapologetically you.” The goal is to create a vibe, not just a t-shirt.
The Secrets of Style: Simple Rules for a Pro-Level Finish
“DIY” doesn’t have to mean “messy and amateur.” These simple secrets are what elevate a craft project into a high-end, boutique-worthy piece.
The Canvas is Everything: The shirt you choose matters. For dyeing and painting, 100% cotton is your best friend. It absorbs pigments evenly for a vibrant, professional finish. Synthetic blends can resist dye and lead to a faded, patchy look.
The Pre-Wash is Non-Negotiable: This is the most skipped step, and the most important. Washing and drying your shirt before you start removes any chemicals or sizing from the manufacturing process, which can block paint and dye. It also pre-shrinks the fabric, so your perfect design doesn’t get warped later.
Heat-Setting is Your Best Friend: Want your design to last? You have to make it permanent. For most fabric paints and markers, this means heat-setting. After your design is dry, turn the shirt inside out and iron it on a high setting (no steam!) for a few minutes. This simple step “locks in the art” and makes it washable.
Cardboard is Your Secret Weapon: Always, always, always slide a piece of cardboard inside your shirt before you start painting, bleaching, or drawing. This creates a flat, stable surface to work on and prevents any “bleed-through” to the back of the shirt.
What’s the Real Cost? A No-Fuss Budget Breakdown
| The Approach | Estimated Cost | What Your Money Buys | The Little Extras (Don’t Skip These!) |
| The Upcycler | $0 – $20 | • Using old shirts you already own • Household items like bleach, Sharpies, or crayons • A basic bottle of fabric paint | • A good roll of painter’s tape • A spray bottle for bleach or water • A piece of cardboard |
| The Craft Store Artist | $20 – $50 | • A few new, high-quality blank tees • A full tie-dye or screen printing kit • A set of good fabric markers or paints | • A pack of assorted stencils • Iron-on transfer paper • A bottle of textile medium |
| The Streetwear Pro | $50 – $100+ | • A vinyl cutting machine (like a Cricut) for stencils • Heat transfer vinyl (HTV) and a heat press • A high-quality embroidery starter kit | • A subscription to a design software • A set of high-end fabric paints • A variety of blank shirts in different styles |
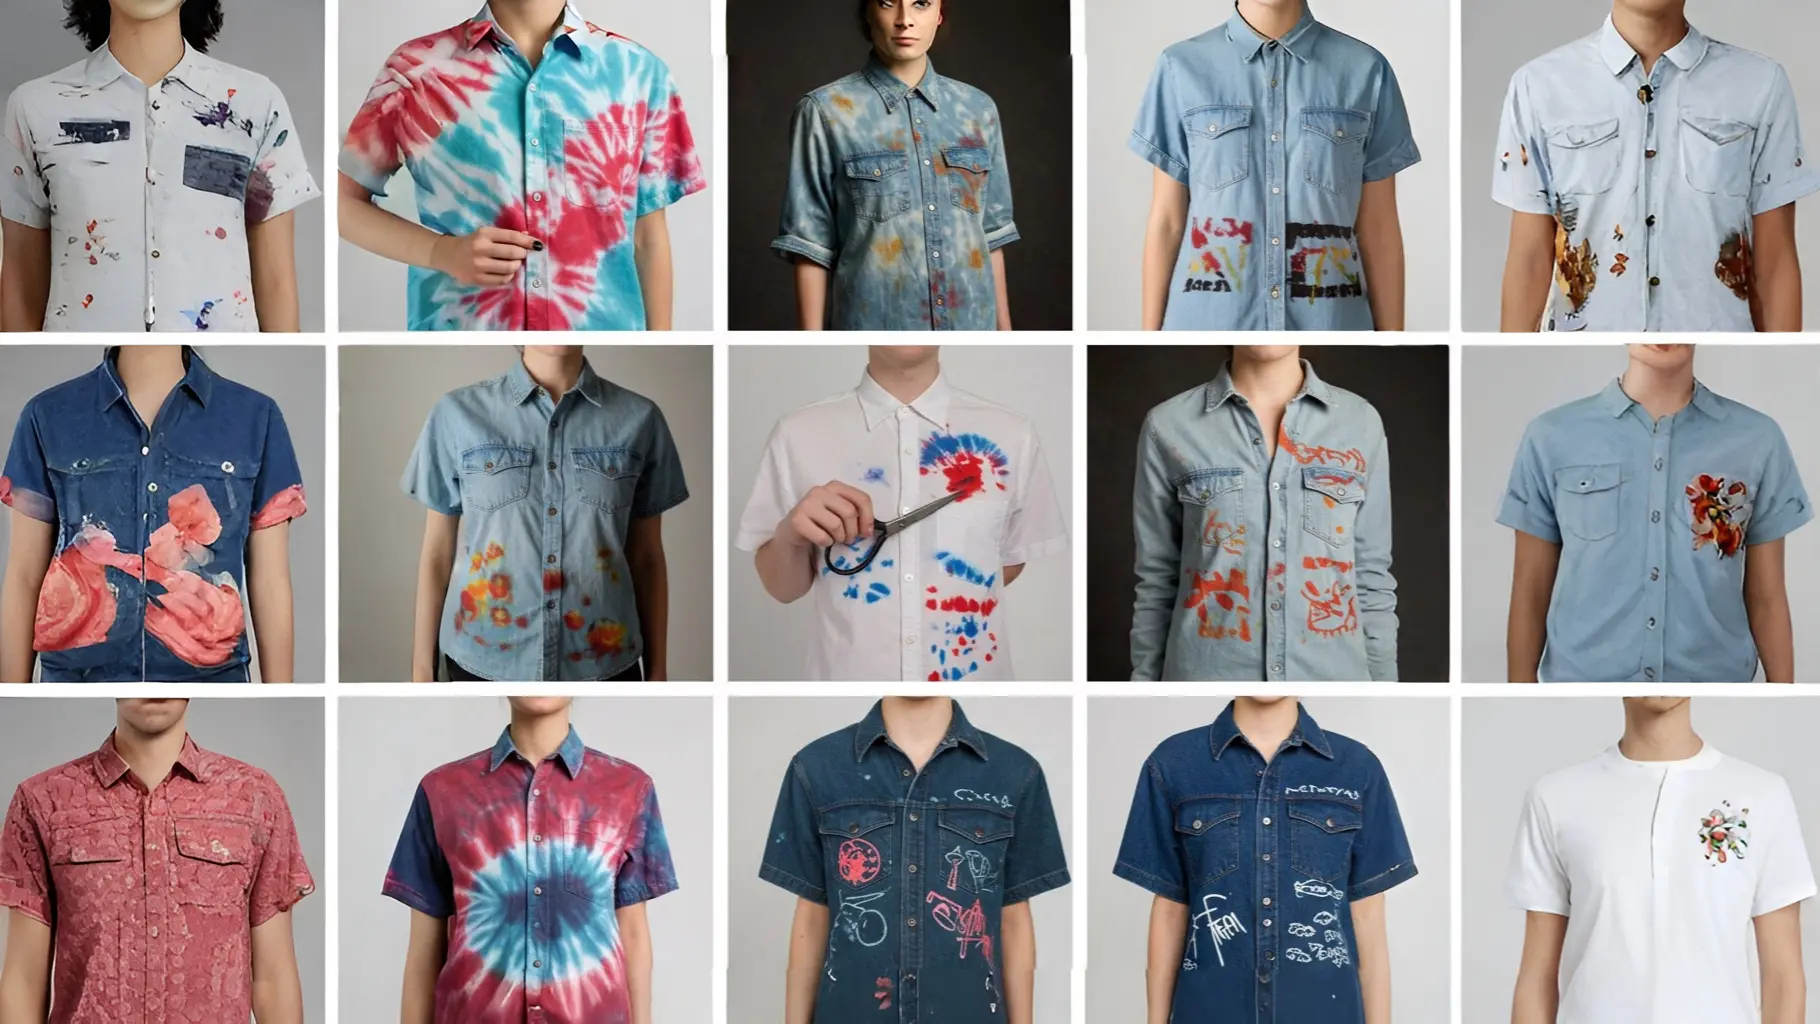
1. Tie-Dye Magic: Bring Back the Retro Vibes
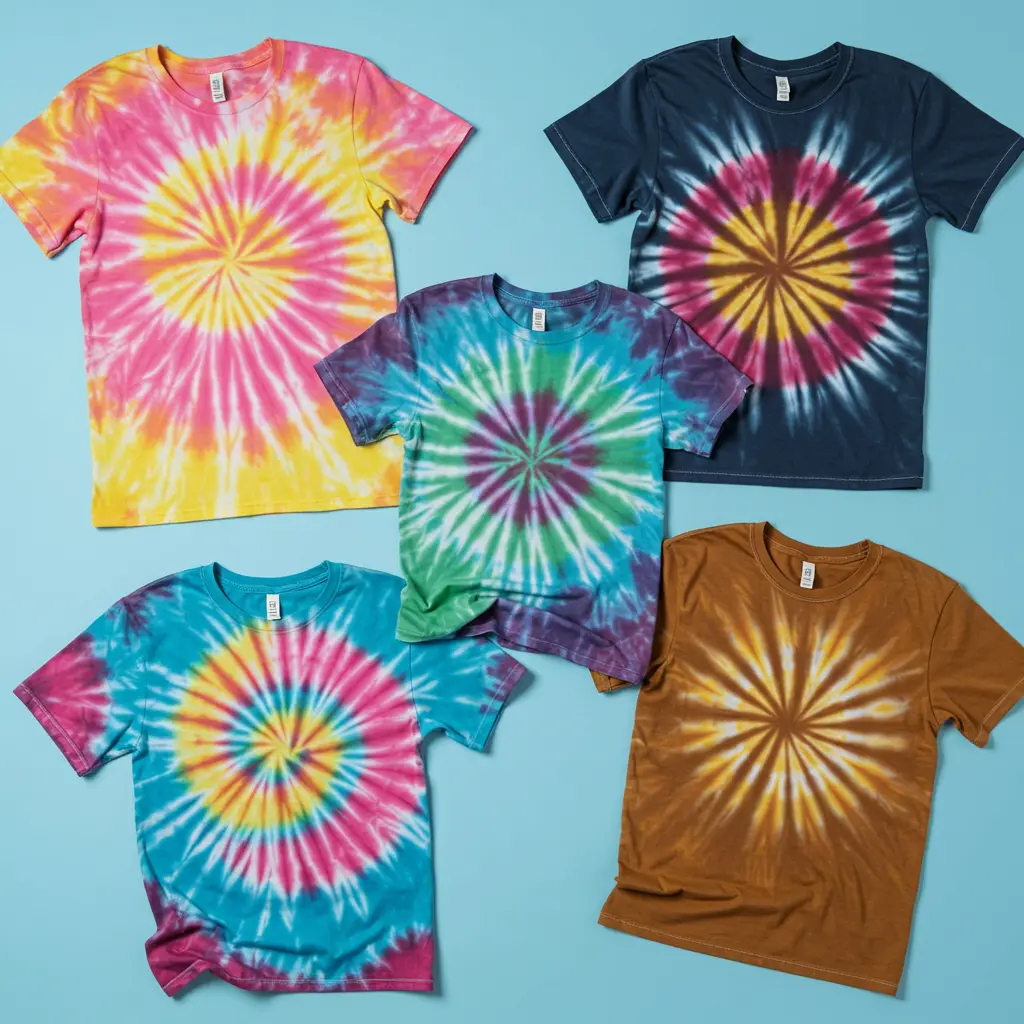
Best For: The free spirit who loves a classic, colorful, and completely unique look.
Pro-Tip: For a modern, watercolor effect, try “ice dyeing.” Bunch up your shirt, cover it with ice cubes, and sprinkle powdered dye on top. As the ice melts, it creates “beautiful, organic patterns” that are impossible to replicate.
Styling Cue: Go full retro with high-waisted flare jeans, or pair it with black skinny jeans to make the vibrant colors the “undisputed star” of your outfit.
2. Bleach Art: Edgy and Unique
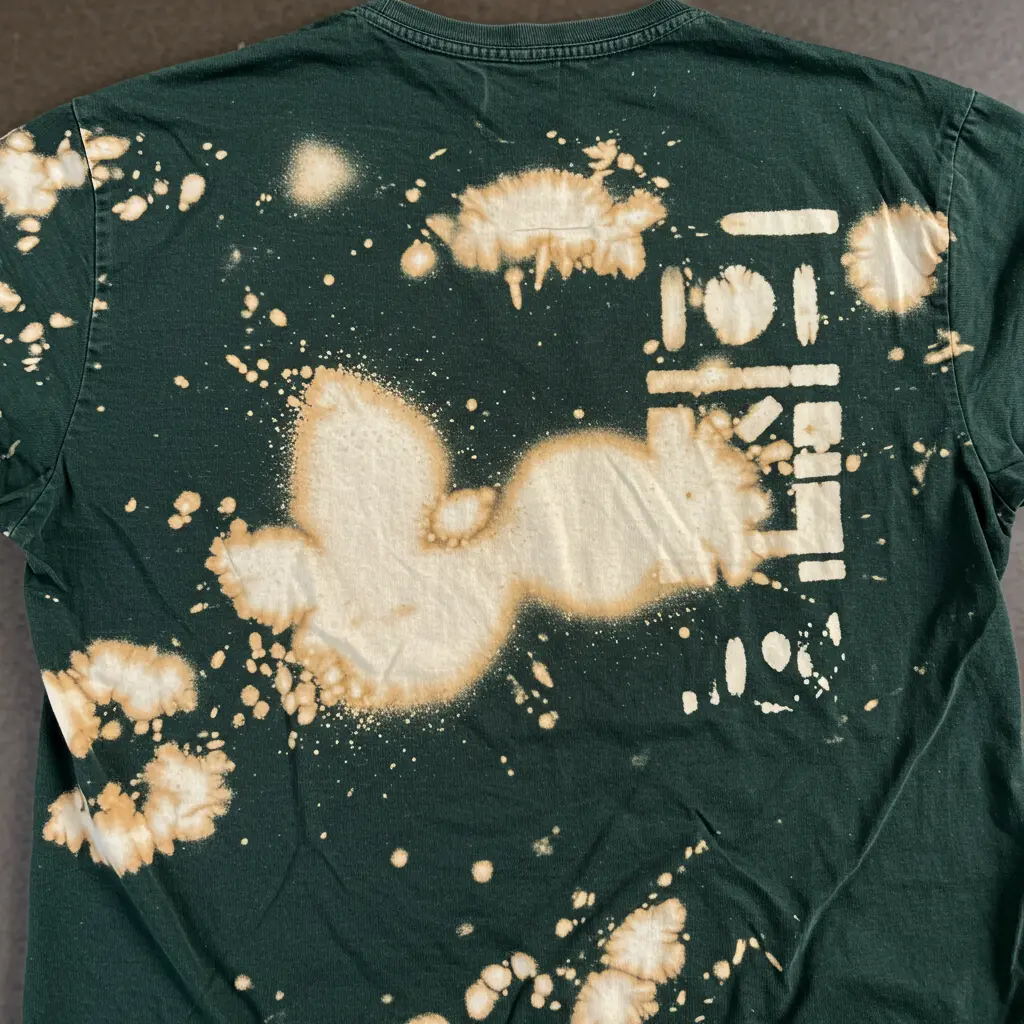
Best For: The edgy minimalist who wants a high-impact, grungy look with minimal effort.
Pro-Tip: For a subtle, misty “galaxy” effect, use a spray bottle on its finest mist setting. For sharp lines, use painter’s tape to create geometric patterns before spraying. Always work in a “well-ventilated area!”
Styling Cue: A bleached black or dark gray shirt looks incredible in an all-black outfit, adding texture and a “perfectly imperfect” focal point.
3. Sharpie Designs: Effortless Yet Stunning
Best For: The detailed artist who loves to draw and wants to turn their doodles into wearable art.
Pro-Tip: After drawing your design, place a cotton ball soaked in rubbing alcohol underneath the fabric and let it bleed through. This will make the Sharpie ink spread into a “beautiful watercolor-like” design. Heat-set with an iron to make it permanent.
Styling Cue: A detailed Sharpie design on the pocket of a plain tee is a subtle, cool detail that looks “effortlessly artistic.”
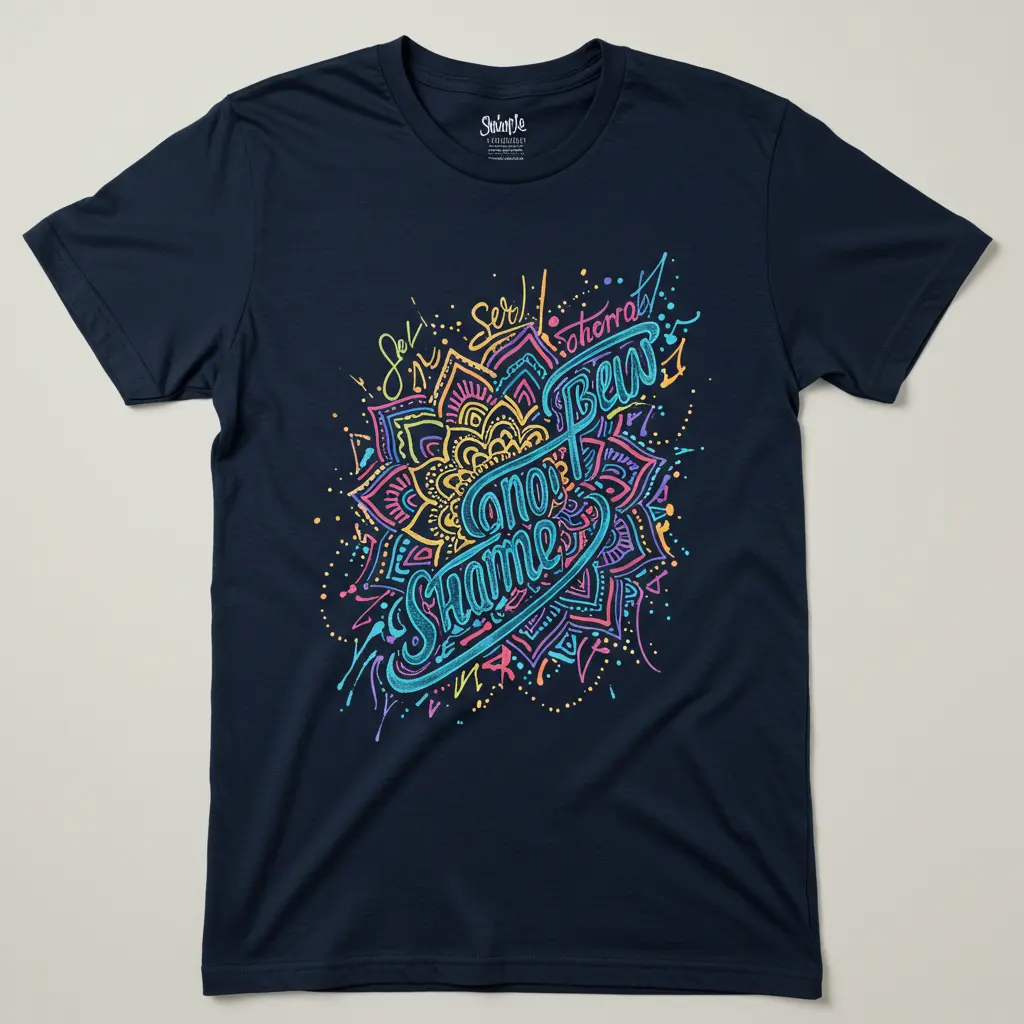
4. Stencil Printing: Flawless Precision Every Time
Best For: The person who wants a clean, graphic look but claims they “can’t draw a stick figure.”
Pro-Tip: To get super crisp lines with no bleeding, spray the back of your stencil with a light coat of temporary spray adhesive. It holds the stencil perfectly in place while you paint.
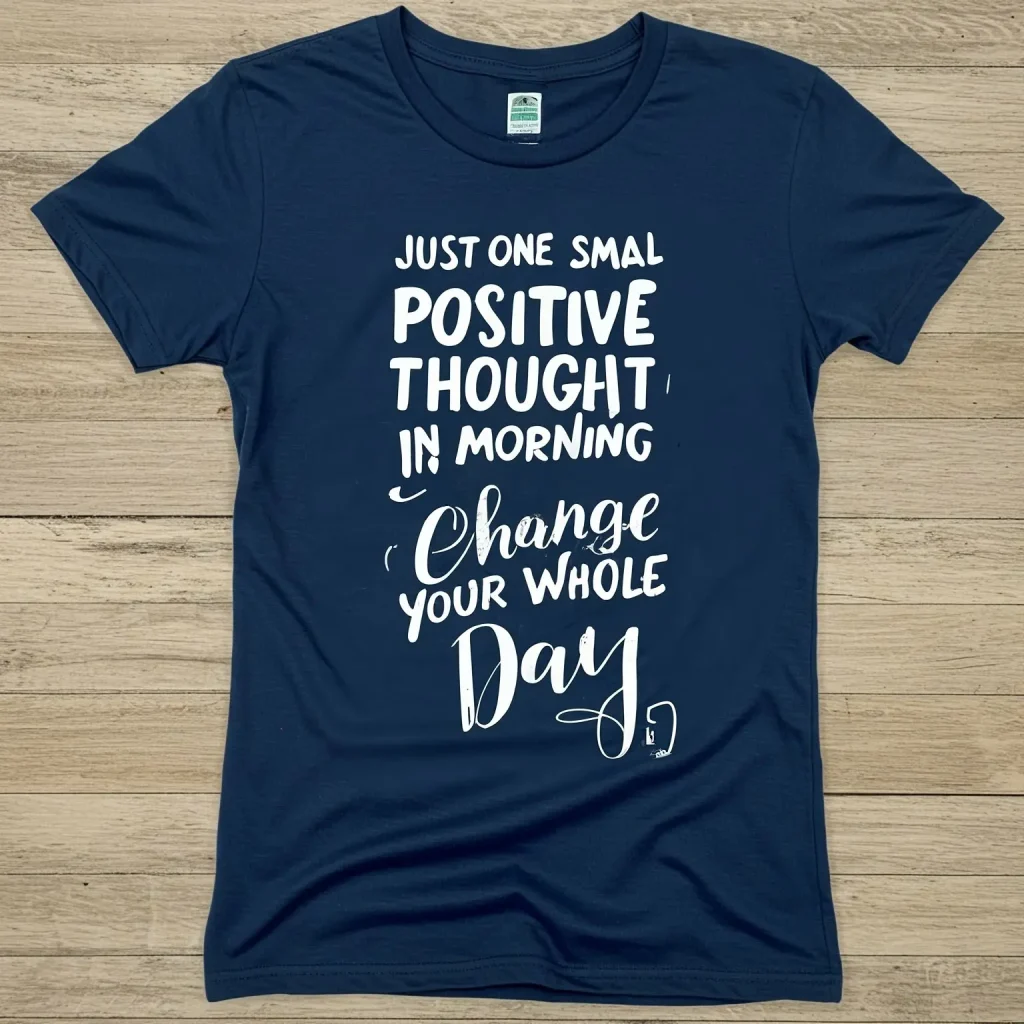
Styling Cue: Use stencils to create a shirt with a favorite quote or a simple, bold icon. It looks “incredibly professional” and clean.
5. Fabric Paint Brushwork: Turn Your Shirt into a Canvas
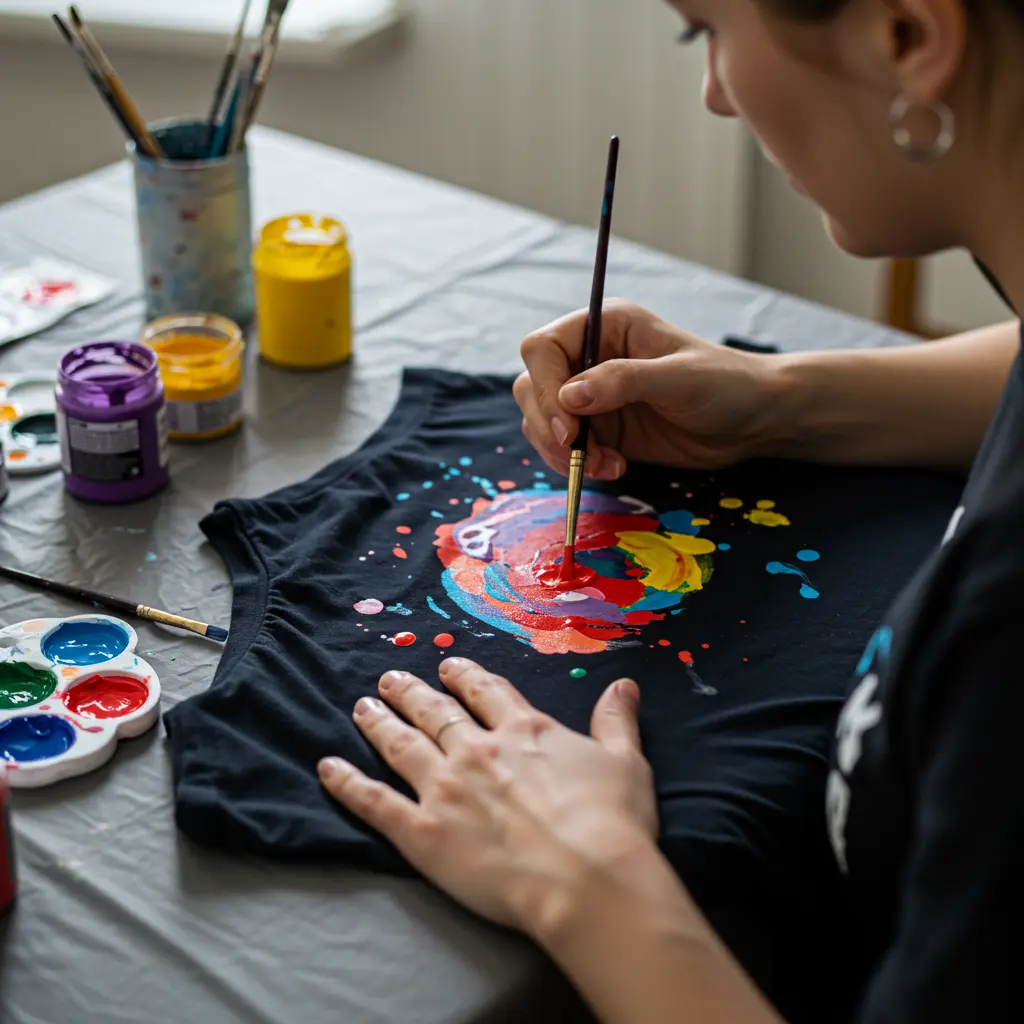
Best For: The true artist who wants complete creative freedom.
Pro-Tip: Mix your fabric paint with a “textile medium” or water to change its consistency. This allows you to create everything from thick, textured strokes to thin, watercolor-like washes.
Styling Cue: An abstract, painterly design can turn a simple t-shirt into a “high-fashion piece of art.” Pair it with simple bottoms to let the shirt do all the talking.
6. Iron-On Transfers: Instant Customization
Best For: The person who wants a photorealistic or complex graphic on their shirt, fast.
Pro-Tip: When printing your design onto the transfer paper, remember to “mirror the image” in your printer settings, especially if it includes text. Otherwise, it will be backward when you iron it on.
Styling Cue: Perfect for creating shirts with your favorite memes, inside jokes, or personal photos for a “truly custom” and hilarious result.
7. Cut and Weave: Edgy Fashion Hack
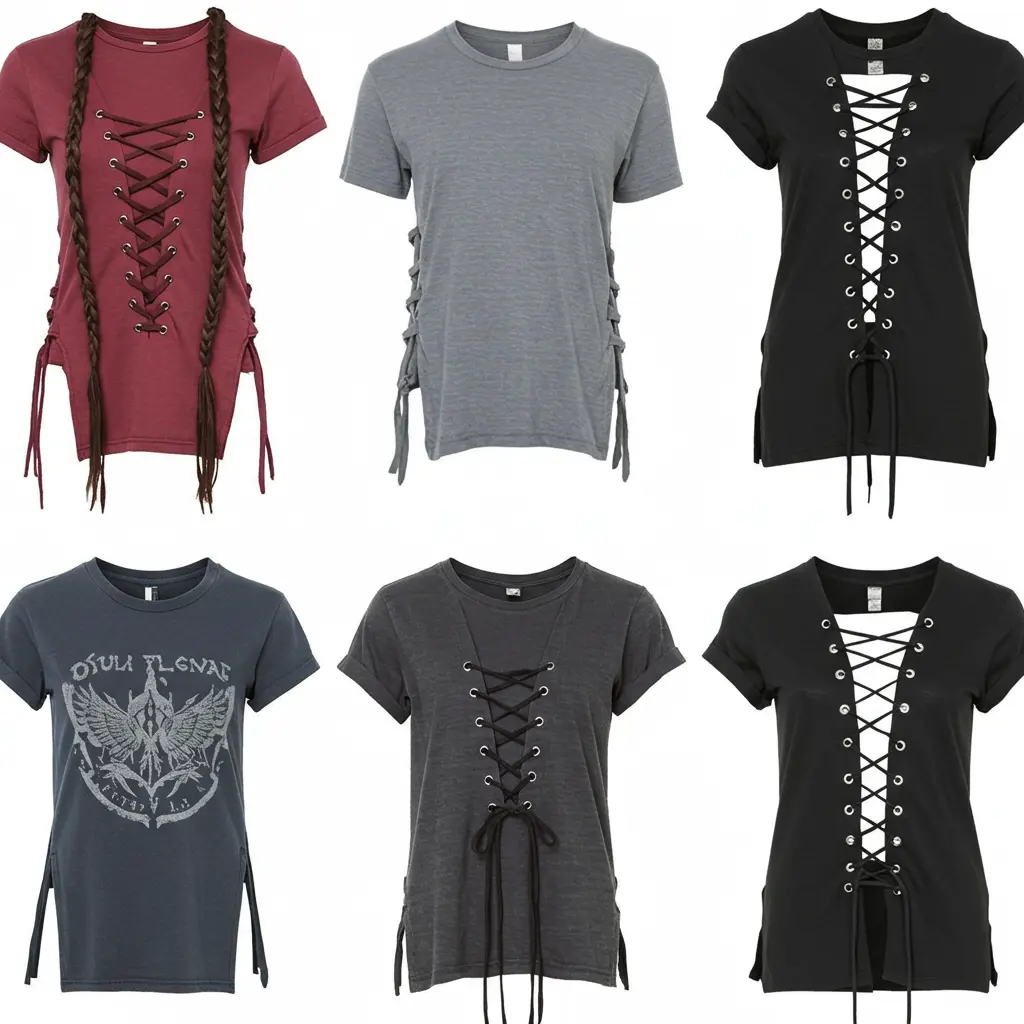
Best For: The festival-goer or punk rocker who wants to add some edge and texture to their basics.
Pro-Tip: Use a rotary cutter and a ruler for perfectly straight, even slits. For woven or braided designs on the back, start with fewer cuts than you think you need; you can “always cut more,” but you can’t undo a cut.
Styling Cue: A cut-up band tee or a simple black shirt with a woven back is the “ultimate cool-girl” look for a concert or a summer night out.
8. Crayon Melt Art: Playful and Vibrant

Best For: A fun, slightly chaotic project that creates a unique, colorful, wax-resist effect.
Pro-Tip: Grate the crayons using a cheese grater for a fine, confetti-like sprinkle of color. Arrange the shavings on your shirt, cover with parchment paper, and iron until melted.
Styling Cue: The bright, waxy texture is playful and bold. This is a “fun, statement piece” that screams creativity.
9. Patchwork Designs: Vintage Meets DIY
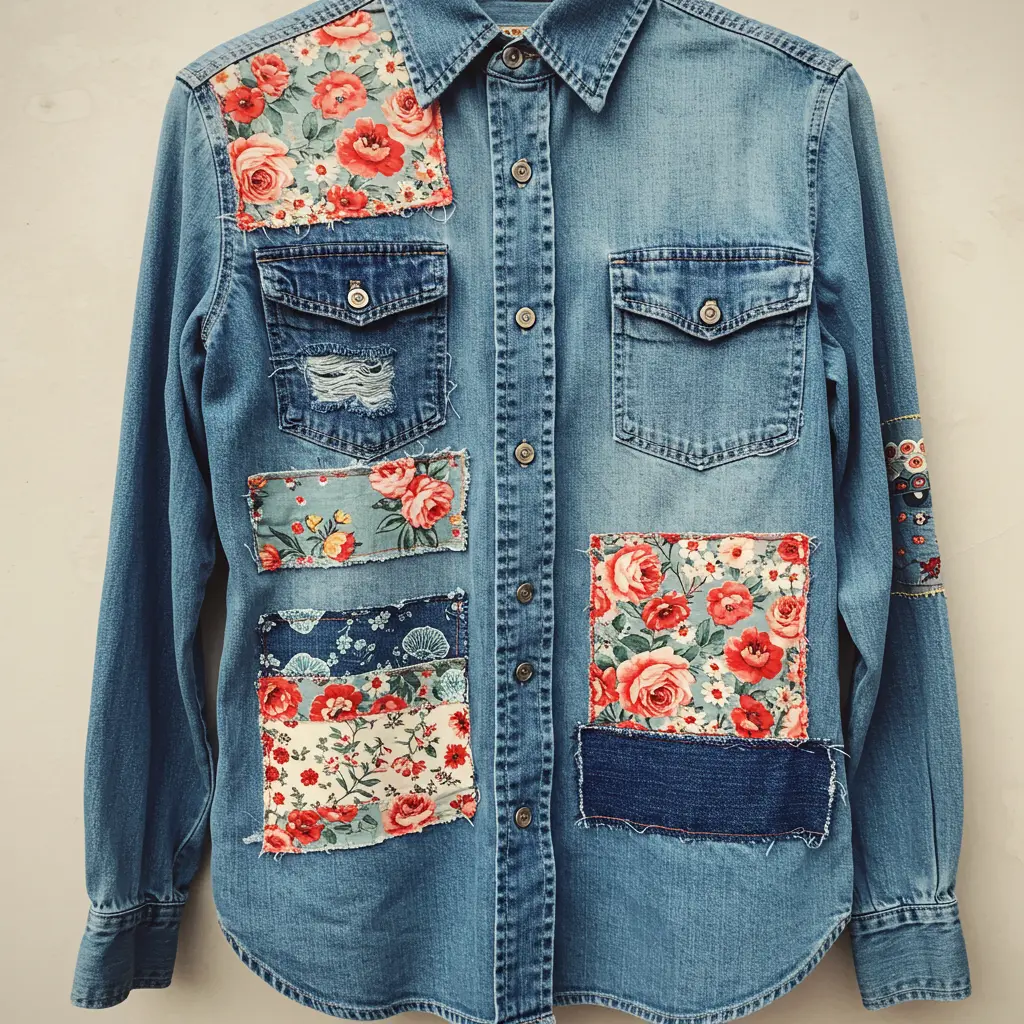
Best For: The boho-chic or streetwear fan who loves a collected, layered look.
Pro-Tip: For a no-sew option, use a strong, permanent fabric glue like E6000 Fabri-Fuse. For a more authentic look, use a simple running stitch around the edge of the patches with a contrasting color of embroidery floss.
Styling Cue: A cluster of vintage or embroidered patches on a denim jacket or a simple tee adds “instant personality” and a story to your clothes.
10. Embroidery Magic: Handmade Elegance
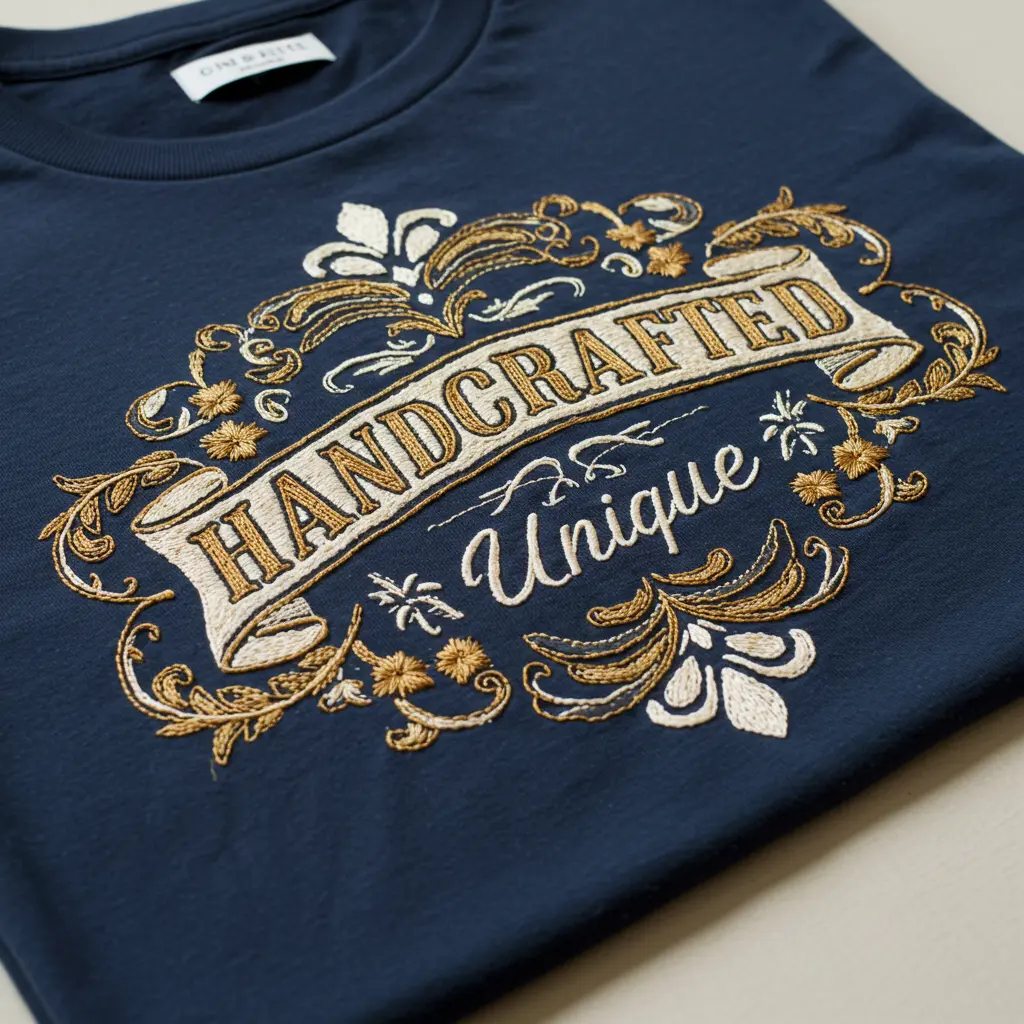
Best For: The patient crafter who wants to add a delicate, sophisticated, and personal touch.
Pro-Tip: Start small. A simple embroidered word on the collar, a tiny flower on the sleeve, or your initials on the hem is an “understated and elegant” way to make a shirt your own. Use a stabilizer on the back of the fabric to prevent puckering.
Styling Cue: Hand embroidery instantly makes any piece feel “luxe and one-of-a-kind.”
11. Galaxy Print: Cosmic Coolness
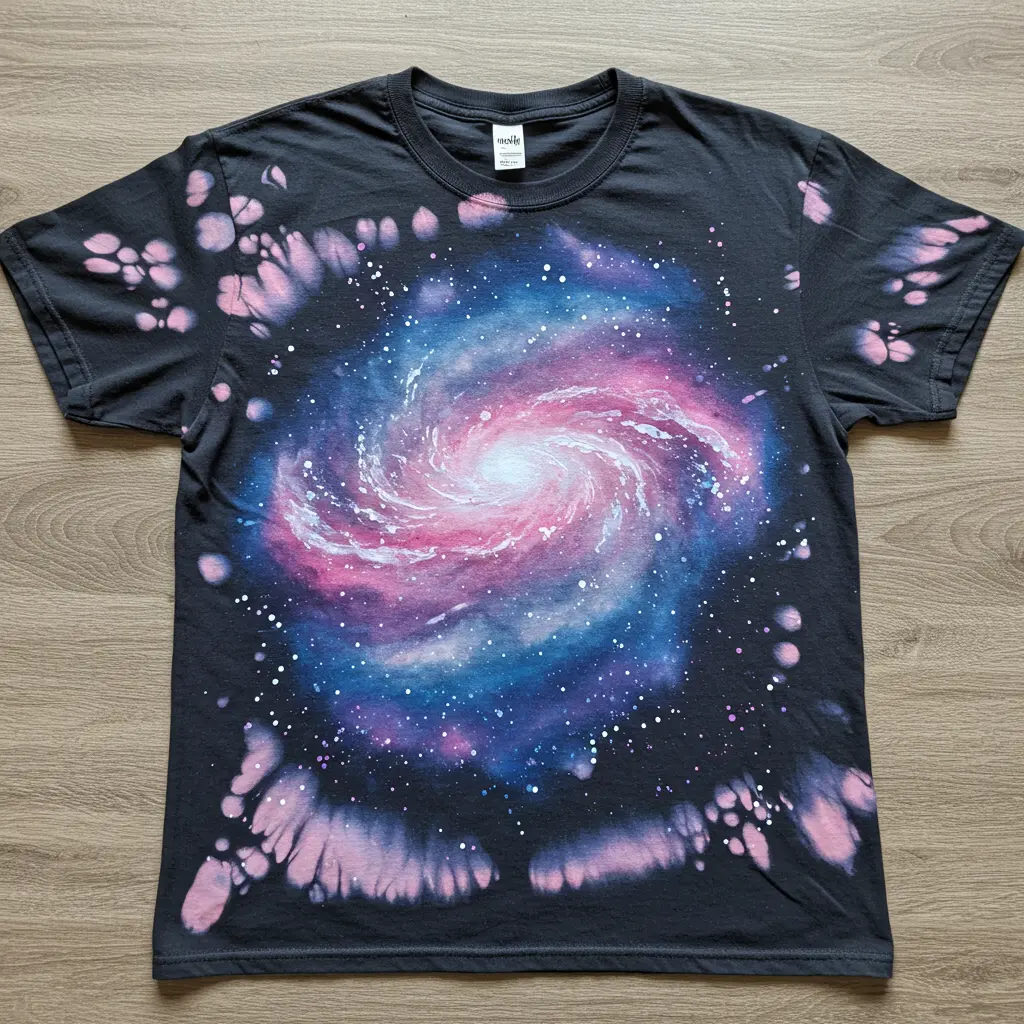
Best For: The sci-fi lover who wants a mesmerizing, otherworldly design.
Pro-Tip: The secret to a good galaxy is layering. Start with a black shirt. Use a spray bottle with bleach for the “star clusters.” Then, use sponges to dab on purple, blue, and pink fabric paint. Finish by splattering white paint with a toothbrush for the “stars.”
Styling Cue: A galaxy print shirt is a whole vibe on its own. Pair it with simple black leggings or jeans and let your “cosmic creation” shine.
12. Distressed & Ripped: Rock ‘n’ Roll Vibes

Best For: The person who wants that perfectly worn-in, rebellious look without waiting years.
Pro-Tip: For the most authentic-looking rips, use a pair of tweezers to pull out individual threads after making a small snip with scissors. For a softer, “vintage” feel, gently rub the collar and hems with a fine-grit sandpaper.
Styling Cue: Pair your distressed tee with ripped jeans and combat boots for that “effortless rockstar” energy.
13. Fabric Appliqué: Textured Creativity
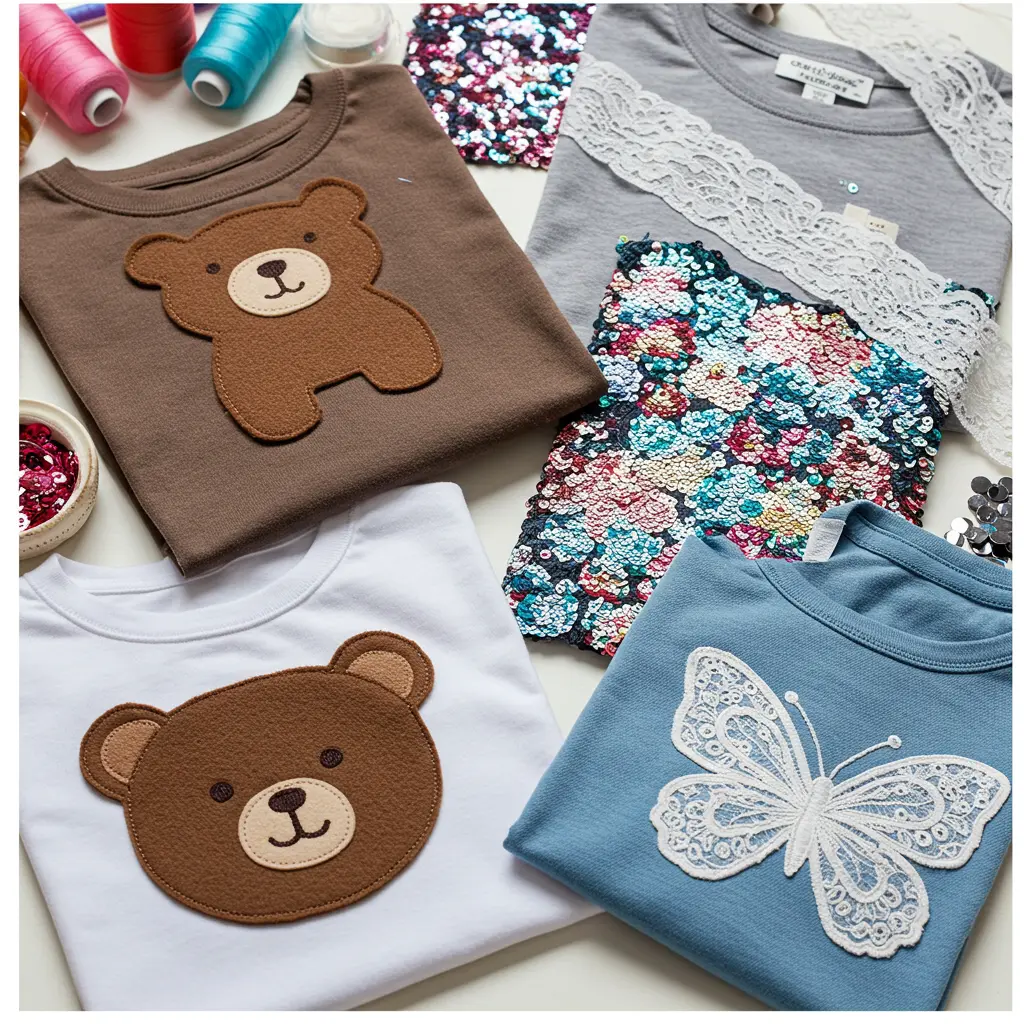
Best For: Adding a bold, 3D element to a simple shirt.
Pro-Tip: Use a variety of textures for a high-impact look. Combine felt for solid shapes, lace for delicate details, and sequins for a pop of sparkle.
Styling Cue: A large, central appliqué design can be the “entire personality” of an outfit.
14. Screen Printing: Professional DIY Look
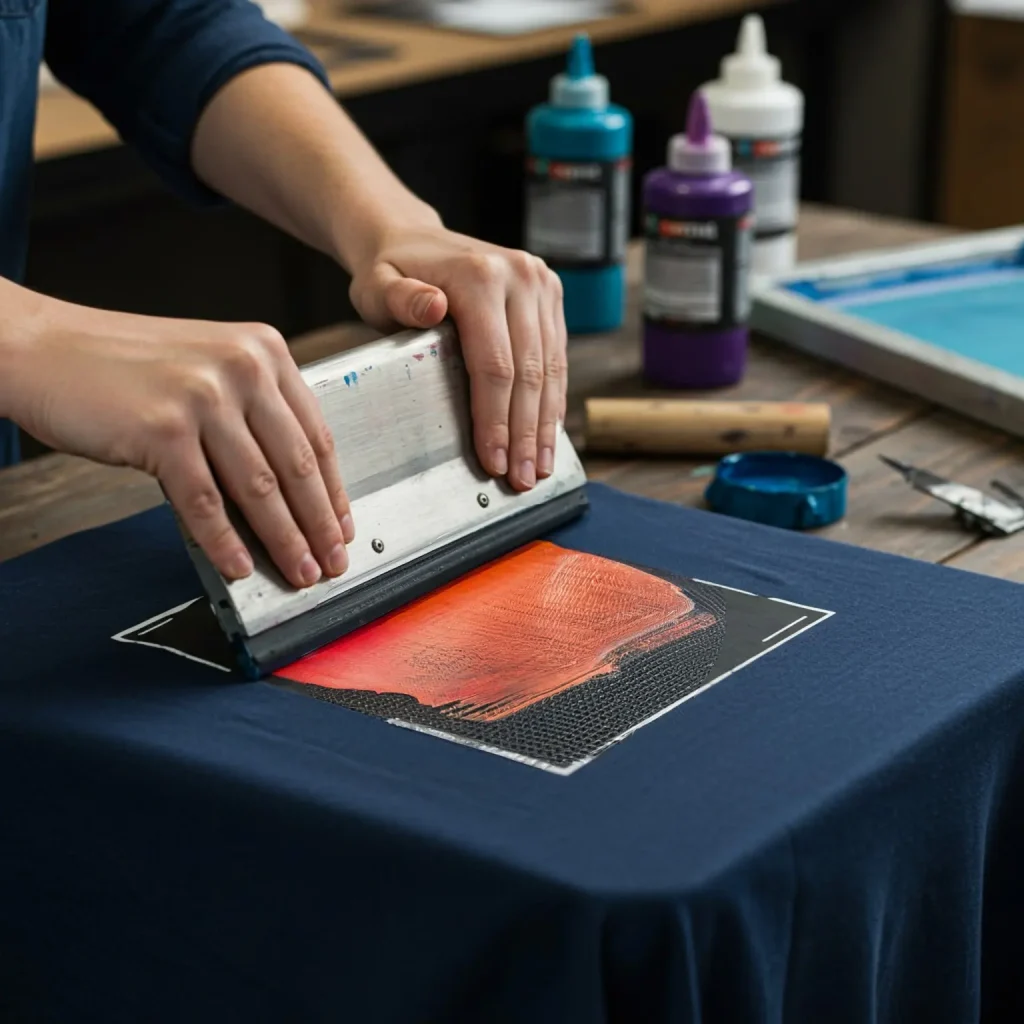
Best For: The aspiring brand owner or anyone who wants to make multiple, identical shirts with a crisp, graphic design.
Pro-Tip: You can buy affordable starter kits online. The key to a perfect print is an “even layer of ink” and a single, firm pass with the squeegee. Don’t press too hard or the ink will bleed.
Styling Cue: This is how you get that “classic, bold graphic tee” look at home.
15. Watercolor Effect: Dreamy & Subtle
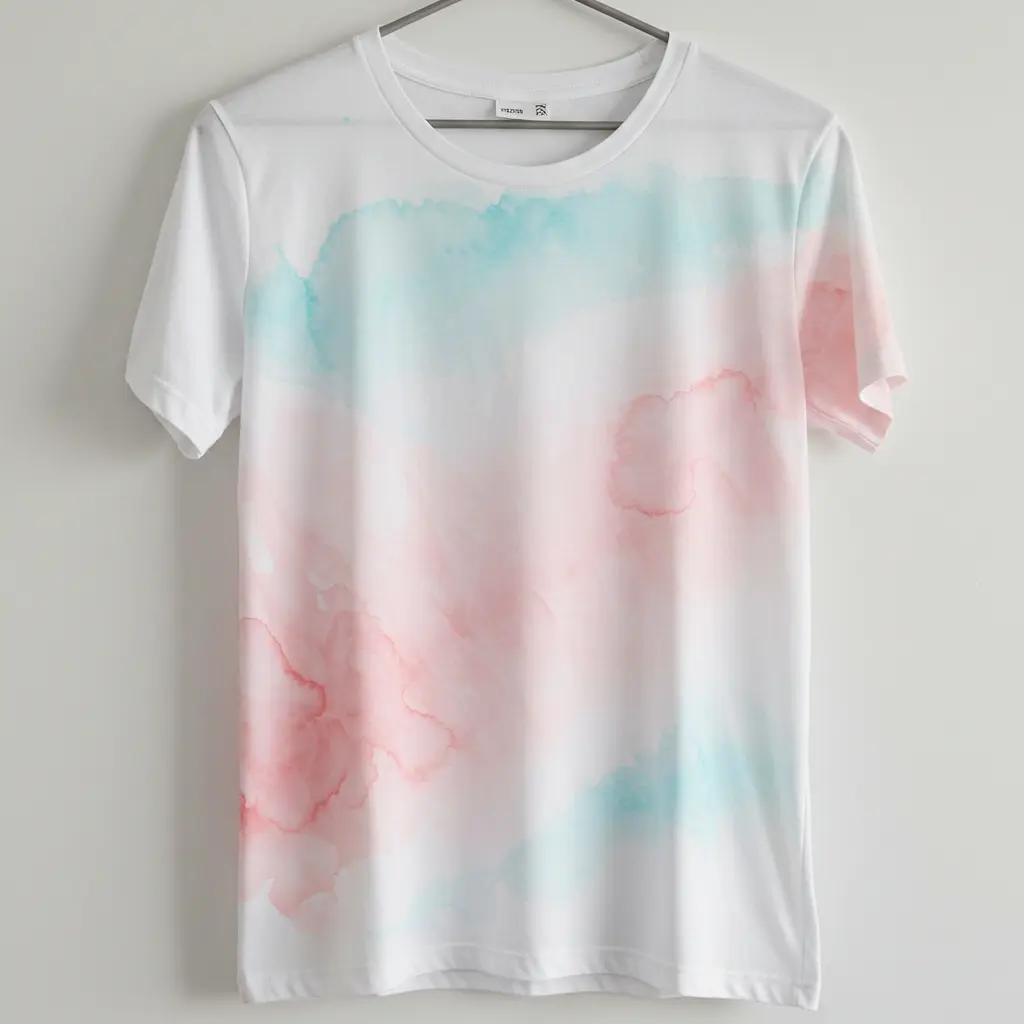
Best For: The romantic or minimalist who loves a soft, ethereal aesthetic.
Pro-Tip: Lightly spray the area of the shirt you’re working on with water before you apply the diluted fabric paint. This will help the colors “bleed and blend beautifully,” just like on watercolor paper.
Styling Cue: A soft floral or abstract watercolor design on a white tee is “delicate, dreamy, and incredibly chic.”
16. Studs & Rhinestones: Glam it Up!
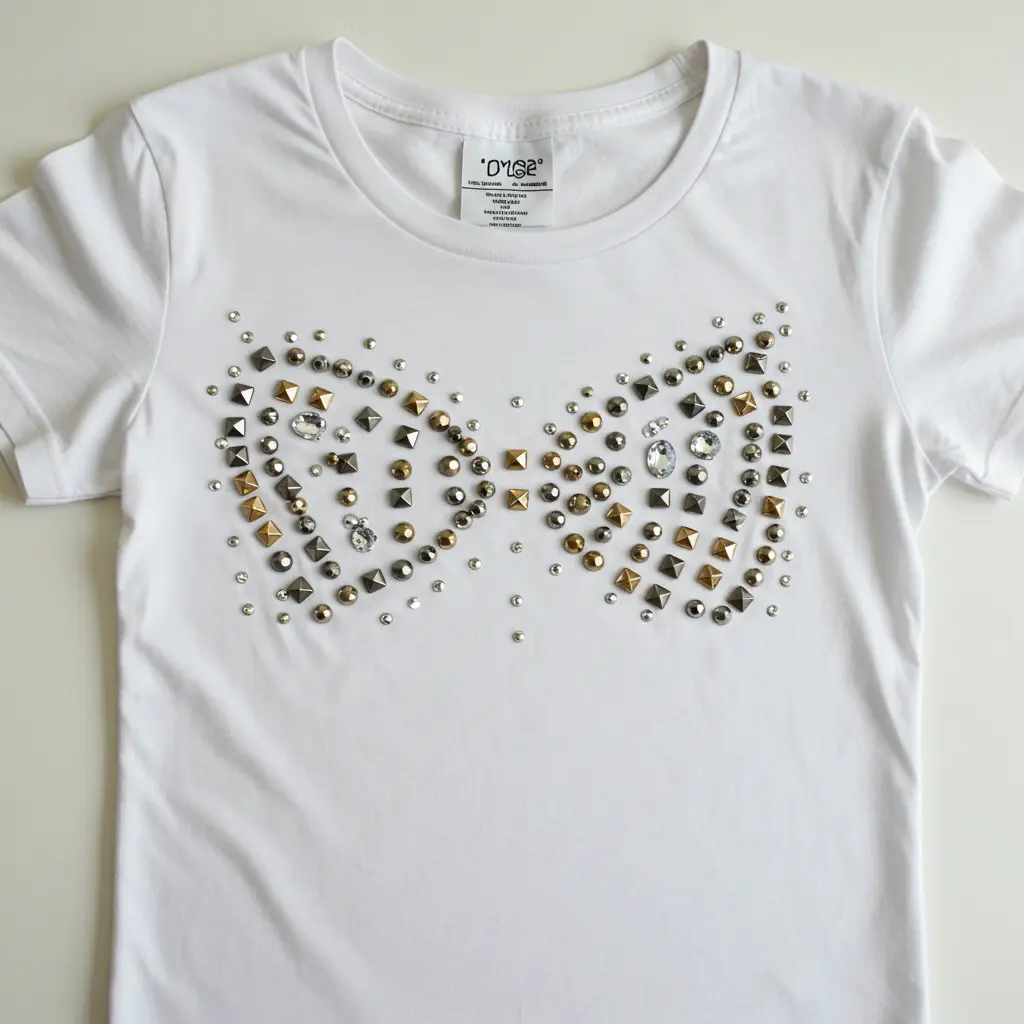
Best For: The glam rocker or Y2K enthusiast who believes “more is more.”
Pro-Tip: Plan your design with a chalk pencil first. For a secure, long-lasting application, use a hotfix applicator tool, which melts the glue on the back of the rhinestones directly onto the fabric.
Styling Cue: A studded collar on a plain t-shirt or a rhinestone-covered pocket is an “easy way to add a dose of glam” to your wardrobe.
17. Reverse Dyeing: Dark & Mysterious
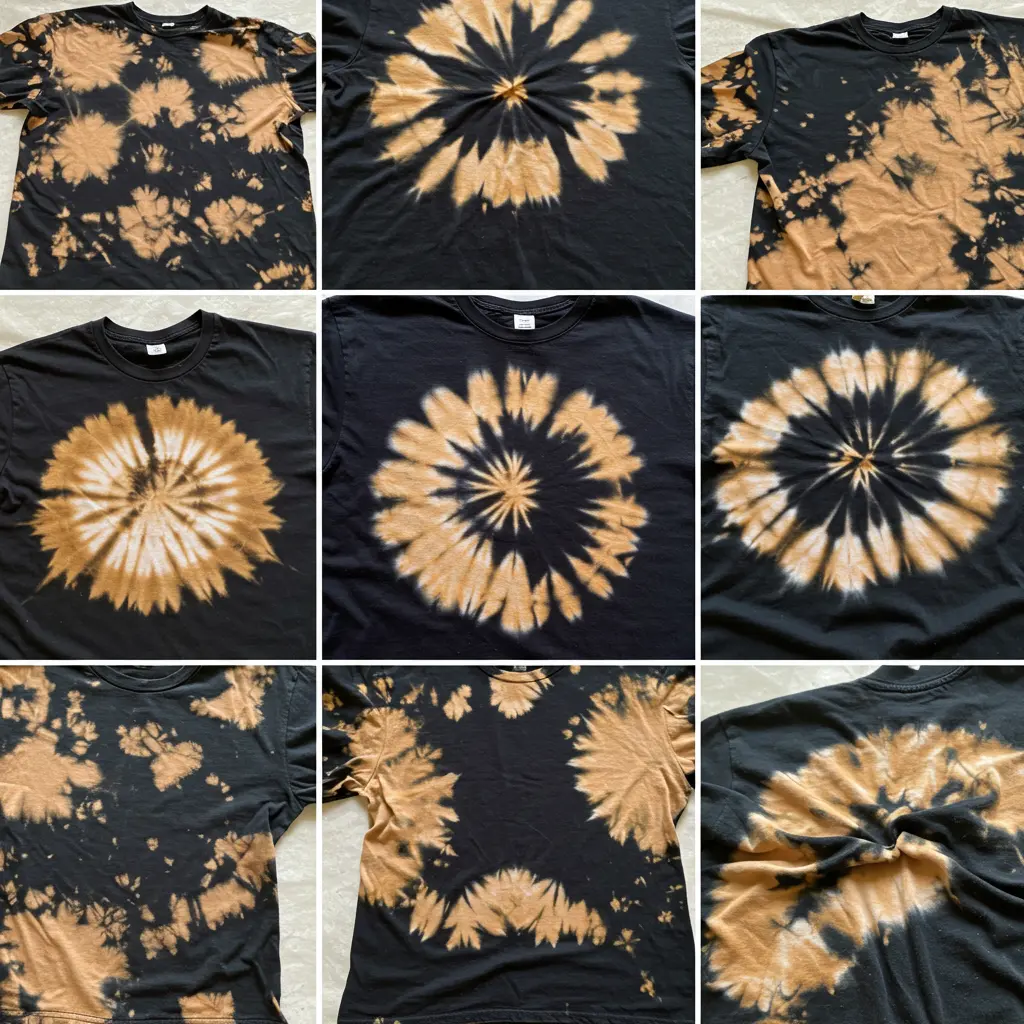
Best For: A darker, moodier take on traditional tie-dye.
Pro-Tip: Use a gel bleach pen for more control. This allows you to “draw” designs or create intricate patterns by removing color, rather than just spraying randomly.
Styling Cue: The orange-ish patterns created by bleaching dark fabric have a “cool, almost fiery” look that pairs perfectly with a grunge or punk aesthetic.
18. DIY Digital Prints: High-Quality Graphics
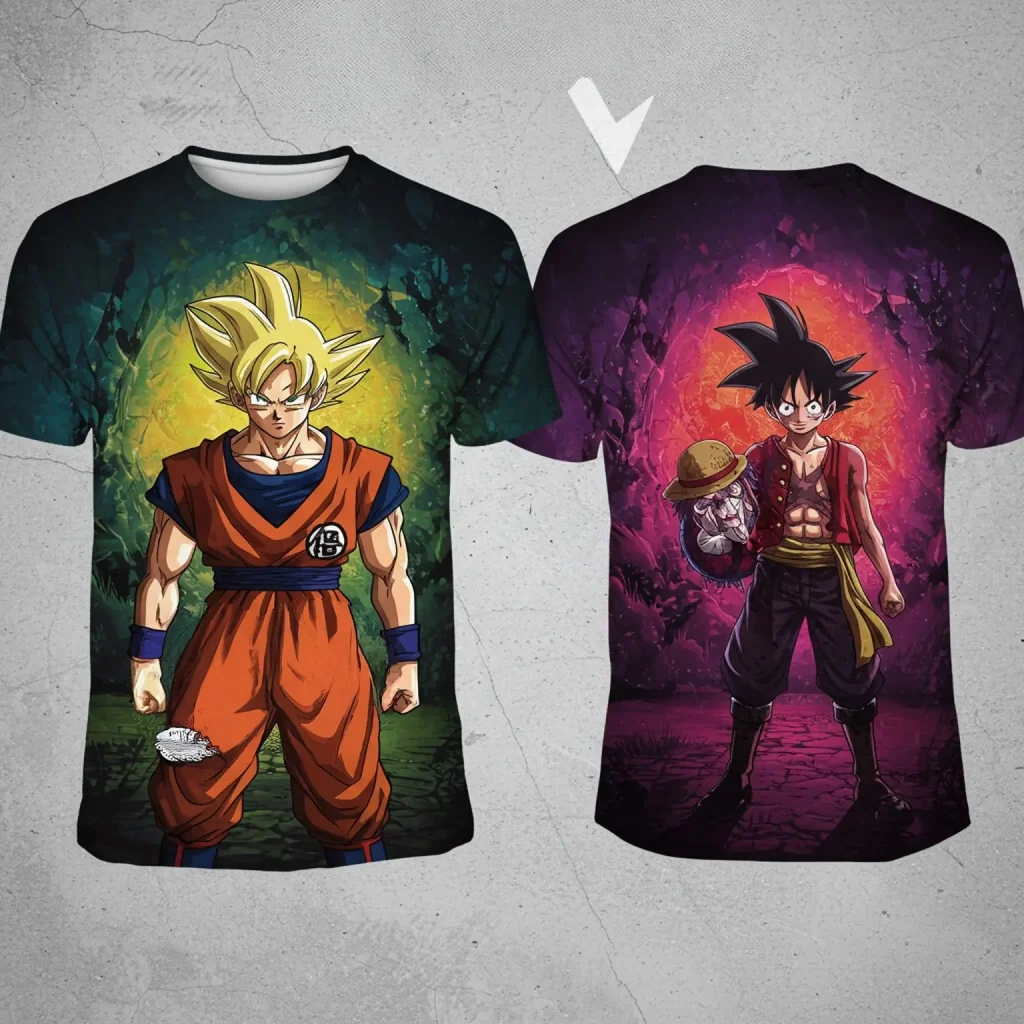
Best For: The person who wants a super specific, high-resolution image on their shirt.
Pro-Tip: Use heat transfer vinyl (HTV) for the most professional, store-bought look. It requires a vinyl cutter, but the results are “incredibly sharp, durable, and vibrant.”
Styling Cue: This is the best method for putting your own digital art, a favorite anime character, or a complex logo onto a shirt with “flawless detail.”
19. Firework Splatter: Messy Yet Cool
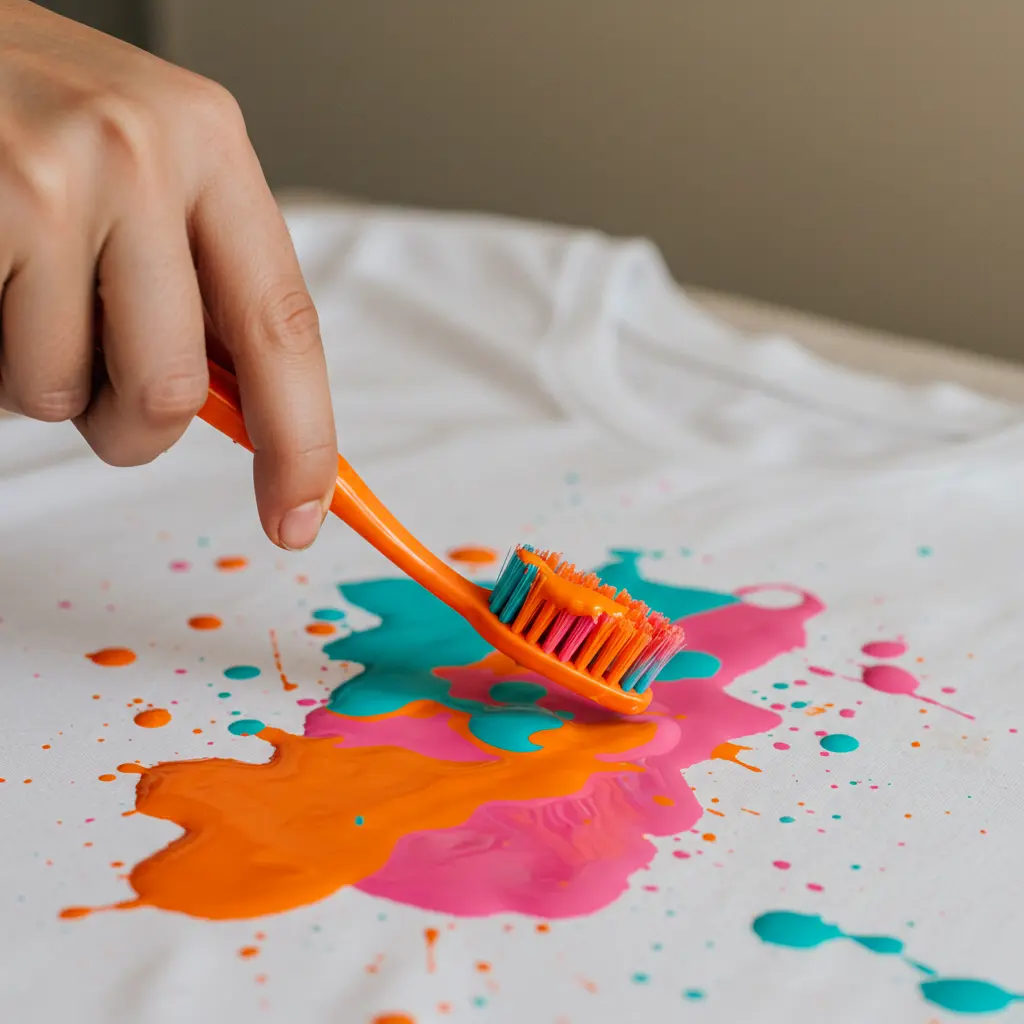
Best For: The abstract art lover who isn’t afraid to get a little messy.
Pro-Tip: For the best “splatter” effect, dip an old toothbrush in fabric paint, aim it at your shirt, and flick the bristles with your thumb. Different angles and distances will create different effects.
Styling Cue: This technique creates a shirt with “tons of energy and movement.” It looks amazing under a structured blazer for a cool, high-low fashion moment.
20. Velvet Touch: Luxurious and Stylish
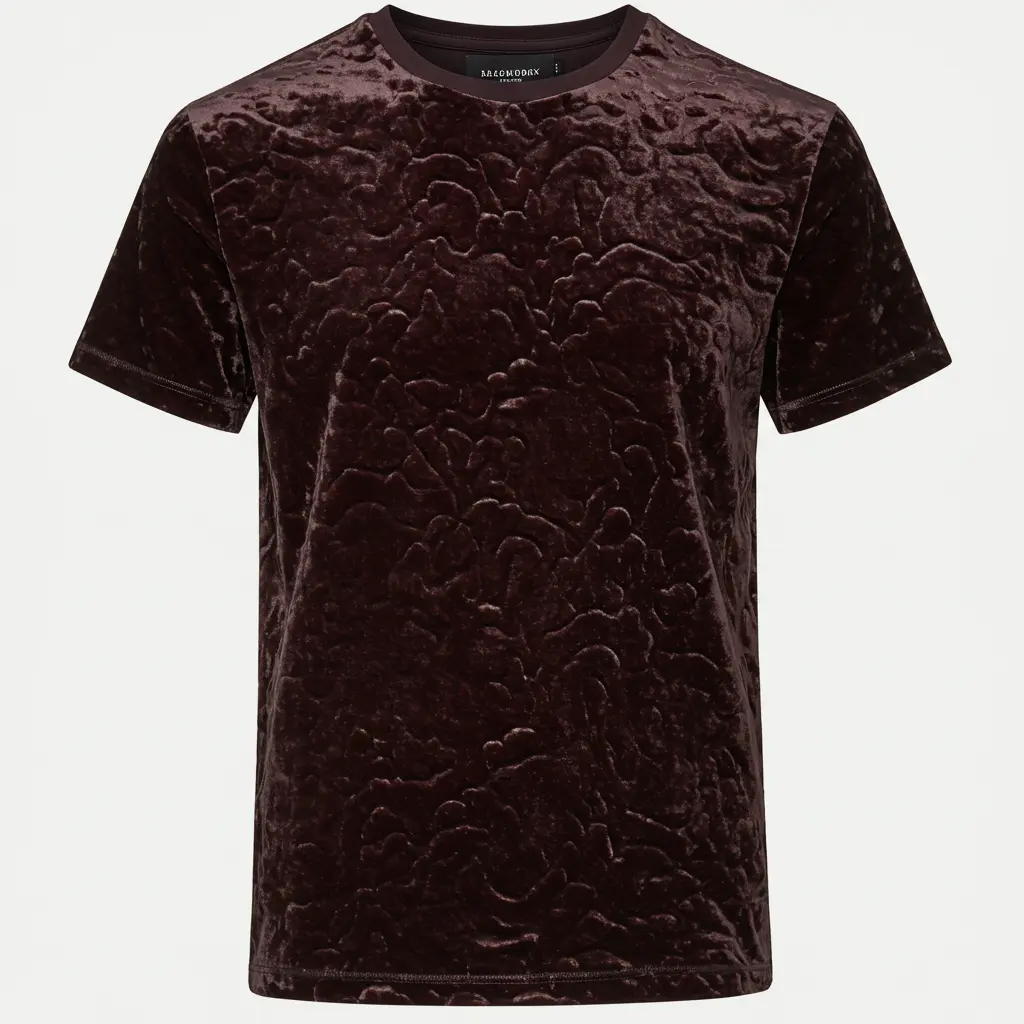
Best For: Adding a rich, sensory texture that looks and feels expensive.
Pro-Tip: Use heat transfer flocking sheets. They cut just like vinyl and apply with an iron, but they leave a “soft, fuzzy, velvety” finish. It’s surprisingly easy for such a luxe effect.
Styling Cue: A single word or a simple design in velvet on a plain shirt is the definition of “quiet luxury.”
21. Dip Dye Ombre: Gradient Perfection
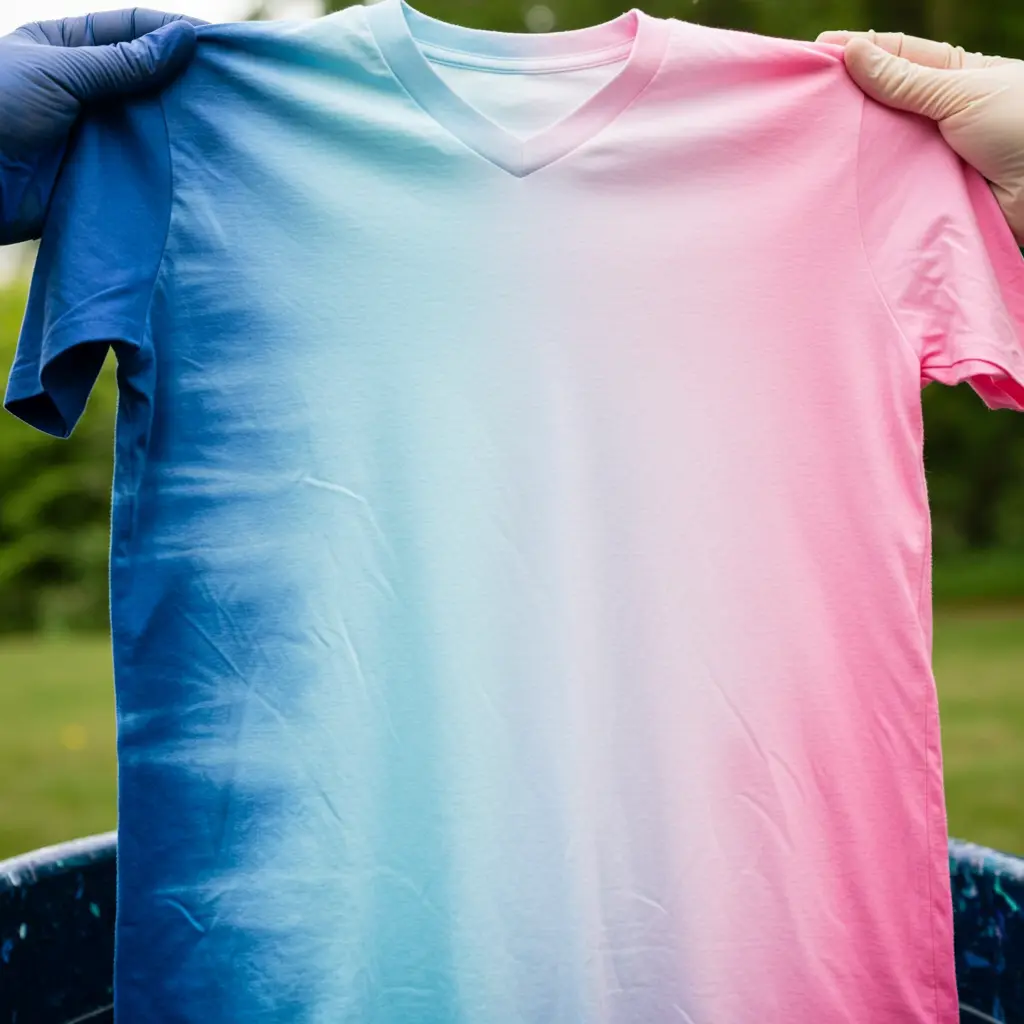
Best For: A chic, trendy, and surprisingly easy way to add a block of color.
Pro-Tip: For a smooth, even gradient, make sure your shirt is “damp but not soaking wet” before you start dipping it into the dye bath. Pull the shirt out of the dye slowly and incrementally to create the different shades.
Styling Cue: An ombre shirt looks incredible with white jeans for a “fresh, beachy, summer-ready” outfit.
22. Safety Pin Art: Punk Rock Statement
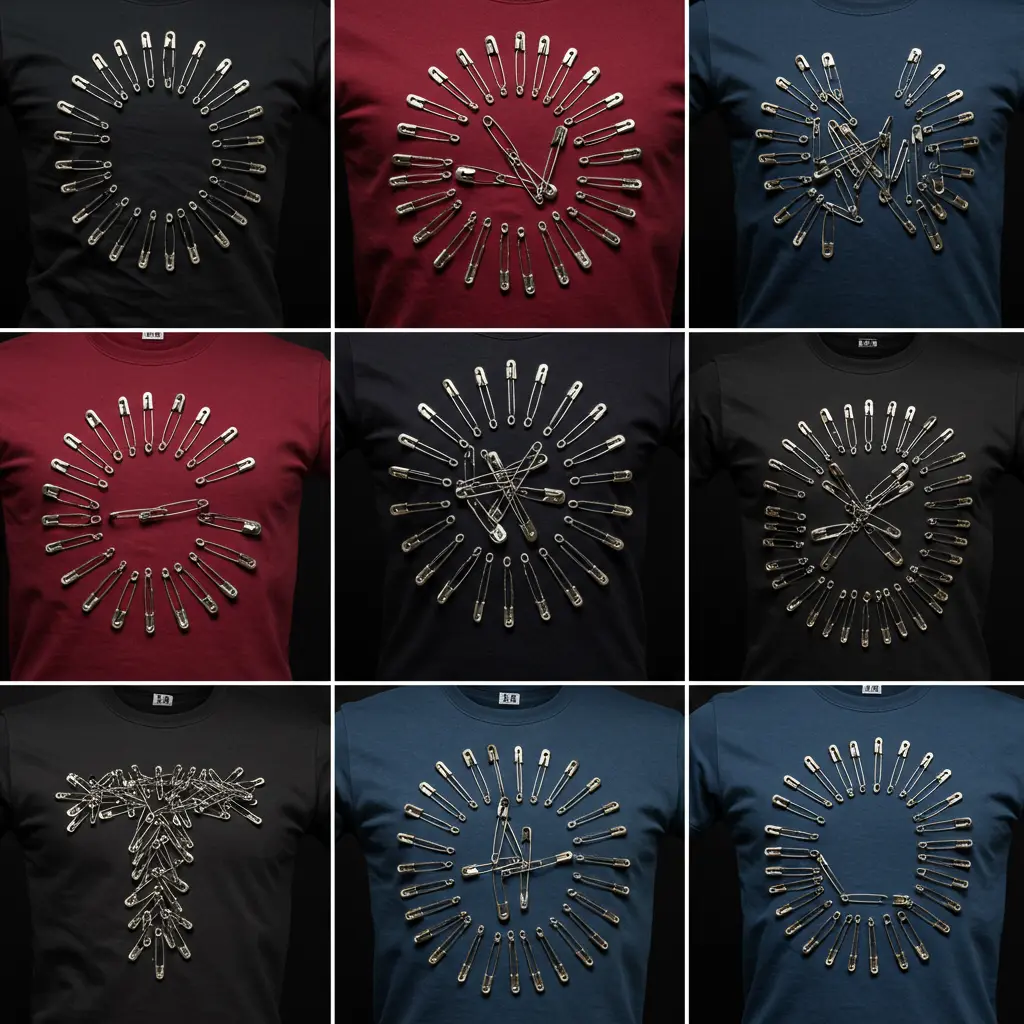
Best For: A no-sew, no-glue way to create edgy, temporary (or permanent) designs.
Pro-Tip: Don’t just use standard silver safety pins. Mix in different sizes and finishes, like black, gold, or antique bronze, to create a more “intentional and designed” look.
Styling Cue: Create a geometric shape on the shoulder or spell out a word on the back of a shirt for an “instant dose of punk-rock attitude.”
23. Eco-Friendly Prints: Natural & Organic
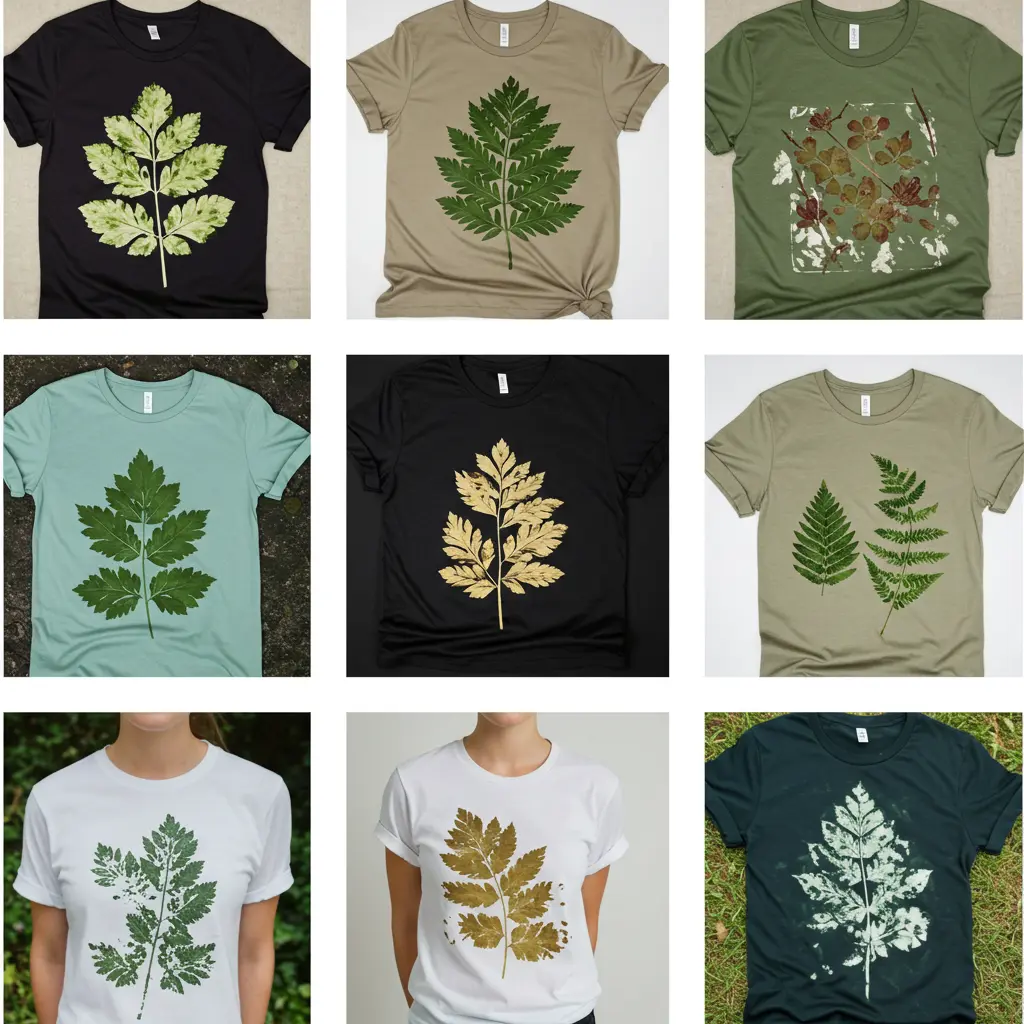
Best For: The nature lover who wants to wear a piece of the outdoors.
Pro-Tip: Try the “Hapa Zome” technique. Arrange leaves and flowers on your fabric, cover with another piece of fabric, and hammer them until the natural pigments transfer. The result is a “beautiful, natural, and eco-friendly” print.
Styling Cue: This earthy, organic design is perfect for a soft, bohemian, or cottagecore aesthetic.
24. Shadow Printing: Elegant and Understated

Best For: Creating a subtle, sophisticated, and almost ghostly pattern.
Pro-Tip: Use a piece of textured fabric with an open weave, like lace or mesh. Lay it flat on your shirt and lightly spray over it with fabric paint from a distance. When you lift the lace, a “delicate shadow” of the pattern will remain.
Styling Cue: A black lace shadow print on a gray t-shirt is “gothic, romantic, and incredibly chic.”
25. DIY Brand Logo: Wear Your Own Label
Best For: The aspiring entrepreneur, artist, or anyone who wants to be their own brand.
Pro-Tip: Create a simple, bold logo for yourself. Use heat transfer vinyl for the cleanest, most professional application. Place it where a traditional brand logo would go, like the left chest.
Styling Cue: You are the brand. Wearing your own logo is a “bold statement of self-confidence” and the ultimate form of self-expression.
Ready to Create Your Signature Look?
The best part about DIY shirt designs is that you’re not just making clothes; you’re crafting a “wearable extension of your personality.” You’re rejecting fast fashion and becoming your own designer.
Which method will you try first? Don’t wait! Grab a blank shirt, pick your technique, and start designing the personalized, head-turning wardrobe you’ve always wanted.
You’ve got this.
