Table of Contents
- DIY Date Night Jar: A Fun Icebreaker for New Relationships
- “Open When” Letter Kit: Emotional Support for Long-Distance Partners
- Photo Transfer Wood Blocks: A Sentimental Keepsake for Married Couples
- Homemade Rose and Lavender Bath Bombs: Pampering for Busy Parents
- Custom Wine Bottle Labels: A Sophisticated Twist for Wine Lovers
- Wrapping Up With Style
- Crafting Dilemmas Solved
Creating a sophisticated atmosphere during the season of love often begins with the small, intentional details we bring into our homes. Rather than relying on temporary store-bought trinkets, crafting bespoke gifts allows you to align your creative expressions with your existing interior design.
It is about finding that perfect balance between heartfelt sentiment and elevated style.
Practicality remains at the forefront of every successful DIY project. Whether you are working with a modest budget or looking to refine your styling skills, these projects for adults emphasize quality materials and clean aesthetics.
You can transform simple components into high-end decor pieces that feel both personal and professional.
Elevating your living space involves more than just selecting the right furniture; it requires a touch of handmade charm that reflects your unique personality. These curated craft ideas offer a grounded approach to seasonal gifting, ensuring that every item created serves a functional purpose in your home.
Let us explore how these creative endeavors can enrich your environment today.
DIY Date Night Jar: A Fun Icebreaker for New Relationships

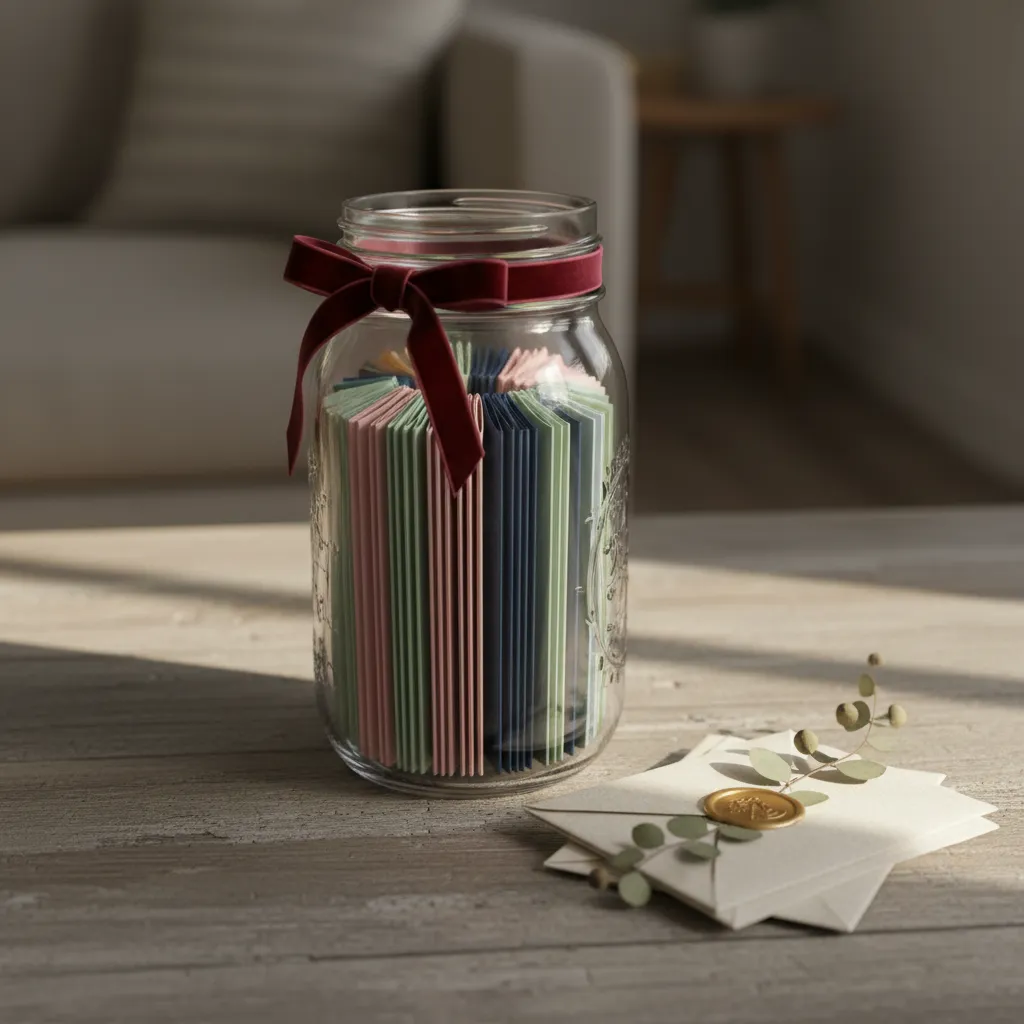
A date night jar is more than just a thoughtful gift; it serves as a functional decor piece that invites connection. Visually, a clear glass vessel filled with colorful paper acts as a vibrant focal point.
It adds a pop of curated color to a coffee table or bookshelf. This simple craft turns the question of “what are we doing?” into a fun surprise, eliminating decision fatigue for new couples.
Select a vessel that complements your interior style. A vintage mason jar suits rustic themes, while a sleek geometric vase fits modern spaces. You want the item to blend naturally with your room.
For a rustic look, pair the jar with cozy farmhouse Valentine decor ideas like burlap or lace. This ensures the gift feels like a permanent part of the home design.
Create a love story you can touch. A date night jar turns shared memories into a beautiful, interactive display.
To make the jar truly useful, organize the activities by “vibe” or budget. Using a color-coded system adds visual structure to the contents inside the glass, creating a layered aesthetic.
| Paper Color | Date Category | Vibe Description | Budget Level |
|---|---|---|---|
| Soft Pink | Romance | Intimate, quiet connection | $$$ |
| Sage Green | Adventure | Active, outdoors, energy | $$ |
| Cream | At-Home | Cozy, relaxing, low-key | Free |
| Navy Blue | Trying New Things | Learning, classes, tasting | $$$ |
The details are not the details. They make the design.
Charles Eames, Architectural Digest
Assembling Your Vessel

Wash and dry your container thoroughly to ensure a crystal-clear finish. This allows the colors of the papers or painted sticks to shine through without smudges or dust obscuring the view.
Write your ideas on high-quality linen paper for a textured feel. Fold them uniformly to create a sense of order within the jar. This attention to detail elevates the craft from basic to chic.
Consider this jar a functional centerpiece. It works beautifully alongside 22 DIY centerpieces to instantly elevate your table vibe, adding personality to your dining area.
Finish the look with a velvet ribbon tied around the neck of the jar. Choose a deep jewel tone like emerald or burgundy to add a sense of luxury and warmth to the overall presentation.
Cupid’s Design Hack
- For a cleaner, architectural look, swap folded paper for flat wooden craft sticks with painted tips; they stand upright in cylinder vases and avoid the clutter of crumpled paper.
- To ensure the jar stays part of your permanent decor, match your paper color codes to the room’s existing palette; like coordinating the ‘Adventure’ slips with your sage green throw pillows.
- Turn the jar into a living archive by writing the date you completed an activity on the back of the slip, then moving it to a separate ‘Memory Box’ to track your relationship milestones.
“Open When” Letter Kit: Emotional Support for Long-Distance Partners

Long-distance relationships require tangible connections to bridge the physical gap. An “Open When” letter kit offers a curated way to provide emotional support.
This DIY project is not just a gift; it is a physical collection of moments. The recipient can hold your words in their hands when they need them most.
A handwritten letter is a physical piece of love that transforms distance into presence.
Selecting the Right Materials

The texture of the paper plays a massive role in the experience. Opt for heavy cardstock or linen-finish paper that feels substantial and organic.
Avoid standard printer paper, which can feel impersonal. Elevate the aesthetic by using a custom seal. This adds a vintage charm that looks beautiful on a desk.
For storage, consider crafting a custom wooden box. You can personalize it using easy simple wood burning ideas for beginners to burn initials into the lid.
Curating the Prompts
The functionality of this gift lies in the specific prompts you choose. They should cover a range of emotions to ensure support is available whenever needed.
Here is a list of essential “Open When” themes to include in your kit:
- The Celebration: Open when you have achieved a goal.
- The Comfort: Open when you had a terrible day at work.
- The Nostalgia: Open when you miss holding my hand.
- The Laugh: Open when you need a silly joke or meme.
- The Reassurance: Open when you feel insecure about us.
- The Future: Open when we are finally back in the same city.
Creating the Atmosphere
Encourage your partner to keep these letters in a special spot. A well-designed box acts as a focal point on a bedside table or vanity, adding to the room’s decor.
Suggest that they open the letters in a calm environment. This helps them fully absorb the sentiment. It works best when they create a cozy winter bedroom look first.
Lighting is also crucial for the reading experience. Soft, ambient lighting creates a hygge vibe that makes the moment feel intimate and safe.
Your home should tell the story of who you are, and be a collection of what you love.
Nate Berkus, Architectural Digest
By treating the letters as a collection of what you love, you turn a simple craft into a lasting artifact of your relationship.
Distance-Defying Details
- Spray each letter with a hint of your signature scent before sealing to trigger a sensory memory that bridges the physical gap instantly.
- Tuck a small, flat token inside specific envelopes, such as a favorite tea bag for the ‘terrible day’ letter or a printed photo for the ‘nostalgia’ prompt.
- Use a wax seal or custom sticker to make each envelope feel like a special ritual, turning a simple letter into a tactile experience.
Photo Transfer Wood Blocks: A Sentimental Keepsake for Married Couples

For a gift that feels deeply personal and organic, photo transfer blocks are a stunning choice for Valentine’s Day. They offer a rustic alternative to standard frames.
The beauty of this project lies in the texture. The image literally fuses with the timber, allowing the natural wood grain to show through the photograph.
This creates a vintage, weathered aesthetic that adds instant warmth to modern or farmhouse interiors. The finish is matte and tactile, unlike glossy prints.
Texture is the secret ingredient that makes a house feel like a home, turning simple memories into art.
Choosing Your Materials
The key to a successful transfer is selecting the right wood. Light-colored woods like birch or pine work best as they do not distort the colors of your photo.
You can purchase pre-cut blocks or cut your own from scrap lumber. If you enjoy rustic crafts, this pairs well with easy simple wood burning ideas for beginners.

The Transfer Process
Functionally, these blocks are brilliant because they are freestanding. You can stack them on mantels or bookshelves without needing easels or wall hooks.
To create them, you apply a gel medium to the face of a laser-printed photo (not inkjet) and press it face-down onto the wood block.
Once dry, you gently rub away the paper backing with a damp cloth. This reveals the ink left behind, now embedded into the fibers of the wood.
I love the idea of taking something common and elevating it. It’s about the mix of materials; wood, stone, metal; that makes a room feel curated.
Shea McGee, Studio McGee Blog
Comparison of Transfer Mediums
Choosing the right medium affects the final clarity and durability of your keepsake. Here is a breakdown of common options.
| Medium Type | Finish Quality | Best For |
|---|---|---|
| Gel Medium | High clarity, durable, textured | Permanent keepsakes and gifts |
| Mod Podge | Slightly cloudy, vintage look | Rustic or distressed styles |
| Wax Paper | Faded, very rustic | Temporary decor or practice |
| Polycrylic | Crystal clear, hard finish | High-contrast B&W photos |
Styling Your Keepsakes
Group these blocks in odd numbers for a curated vignette. A stack of three blocks works well on a bedside table next to a warm ambient lamp.
The lack of glass eliminates glare, making them perfect for rooms with bright natural light. They add a soft, sentimental touch to any surface.
Artisan Crafting Secrets
- Always mirror your images before printing, especially if they contain text, so they appear correctly once transferred face-down onto the timber.
- Use a laser printer rather than an inkjet; the toner in laser prints reacts better with the gel medium to create a crisp, permanent bond.
- For a perfectly weathered look, lightly sand the edges of the block after the image has dried to blend the photo seamlessly into the wood grain.
Homemade Rose and Lavender Bath Bombs: Pampering for Busy Parents

Creating a spa-like atmosphere at home is the ultimate luxury for busy parents. These handmade bath bombs offer a moment of pure relaxation.
The combination of soothing lavender and romantic rose creates a sophisticated scent profile. It transforms a standard bath into a sensory retreat.
Focus on using organic textures in your ingredients. Dried botanicals add visual interest and elevate the tactile experience of the bath.
If you are working with limited space, thoughtful storage is key. You can explore our simple small bathroom ideas for ways to display these beauties.
True luxury in the home is defined by the experiences we create within it, not just the objects we own.
Gathering Your Botanical Materials

Quality ingredients are essential for a fizz that feels professional. You need baking soda, citric acid, cornstarch, and Epsom salts as your base.
For the aesthetic appeal, incorporate dried rose petals and lavender buds. These float on the water surface, adding a dreamy visual layer.
Select high-grade essential oils for the fragrance. Lavender oil promotes calm, while rose geranium adds a floral, uplifting note.
The Crafting Process
- Mix Dry Ingredients: Whisk 1 cup baking soda, 1/2 cup citric acid, 1/2 cup cornstarch, and 1/2 cup Epsom salts in a large bowl.
- Add Botanicals: Fold in your dried flowers gently. This ensures they are evenly distributed throughout the sphere for visual balance.
- Combine Wets: In a separate jar, mix 2 tsp water, 2 tsp essential oil, and 3 tsp almond oil. Whisk them vigorously to emulsify.
- Slow Integration: Add the liquid to the dry mix very slowly. Whisk constantly to prevent premature fizzing during this step.
- Check Texture: The mixture is ready when it holds together like damp sand. If it crumbles, add a tiny spray of water.
- Mold and Dry: Press firmly into spherical molds. Let them dry for 24 hours in a cool, dry area away from humidity.
Baths are a place to wash away the day, but they are also a place to dream. Making the space beautiful connects us to that ritual.
Justina Blakeney, The New Bohemians
Presentation and Packaging

The presentation transforms these from a craft into a high-end gift. Use clear glass apothecary jars to showcase the texture of the petals.
Tie a raw silk or velvet ribbon around the neck of the jar. This adds a layer of softness that contrasts beautifully with the glass.
For a complete sanctuary vibe, pair the jar with a beeswax candle. This mirrors the advice found in our cozy winter decor ideas for your home sanctuary.
Troubleshooting Your Batch
DIY bath products can be sensitive to humidity and mixing techniques. Use this guide to correct common texture issues.
| Common Issue | Likely Cause | Quick Solution |
|---|---|---|
| Premature Fizzing | Liquid added too fast | Add liquid in tiny drops while whisking rapidly. |
| Cracking while Drying | Mixture too dry | Spray lightly with witch hazel to bind ingredients. |
| Soft or Mushy | High humidity in room | Let dry longer or place near a dehumidifier. |
| Flat Shape | Not packed tightly | Overfill the mold slightly and press very firmly. |
Store these in an airtight container until gifting. Moisture is the enemy of a good fizz, so keep them dry to maintain their quality.
Artisan Maker Secrets
- Switch out the water for witch hazel in a spray bottle to achieve the perfect damp sand texture without triggering a premature fizzing reaction.
- If you lack professional molds, use a silicone ice cube tray or a muffin tin for uniquely shaped bath treats that pop out effortlessly.
- To preserve the vibrant color of the dried rose petals, store your finished bath bombs in a dark, cool place away from direct sunlight.
Custom Wine Bottle Labels: A Sophisticated Twist for Wine Lovers

Transforming a standard bottle of wine into a bespoke gift elevates the entire evening. It shows forethought and care.
A custom label acts as a focal point on your dining table. It turns a simple beverage into a memorable keepsake for your partner.
The tactile experience of a textured label adds a layer of luxury. Choose materials that feel substantial in the hand.
Consider how the bottle complements your setting. It pairs beautifully with cozy farmhouse valentine decor for a rustic dinner.
Selecting the Right Materials

The paper choice dictates the mood of the gift. A matte finish absorbs light, creating a modern and understated look.
For a traditional aesthetic, opt for linen paper. The woven texture catches the ambient lighting and feels organic.
Typography plays a crucial role in the design. Serif fonts suggest elegance, while handwritten scripts feel intimate.
Texture is the most important part of design; it’s what makes a room feel like a home.
Kelly Hoppen, Kelly Hoppen Interiors
Application for a Flawless Finish

Proper preparation ensures a professional result. You must remove the original label completely before starting.
Soak the bottle in warm soapy water with baking soda. This breaks down the adhesive for easy removal without scratching.
Dry the glass thoroughly with a lint-free cloth. Any moisture will prevent the new label from adhering smoothly.
Align the label carefully to maintain visual balance. A straight application improves the overall spatial flow of the vignette.
This attention to detail mirrors the effort put into party decorations table settings for special events.
True luxury lies in the personalization of everyday objects.
Comparison of Label Materials
Choosing the right material ensures durability and style. Here is a breakdown of popular finishes for DIY projects.
| Material Type | Visual Texture | Best Application | Durability |
|---|---|---|---|
| Matte Vinyl | Smooth, flat finish | Modern, minimalist designs | Water-resistant |
| Textured Linen | Woven, organic feel | Elegant, romantic dinners | Delicate |
| Kraft Paper | Raw, fibrous look | Rustic or farmhouse styles | Standard |
| Glossy Photo | High-shine, reflective | Vibrant, colorful graphics | Splash-proof |
The Vintner’s Touch
- Use the bottle’s vertical side seams as a natural alignment guide to ensure your custom label is perfectly centered and straight.
- If you plan on chilling your wine, opt for weatherproof polyester label paper to prevent the design from bubbling or ink from bleeding in an ice bucket.
- For any stubborn adhesive residue left after soaking, apply a small amount of vegetable oil or rubbing alcohol to create a perfectly clean surface for your new label.
Wrapping Up With Style
Creating DIY Valentine’s gifts is about more than just glue and paper. It is an opportunity to blend personal sentiment with your unique interior aesthetic.
Whether you choose the interactive date night jar or heartfelt letters, focus on quality materials. High-end textures and cohesive colors ensure your gift doubles as chic decor.
Ultimately, the best designs are the ones that tell a story. Let your handmade gestures become cherished artifacts in the home you share.
Crafting Dilemmas Solved
Focus on materials. Use high-quality linen paper, velvet ribbons, or glass vessels. Neutral colors and uniform textures instantly elevate the look from basic to boutique.
Absolutely. The beauty of these projects lies in their simplicity. Start with the date night jar; it requires minimal skill but offers maximum visual impact.
Most ideas listed, like the jar or “Open When” letters, can be completed in an afternoon. Allow extra time if you plan to paint or dry specialized finishes.
Yes! Swap standard red and pink for colors that fit your room. Use navy, sage, or cream materials to ensure the gift blends seamlessly with your existing palette.
