Table of Contents
- The Zero-Waste 4×8 Parallel Layout: Optimized Lumber Blueprints
- The Accessible U-Shaped Enclave: Kitchen Garden Schematics
- The L-Shaped Perimeter Plan: Corner Optimization and Trellis Zoning
- The Tiered Pyramid Configuration: Vertical Planting Maps
- The Integrated Keyhole Design: Composting Core Dimensions
- Cultivating Your Structured Sanctuary
- The Garden Blueprint: Questions Solved
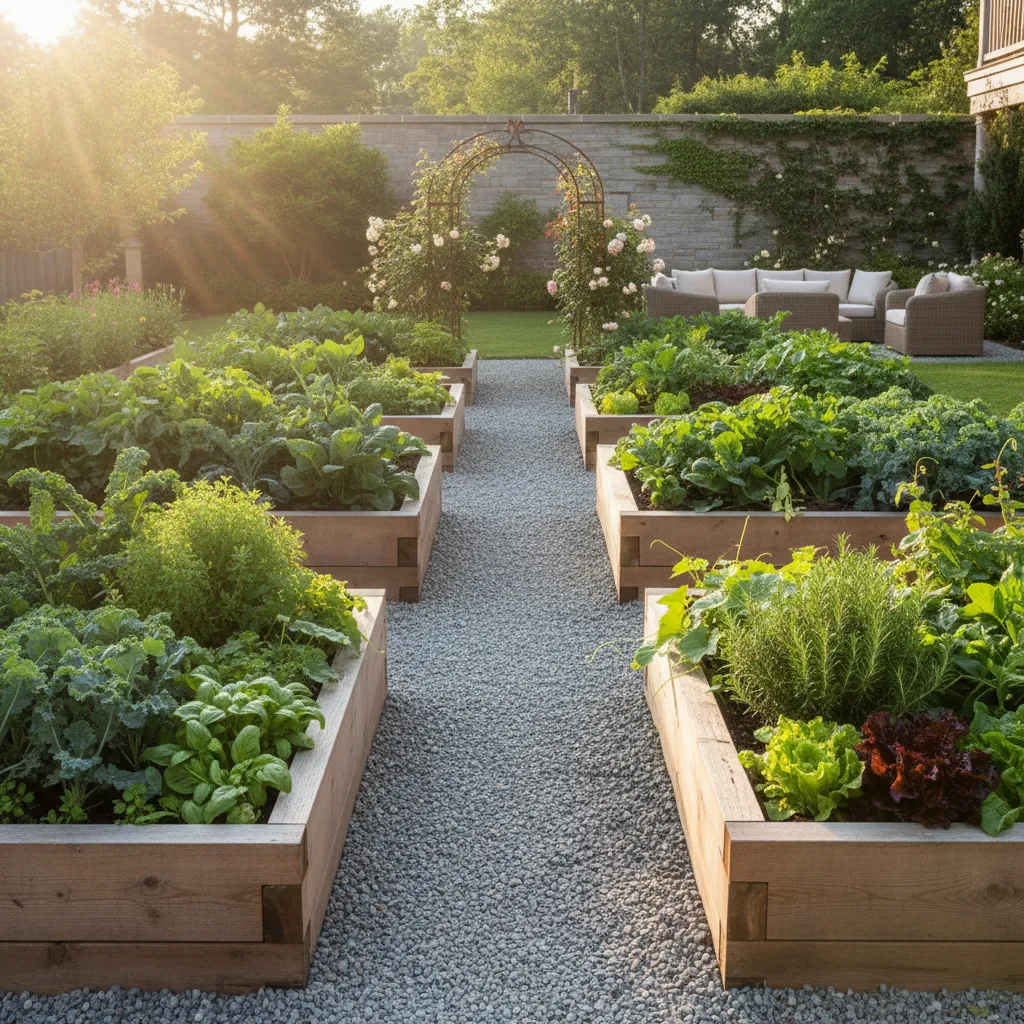
Transform your outdoor area into a curated sanctuary by focusing on the architectural beauty of raised garden beds. These structures provide a clean and sophisticated framework that balances style with high functionality for any backyard.
Whether you are working with a small urban patio or a sprawling lawn, a thoughtful layout serves as the foundation for a flourishing green space.
Designing a modern garden requires a blend of aesthetic vision and practical planning to ensure every plant thrives. Incorporating geometric patterns or tiered levels adds a professional touch without breaking the bank on expensive landscaping services.
By choosing materials that complement your home, you create a cohesive look that feels both inviting and organized.
Start your project by exploring clever arrangements that maximize sunlight and accessibility for easy maintenance. Simple DIY hacks like using cedar or repurposed stone can elevate the overall vibe of your garden while keeping it cozy and approachable.
Your garden should be a reflection of your personal style, offering a peaceful retreat that is as beautiful as it is productive.
The Zero-Waste 4×8 Parallel Layout: Optimized Lumber Blueprints

The 4×8 parallel layout remains the undisputed champion of efficiency for modern kitchen gardens. It balances perfect spatial flow with distinct structural elegance.
This design utilizes standard eight-foot lumber boards without requiring complex cuts. You simply use two full boards for the sides and cut one in half for the ends.
The result is a zero-waste project that maximizes your budget. The natural grain of untreated cedar adds a warm, organic texture to the backyard landscape.
Design your garden so the structure feels as permanent and intentional as the home itself.
Functionality drives this specific layout choice. A four-foot width ensures you can reach the center of the bed from either side without stepping on the soil.
If you are researching 10 Best Outdoor Vegetable Garden Design Ideas for Small Yards, you will find this dimension is a staple. It prevents soil compaction and keeps roots healthy.
Builder’s Blueprint
- Ask your local lumber yard to cut the third 8-foot board exactly in half for you; this guarantees a factory-straight edge for the end caps and simplifies transport.
- To prevent the long 8-foot sides from bowing outward over time due to soil pressure, install a simple cross-brace or drive a stake internally at the 4-foot midpoint.
- When spacing parallel beds, leave at least 30 inches of pathway width to comfortably accommodate a standard wheelbarrow and kneeling pad.
Choosing the Right Lumber for Longevity

Selecting the correct material defines the longevity of your parallel beds. The wood must withstand moisture while maintaining a sophisticated, curated look.
Rough-sawn hemlock or cedar offers a rustic yet refined aesthetic. These woods naturally resist rot and insects, making them ideal for organic vegetable growing.
Construct your beds from rot-resistant woods like cedar or redwood. While more expensive initially, they last years longer than pine and require no chemical treatment.
The Old Farmer’s Almanac, Raised Garden Bed Guide
We have compiled a comparison of common lumber choices to help you plan your blueprint. This data helps you balance upfront investment with long-term durability.
| Material Type | Estimated Lifespan | Visual Texture | Cost Efficiency |
|---|---|---|---|
| Untreated Pine | 2-4 Years | Smooth, Light Yellow | High (Budget Friendly) |
| Western Red Cedar | 10-15 Years | Rich Red, Knotty | Medium |
| White Oak | 15-20 Years | Dense, Gray Patina | Low (Premium) |
| Composite Timber | 25+ Years | Uniform, Matte | Low (Investment) |
Builder’s Insight
- Opt for 2-inch thick lumber rather than standard 1-inch boards; the added density significantly slows decay and prevents the walls from bowing under the weight of wet soil.
- Don’t compromise on hardware: use stainless steel or polymer-coated deck screws to ensure your fasteners last just as long as your premium rot-resistant wood.
- If you prefer the warm tones of new wood over a gray patina, seal your cedar or redwood annually with a non-toxic, food-safe oil like raw tung or linseed oil.
Defining the Pathway Spacing

The negative space between your beds is as critical as the growing area. Proper spacing creates a breathable, airy atmosphere in your outdoor sanctuary.
We recommend a minimum path width of thirty inches. This allows comfortable movement for a standard wheelbarrow during seasonal soil amendments.
For a more polished look, consider 15 Cheap Outdoor Flower Bed Border Ideas to Elevate Your Yard to define these paths. Crisp edges prevent grass from encroaching on your workspace.
Fill these pathways with pea gravel or crushed granite. These materials provide excellent drainage and a satisfying auditory crunch underfoot.
Walkway Wisdom
- Before laying any material, ‘test drive’ your path width by physically walking the layout with your wheelbarrow or lawnmower to ensure you can maneuver turns without scraping your knuckles.
- Place a layer of heavy-duty landscape fabric or cardboard underneath your gravel to prevent weeds from sprouting and to stop stones from sinking into the soil over time.
- If you plan to kneel often while gardening, consider widening the path slightly to accommodate a kneeling pad so you aren’t forced to kneel directly on sharp gravel.
The Accessible U-Shaped Enclave: Kitchen Garden Schematics

The U-shaped layout transforms a standard garden into an immersive room. You step into the center and instantly feel surrounded by lush textures and life.
This “enclave” approach is ideal for a kitchen garden. It keeps culinary herbs and vegetables within arm’s reach while maximizing vertical growing space.
By wrapping the growing area around you, you reduce the need for expansive walkways. This efficiency mirrors the logic found in the 10 Best Outdoor Vegetable Garden Design Ideas for Small Yards.
A garden layout should not just hold plants; it should embrace the gardener.
Optimizing Spatial Flow and Reach

Functionality is the primary driver for this schematic. The central aisle serves as your cockpit, allowing you to tend to three distinct sides at once.
We recommend a central path width of at least three feet. This ensures enough clearance for a wheelbarrow or a garden stool to move freely without obstruction.
For the beds themselves, keep the depth between two to three feet. This measurement prevents you from overextending or stepping into the soil to harvest.
The key to a successful kitchen garden is accessibility. If you can’t reach it easily, you won’t harvest it. Keep beds narrow enough to reach the center from the path.
Joe Lamp’l, The Joe Gardener Show
Material Choices for Structure
The U-shape requires sturdy corner connections to maintain its form. Using rot-resistant wood like cedar adds a warm, organic aesthetic to the backyard.
For a more permanent structure, consider stone or brick. You can explore cost-effective options in our guide to 15 Cheap Outdoor Flower Bed Border Ideas to Elevate Your Yard.
Soften the hard lines of the timber with spilling plants. Nasturtiums or creeping thyme draped over the edges create a beautiful, romantic vignette.
U-Shape Schematic Checklist
To build the perfect enclave, adhere to these specific dimensional rules for comfort and flow:
- Bed Height: Aim for 18 to 30 inches tall. This height eliminates the need to bend over, saving your back during long planting sessions.
- Internal Width: The “U” opening should be 36 inches minimum. This accommodates mobility aids and essential garden tools.
- Sun Orientation: Position the open end of the “U” facing South (in the Northern Hemisphere). This traps heat and creates a warm microclimate.
- Corner Bracing: Reinforce the two inner corners with 4×4 posts. This prevents the weight of wet soil from bowing the wood outward over time.
Enclave Insider
- Maximize the ‘cockpit’ effect by planting your most-used herbs on the inner corners, allowing you to harvest dinner ingredients without moving your feet.
- Orient the open end of the U-shape toward the south to capture heat, creating a warm microclimate that helps extend the growing season for vegetables.
- Soften rigid hardscaping lines by planting trailing varieties, like nasturtiums or creeping thyme, to drape over the edges for a romantic, organic look.
The L-Shaped Perimeter Plan: Corner Optimization and Trellis Zoning

The L-shaped perimeter plan is a champion of spatial efficiency. It wraps neatly around patio corners or existing fence lines to maximize use.
This layout creates a distinct “garden room” feeling. It defines the edge of your outdoor living space without encroaching on the central lawn.
Visually, the L-shape offers a structured and architectural look. It draws the eye outward to the boundaries of the yard to make the space feel larger.
Design your garden to embrace the edges; an L-shaped bed turns a forgotten corner into a functional sanctuary.
Solving the Corner Access Challenge

The inner corner of an L-shaped bed can be tricky to reach. The reach distance often exceeds the standard arm length of two feet.
Avoid planting high-maintenance crops in this deep nook. Daily harvesting of beans or leafy greens becomes frustrating if you cannot reach them.
Install a permanent focal point here instead. A tall glazed pot or a perennial shrub fills the void while requiring less daily attention.
You can also use this corner for aesthetic anchoring. For more ideas on structuring your yard, check out Chic & Easy Backyard Landscaping Designs on a Budget.
Vertical Zoning with Trellises

The rear edge of an L-shaped bed is ideal for vertical gardening. It provides a sturdy backdrop for installing cattle panels or wooden lattice.
This adds significant height and privacy to your sanctuary. It turns a flat garden into a lush living wall that softens harsh fence lines.
Vertical growing works beautifully for vining crops. If you enjoy flowers, this method mirrors the techniques used for Climbing Roses on House Front Porches Cottage Gardens Guide.
To get the most out of your raised beds, go vertical. Trellising on the north side of the bed prevents shading smaller plants.
Joe Lamp’l, Joe Gardener
The L-Shape Planting Zone Checklist
To maximize the functionality of this layout, follow a strict zoning height guide. This ensures every plant receives adequate sunlight.
- Zone 1 (Back Edge): Install trellises here. Plant climbers like pole beans, cucumbers, or indeterminate tomatoes to act as a green screen.
- Zone 2 (Middle Layer): Place medium-height crops here. Bush peppers, eggplant, and kale thrive in this central strip without blocking the back.
- Zone 3 (Front Border): utilize the accessible edge for low growers. Strawberries, basil, and lettuces are easy to grab for a quick dinner.
- Zone 4 (The Dead Corner): Place a bird bath or architectural statue. This eliminates the need to step into the bed to weed a hard-to-reach area.
Using raw cedar or stone materials adds tactile warmth. These textures contrast beautifully against the vibrant greens of a well-planned vegetable layout.
Corner Logic & Layout Hacks
- Position trellises on the north or east side of the L-shape to ensure your taller climbers do not shade out smaller herbs and greens in the front rows.
- If the corner depth exceeds your reach, install a decorative ‘landing stone’ inside the bed to provide a stable spot to step without compacting the soil.
- Use dark-colored trellis materials to create an ‘infinite’ feel, which makes the boundaries of your L-shaped garden appear further away than they actually are.
The Tiered Pyramid Configuration: Vertical Planting Maps

The tiered pyramid configuration is a masterclass in combining structural elegance with high-yield gardening. It creates a stunning focal point.
This layout involves stacking progressively smaller boxes on top of one another. The result is a sculptural element that adds height and drama.
By utilizing vertical space, you can triple your planting area without expanding the footprint. This is ideal for compact urban patios or courtyards.
A tiered design also improves ergonomics significantly. The upper levels reduce the need to bend, making maintenance a comfortable experience.
Design is not just about how it looks, but how it flows. A tiered garden brings the harvest up to you.
Constructing the Foundation

The material choice defines the atmosphere of your pyramid garden. Raw cedar offers a warm, organic look that weathers into a beautiful silvery gray.
For a more industrial or modern aesthetic, consider using corten steel. The rusty patina provides a striking contrast against lush green foliage.
Ensure the base layer is robust and level. This bottom tier supports the weight of the soil and plants above, so structural integrity is paramount.
We recommend leaving at least 12 inches of planting width exposed on each “step” of the pyramid. This ensures adequate light reaches the lower plants.
If you are looking to add soft color to these levels, our guide on simple flower gardening for beginners offers excellent starting points.
The Vertical Planting Map

Successful tiered gardening relies on strategic placement. You must match the plant’s root depth and sun requirements to the specific tier height.
The top tier offers the deepest soil volume. This is the perfect spot for plants with extensive root systems that need stability.
Conversely, the lower tiers are shallower and often shaded by the levels above. These areas require robust plants that thrive in cooler conditions.
To assist with your layout, we have curated a planting map specifically for a standard three-tier pyramid structure.
| Tier Level | Soil Depth | Ideal Plant Varieties | Visual Effect |
|---|---|---|---|
| Top Tier (Apex) | 24+ inches | Tomatoes, Peppers, Lavender | Creates a tall, central statement piece. |
| Middle Tier | 12-18 inches | Basil, Kale, Marigolds | Adds volume and bushy texture. |
| Bottom Tier | 6-12 inches | Strawberries, Lettuce, Thyme | Provides a cascading, spilling border. |
To get the most out of your raised garden beds, think of them as oversized containers. Because the soil warms up faster in spring, you can plant earlier than in the ground.
The Editors, Better Homes & Gardens
Finishing Touches and Lighting
Lighting transforms a practical garden bed into an evening vignette. Install small solar path lights on the corners of each tier for a soft glow.
This ambient lighting highlights the texture of the plants and the architecture of the wood. It also prevents tripping hazards in the evening.
Consider the spatial flow around the pyramid. Surrounding the bed with crushed gravel or pavers creates a clean separation from the lawn.
You can also hang small decorative elements nearby to complement the theme. See our projects on homemade diy hanging bird feeders for inspiration.
The Vertical Advantage
- Install a drip irrigation system starting at the top tier; gravity will naturally assist in watering the lower levels while preventing soil erosion.
- Orient your pyramid so the tallest plants on the top tier don’t cast unwanted shadows on sun-hungry varieties in the lower sections.
- Use a lightweight potting mix rather than heavy topsoil to ensure the structure remains stable and the lower tiers aren’t overly compressed by weight.
The Integrated Keyhole Design: Composting Core Dimensions

The keyhole garden offers a brilliant solution for homeowners seeking a self-sustaining layout. This circular design features a wedge-shaped indentation that allows easy access to the center.
Visually, the curved edges soften the harsh lines of a rectangular yard. The organic shape creates a natural focal point that feels intentional and architectural rather than purely utilitarian.
Functionality is the primary driver here. By incorporating a central composting basket, you feed the soil directly from within. This reduces the need for external fertilizers.
You can construct these beds from materials that match your home’s exterior. Consider rough-hewn limestone for a rustic look or sleek corten steel for a modern aesthetic.
If you are new to arranging planting zones, this layout simplifies the process. It naturally creates a hierarchy of plants based on their proximity to the nutrient-rich center.
For those interested in combining aesthetics with plant health, this method pairs well with simple flower gardening for beginners. It allows for dense planting in a compact footprint.
Constructing the Central Basket

The heart of this layout is the central tube. This is typically a wire mesh cylinder standing vertically in the middle of the bed. It houses kitchen scraps and garden waste.
As the organic matter decomposes, nutrients seep directly into the surrounding soil. This creates a constant slow-release feeding system for your vegetables.
Watering through this central basket is highly efficient. Moisture wicks outward from the center, encouraging deep root growth and reducing surface evaporation.
True garden design efficiency creates a closed loop where waste becomes fuel for beauty.
The dimensions are critical for success. The bed usually spans six feet in diameter. This ensures you can reach every plant from the keyhole notch without stepping on the soil.
The walls should stand at waist height to minimize bending. This ergonomic height makes it an excellent choice for gardeners who want to avoid back strain.
Integrating this shape into chic and easy backyard landscaping designs adds instant character. It breaks up the monotony of straight rows.
The keyhole bed is a technique for maximizing space and minimizing work… It’s a super-productive raised bed with a built-in compost pile.
Toby Hemenway, Gaia’s Garden: A Guide to Home-Scale Permaculture
Standard vs. Keyhole Layout Comparison
When deciding on your garden layout, it helps to understand how the keyhole design differs from a traditional linear raised bed. The table below outlines the functional differences.
| Feature | Traditional Linear Bed | Integrated Keyhole Bed |
|---|---|---|
| Water Retention | Moderate; dries from edges inward | High; moisture wicks from center |
| Nutrient Delivery | Top-dressing or liquid fertilizer | Continuous internal composting |
| Space Efficiency | Requires walking paths between rows | Maximize planting area; one access point |
| Visual Impact | Structured, rigid, linear | Organic, sculptural, focal point |
This layout works exceptionally well in arid climates or areas with poor soil. The volume of the bed retains heat in the spring and moisture in the summer.
To style the exterior, consider planting trailing vines near the edge. Plants like nasturtiums will drape over the stone or wood walls, softening the hardscape.
The Keyhole Advantage
- Position heavy-feeding crops like tomatoes or leafy greens closest to the central basket to take full advantage of the highest nutrient concentrations.
- Extend the central wire mesh tube about 6 to 12 inches above the soil level to prevent garden soil from falling into your compost and to make adding kitchen scraps easier.
- Line the bottom of your keyhole bed with a thick layer of cardboard and woody debris to help retain moisture and provide a long-term source of carbon as it breaks down.
Cultivating Your Structured Sanctuary
The parallel 4×8 layout blends form and function seamlessly. It transforms a simple hobby into a sophisticated architectural statement right in your backyard.
Material choice defines longevity. Selecting cedar or white oak ensures your structures withstand the elements while aging gracefully into a rich, organic patina.
Never neglect the negative space. Generous pathways create a breathable flow, inviting you to wander through your sanctuary and nurture your plants daily.
The Garden Blueprint: Questions Solved
North to south is generally best. This orientation ensures equal sunlight exposure, preventing taller crops from shading smaller ones as the sun moves.
Aim for a minimum depth of 12 inches. This supports healthy root systems for most vegetables and ensures proper drainage for a thriving harvest.
We recommend 30 inches or more. You need ample space to maneuver a wheelbarrow comfortably without damaging the crisp corners of your timber frames.
Yes, use hardware cloth or cardboard. This simple barrier stops burrowing pests and weeds from invading while allowing beneficial earthworms to enter.
