Is the post-holiday lull leaving your home feeling a bit lackluster? Are you dreaming of hosting a dazzling New Year’s Eve party but your budget is feeling the pinch after a season of spending? You’re in the right place to change that.
A DIY New Year’s decoration shouldn’t just be a craft project; it should be a personal, sparkling statement that creates an atmosphere of celebration and excitement. A backdrop for new memories, a conversation starter, and a testament to your own creativity as you welcome a new chapter.
This is your creative playbook for transforming simple materials into a party-ready spectacle that’s not only glamorous and festive but feels deeply, personally you without the hefty price tag.
We’ll explore stunning project ideas, decode the secrets of a high-end DIY look, and walk through the practical steps to bring it all to life.
By the end, you’ll see your home not as an empty space, but as a canvas for the most creative celebration of the year.
Before You Begin: Dreaming Up Your Handmade Celebration
The most impressive parties start with a creative vision, not just a last-minute scramble through the craft store. Before you plug in the hot glue gun, let’s lay the groundwork for a design that is cohesive, clever, and absolutely chic.
The Secrets of a Luxe DIY Look: Simple Rules for a Stunning Party
Making homemade decorations look expensive and intentional is all about a few key strategies. Here are a few simple secrets:
- The Power of Paint: A can of metallic spray paint is your single most powerful tool. It can transform dead branches from your yard, cheap plastic toys, and old wine bottles into chic, uniform, and expensive-looking decor. Committing to a tight color palette (like matte black and gold) is key.
- Create in Multiples: One paper star looks crafty; fifty paper stars hung from the ceiling look like a stunning art installation. The secret to a high-impact DIY is repetition. Creating a large quantity of one simple element is far more effective than making a few complicated, different items.
- Focus on a Focal Point: Don’t try to decorate every inch of the room. Concentrate your DIY efforts on creating one incredible “wow” moment. A massive balloon garland, a floor-to-ceiling photo backdrop, or a dramatic centerpiece will set the tone and make the biggest impact.
- Mix DIY with Store-Bought Basics: Your entire party doesn’t have to be handmade. Let your statement DIY pieces shine by mixing them with simple, store-bought basics like plain white candles, a simple tablecloth, or classic glassware. This balance makes your handmade items look like intentional artistic choices.
What’s the Real Cost? A No-Fuss Budget Breakdown
| The Approach | Estimated Cost | What Your Money Buys | The Little Extras (Don’t Skip These!) |
| The Thrifty Crafter | $30 – $75 | • Paper, paint, and glitter • Repurposed glass bottles • Foraged natural elements | • A good hot glue gun • Sharp scissors or a craft knife • Clear fishing line for hanging |
| The Dedicated DIYer | $80 – $200 | • A full DIY balloon garland kit • Higher-quality craft supplies • A Cricut or other cutting machine | • A comfortable workspace • Good quality cardstock • A self-healing cutting mat |
| The All-Out Project | $250+ | • Plywood for a custom photo wall • Bulk materials for a large installation • A rental (like a helium tank) | • A patient friend to help you • Proper tools (like a power drill) • A clear plan and measurements |
The Design Menu: Finding Your Signature Sparkle
Here are 20 New Year’s DIY decoration ideas for 2026. Each one comes with a breakdown to help you create your own party magic.
Statement Backdrops & Installations
1. The Paper Star Chandelier

- Best For: Creating a breathtaking, dreamy installation over a table or in a corner.
- Key Consideration: This is time-consuming but the result is worth it. You can find easy-to-follow tutorials for 3D paper stars online.
- Pro-Tip: Make the stars in three different sizes and in your party’s color palette (e.g., gold, silver, and black cardstock). The variation adds professional-looking depth.
- Styling Cue: Use clear fishing line to hang the stars at dozens of different lengths from the ceiling to create a magical, floating star field.
2. The Tassel Garland Wall

- Best For: A fun, textural, and fully customizable photo booth backdrop.
- Key Consideration: You can make tassels from tissue paper, plastic tablecloths, or even yarn.
- Pro-Tip: Make your tassels in varying lengths and thicknesses. String them onto twine in a random, layered pattern rather than a perfect, straight line.
- Styling Cue: Create an ombré effect by arranging the tassels from light to dark, or mix in strands of metallic tinsel for extra sparkle.
3. The Coffee Filter Backdrop

- Best For: An incredibly cheap way to create a soft, ethereal, flower-wall effect.
- Key Consideration: This project requires hundreds of basic, white coffee filters and a lot of hot glue.
- Pro-Tip: To add a touch of glam, lightly spray the edges of some filters with gold or silver spray paint before you glue them down.
- Styling Cue: Glue the coffee filters (pinched at the base to create a ruffled look) onto a large piece of foam board or cardboard. Overlap them tightly so none of the backing shows through.
4. The “Year in Review” Photo Wall

- Best For: A personalized and sentimental backdrop that’s a natural conversation starter.
- Key Consideration: Choose your favorite photos from 2025 and print them all in a uniform size and finish (like black and white squares).
- Pro-Tip: Use removable wall putty or washi tape to arrange the photos on a blank wall in the shape of “2026”.
- Styling Cue: Weave a delicate strand of copper-wire fairy lights in and around the photos to illuminate the display.
Tabletop & Centerpieces
5. The Spray-Painted Branch Centerpiece

- Best For: A dramatic, sculptural, and practically free centerpiece.
- Key Consideration: Find interesting, bare branches from your yard. Ensure they are completely dry before painting.
- Pro-Tip: Use a high-quality metallic spray paint (gold, silver, or copper). Apply two thin coats for a smooth, professional finish.
- Styling Cue: “Plant” the painted branches in a vase filled with sand or rocks for stability. Hang a few lightweight, glittery ornaments from the twigs.
6. The Repurposed Bottle Candlesticks

- Best For: An easy, rustic-glam way to add height and candlelight to your table.
- Key Consideration: Collect empty wine, bubbly, or even interesting soda bottles.
- Pro-Tip: Spray paint the bottles in a cohesive color, like matte black or glittery gold. Once dry, simply place elegant taper candles in the openings.
- Styling Cue: Let the candle wax drip down the sides of the bottles throughout the night to create a romantic, old-world patina.
7. The DIY Clock Face Plates

- Best For: A clever, thematic detail for your table setting.
- Key Consideration: This is a decorative element. You can use cheap charger plates or place a clear glass plate over your design.
- Pro-Tip: Cut large circles out of black cardstock. Use a white or gold paint pen to draw a simple clock face with the hands pointing to just before midnight.
- Styling Cue: Place the “clock” under a clear plate at each setting so the design shows through, doubling as a unique placemat.
8. The Disco Ball Vase Filler

- Best For: A fun, sparkling alternative to flowers or candles.
- Key Consideration: This is a great way to add a party vibe to any surface.
- Pro-Tip: Buy a bag of mini disco ball ornaments from a craft store.
- Styling Cue: Fill a large, clear glass hurricane vase or a simple bowl to the brim with the disco balls. It’s a simple but incredibly effective centerpiece.
Hanging Decor & Accents
9. The DIY Disco Ball

- Best For: Getting that iconic party centerpiece without the high price tag.
- Key Consideration: This requires patience, but the result is a keeper for future parties.
- Pro-Tip: Use a styrofoam ball from a craft store. Instead of cutting tiny mirrors, use self-adhesive mirror tape or sheets of mirrored scrapbook paper cut into squares for a much faster application.
- Styling Cue: Hang your finished disco ball in the center of the room and aim a focused light source (like a desk lamp or a strong flashlight) at it to make it spin and cast dancing lights.
10. The Glitter-Dipped Feathers

- Best For: An ethereal, glamorous, and unexpected decorative accent.
- Key Consideration: Use simple, inexpensive craft feathers (in white or black for the best contrast).
- Pro-Tip: Dip the tips of the feathers in craft glue, then dip them into a bowl of fine gold or silver glitter.
- Styling Cue: String them into a delicate garland, tuck them into napkins at your place settings, or gather them in a small vase like a bouquet.
11. The “Bubble” Garland

- Best For: A whimsical, modern garland that mimics champagne bubbles.
- Key Consideration: This is a simple sewing project.
- Pro-Tip: Use a circle punch to create perfect circles from vellum or iridescent cellophane. Then, simply use your sewing machine to stitch a straight line through the center of the circles, feeding them in one after another to create a long, connected strand.
- Styling Cue: Hang multiple strands vertically in a doorway or behind the bar to create a beautiful, shimmering curtain of “bubbles.”
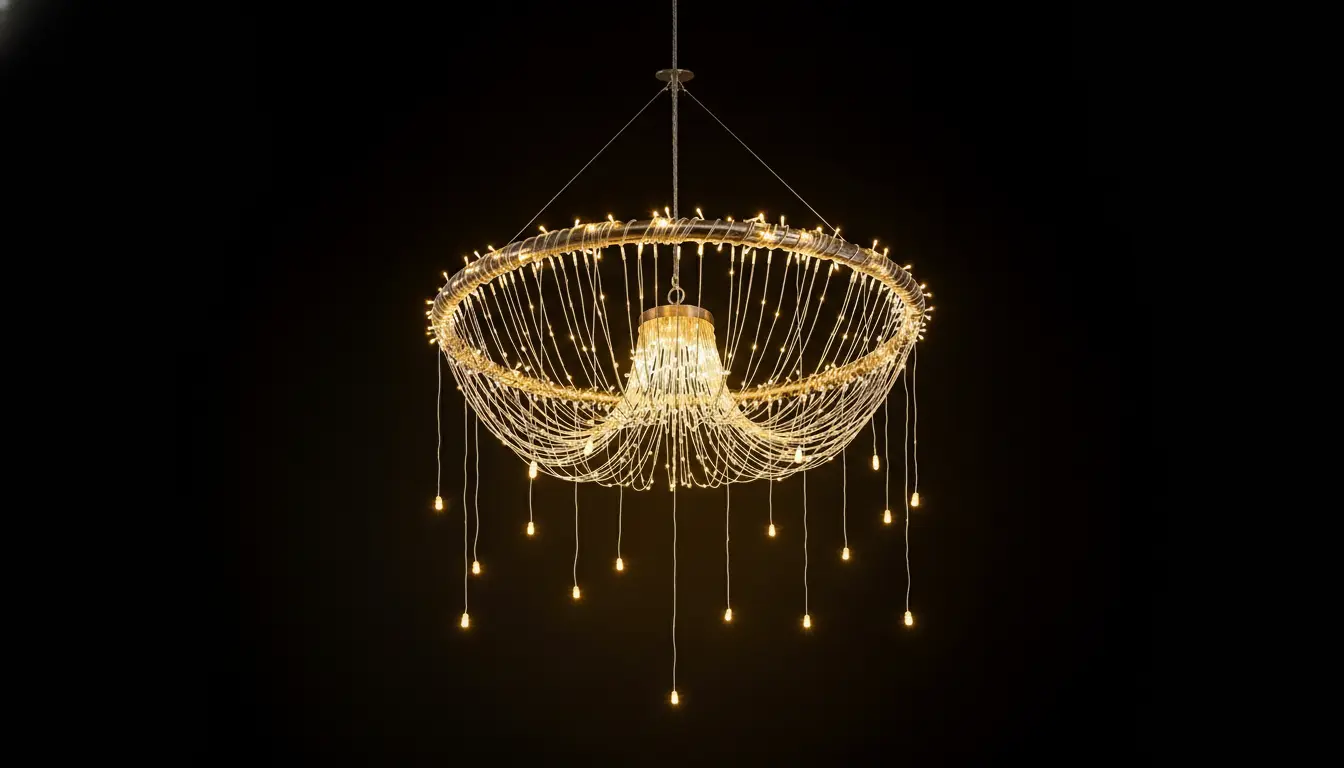
12. The Hula Hoop Chandelier

- Best For: A large-scale, statement lighting feature that looks incredibly high-end.
- Key Consideration: You need a simple hula hoop and lots of fairy lights.
- Pro-Tip: Spray paint the hula hoop gold or silver. Then, tightly wrap it with multiple strands of fairy lights. Use fishing line to hang more light strands vertically from the hoop at varying lengths.
- Styling Cue: Hang it over your main party table or dance floor as a stunning, magical centerpiece.
Interactive & Fun Details
13. The DIY Confetti Bar

- Best For: An interactive station that builds excitement for the midnight countdown.
- Key Consideration: This is a fun activity and decor all in one.
- Pro-Tip: Set out several large glass bowls or jars, each filled with a different type of confetti (use a hole punch on metallic paper to make your own!). Provide small paper bags or cones and let guests create their own custom mix to throw.
- Styling Cue: Create a fancy, hand-lettered sign that says “Confetti Bar: A Little Sparkle for the New Year.”
14. The Resolution Tree

- Best For: A meaningful activity that doubles as a beautiful, evolving centerpiece.
- Key Consideration: This is the centerpiece from Idea #5, taken to the next level.
- Pro-Tip: Next to your painted branch centerpiece, leave a stack of small, pre-punched tags and a metallic pen.
- Styling Cue: Add a small sign that invites guests to write down a hope or resolution for 2026 and hang it on a branch. By the end of the night, your centerpiece will be full of wishes.
15. The DIY Party Popper Favors

- Best For: A personalized and fun way to make some noise at midnight.
- Key Consideration: This is a safe and easy project using empty toilet paper rolls.
- Pro-Tip: Fill the rolls with confetti and small treats. Wrap them in festive tissue paper and twist the ends like a candy wrapper, securing with a ribbon.
- Styling Cue: Pile the finished poppers in a beautiful bowl near the door for guests to grab as they countdown.
16. The “Time Capsule” Guest Book

- Best For: Creating a wonderful keepsake to open at next year’s party.
- Key Consideration: Find a beautiful, decorative box to serve as your “time capsule.”
- Pro-Tip: Set out slips of paper and pens with prompts like “My favorite memory of 2025 was…” and “My biggest hope for 2026 is…”
- Styling Cue: Decorate the box with the year “2026” in bold, glittery numbers and a sign that says “To Be Opened: Dec 31st, 2026.”
Quick & Easy Accents
17. The Free Printable Signs

- Best For: The fastest, cheapest way to add chic, coordinated signage to your party.
- Key Consideration: Many designers offer free, high-quality printables online.
- Pro-Tip: Search for “Free New Year’s Eve Printables” on Pinterest. Look for bar signs, food labels, or fun quotes like “Pop, Fizz, Clink.” Print them on white cardstock.
- Styling Cue: Place the signs in simple black or metallic frames you already own and scatter them around the party.
18. The Glittered Glassware

- Best For: A simple way to make cheap plastic or old glassware look festive and new.
- Key Consideration: Apply glitter only to the stems and bases where mouths won’t touch.
- Pro-Tip: Use Mod Podge or craft glue and a foam brush to apply a thin, even layer. Sprinkle with fine glitter, tap off the excess, and let it dry completely before applying a clear sealer coat.
- Styling Cue: Display your glam new glasses on a silver tray, ready for the big toast.
19. The Confetti Balloons

- Best For: Upgrading plain balloons into something special in seconds.
- Key Consideration: This works best with clear or translucent latex balloons.
- Pro-Tip: Use a small funnel to pour a spoonful of metallic confetti into a balloon before you inflate it.
- Styling Cue: Once inflated, rub the outside of the balloon on your clothes or hair to create static electricity. This will make the confetti cling beautifully to the inside walls of the balloon.
20. The Bow Tie Drink Garnish

- Best For: A final, charming detail for your cocktails or champagne flutes.
- Key Consideration: This is a simple paper craft that adds a huge dose of personality.
- Pro-Tip: Cut small bowtie shapes out of black glittery cardstock. Use a dot of hot glue to attach them to the top of a simple paper straw or a cocktail pick.
- Styling Cue: Place a “dapper” straw in every glass just before serving for a fun, celebratory touch.
Conclusion: Your Most Creative Year Yet
And just like that, you’re no longer just throwing a party; you’re the creative director of a dazzling, handmade celebration.
You have the ideas, the inspiration, and the savvy DIY secrets to create a New Year’s Eve that is sparkling, personal, and a true reflection of your style.
This isn’t just about making decorations; it’s about crafting a joyful and beautiful beginning to a brand new year.
It all starts with a single choice. Pick one project that sparked your excitement, and take the first small step.
You’ve got this. Happy crafting
