Table of Contents
- 1. Install Peel-and-Stick Vinyl Floor Tiles and Planks Using a Deposit-Safe Removal Test
- 2. Layer Large Area Rugs and Runners to Hide Ugly Spots
- 3. Assemble Interlocking Floating Floor Tiles and Deck Tiles
- 4. Roll Out Loose-Lay Temporary Sheet Vinyl Flooring
- 5. Use a Door Clearance Checklist Before Installing Any Temporary Floors
- Elevate Your Floors, Protect Your Deposit
- Common Renter Flooring Dilemmas Solved
Living in a rental often means compromising on aesthetics, especially when it comes to dated or unsightly floor tiles that disrupt your design vision.
Transforming your space does not require a permanent renovation or a massive budget; it simply requires a bit of intuition and the right temporary solutions.
By focusing on texture and color, you can easily mask imperfections while creating a foundation that feels both intentional and high-end.
Practicality meets style when we explore clever hacks like peel-and-stick vinyl or strategically layered area rugs. These methods offer a protective barrier for original floors while allowing your personal style to shine through every room.
Whether you are dealing with cracked ceramics or mismatched patterns, these techniques provide the flexibility to experiment with modern trends without risking your security deposit.
Elevating your home is about more than just hiding flaws; it is about crafting an environment that truly resonates with your lifestyle.
These seven renter-friendly strategies ensure that your floors become a cohesive part of your decor rather than a distraction.
Embrace the process of refining your sanctuary with smart, stylish choices that prioritize both beauty and functionality in every square foot.
1. Install Peel-and-Stick Vinyl Floor Tiles and Planks Using a Deposit-Safe Removal Test

Transforming a cold, outdated floor is easier than ever with peel-and-stick vinyl. This temporary material perfectly mimics the rich texture of natural wood or sleek stone.
These adhesive tiles completely shift the spatial flow of your room. Warm ambient lighting reflects beautifully off the matte vinyl, creating a cozy and curated atmosphere.
Before applying anything to your floors, you must protect your security deposit. A simple patch test ensures the adhesive will not leave a stubborn, sticky residue behind.
Peel-and-stick vinyl tiles are an easy, affordable way to update a room’s look without laying permanent flooring.
The Spruce Editorial Team, The Spruce
To elevate your space further, pair your new floors with thoughtful modern living room decor ideas.
Consider adding a plush rug or a linen accent chair. This layered approach adds tactile depth and makes the room feel incredibly inviting and warm.
A beautiful room begins from the ground up. Temporary flooring offers permanent style.
Conducting a Deposit-Safe Adhesion Test

Testing your vinyl tiles requires a hidden spot, like a back corner or inside a closet. This functional step is absolutely crucial for your peace of mind as a renter.
- Clean the surface: Remove all dust and grease from the original tile to ensure a flat bond.
- Apply the vinyl: Press a single test plank or tile firmly to the cleaned area.
- Wait it out: Leave the tile undisturbed for at least 48 hours to let the adhesive fully set.
- Apply gentle heat: Use a hairdryer on a warm setting and slowly peel the corner upward.
- Inspect the floor: Check for any leftover residue or damage to the underlying ceramic tile.
If your test leaves a clean surface, you are ready to transform your floor. Opt for raw wood textures if you are aiming for a grounded, organic aesthetic in your home.
Planks elongate narrow spaces and improve visual flow. Square tiles work beautifully to anchor smaller zones like a galley kitchen or a compact apartment bathroom.
| Vinyl Style | Visual Effect | Best Room Application |
|---|---|---|
| Wood-Look Planks | Adds warmth and elongates the space | Living rooms and long hallways |
| Geometric Tiles | Creates a striking modern focal point | Bathrooms and entryways |
| Stone-Look Squares | Offers a sleek and minimalist aesthetic | Kitchens and dining areas |
Always check the manufacturer guidelines for removal tips. Proper application and removal ensure your floors remain flawless and your deposit stays completely safe.
Renter-Friendly Designer Hacks
- Always thoroughly scrub and degrease your original floors before applying any peel-and-stick vinyl; even microscopic dust can weaken the adhesive and cause lifted corners.
- When it is time to move out, let a hairdryer do the heavy lifting. Gently warming the vinyl softens the adhesive, allowing the tiles to pull up smoothly without leaving sticky residue behind.
- Use the shape of your temporary flooring to your advantage: run wood-look planks lengthwise to visually stretch narrow rooms, or use bold geometric tiles to anchor smaller spaces like entryways.
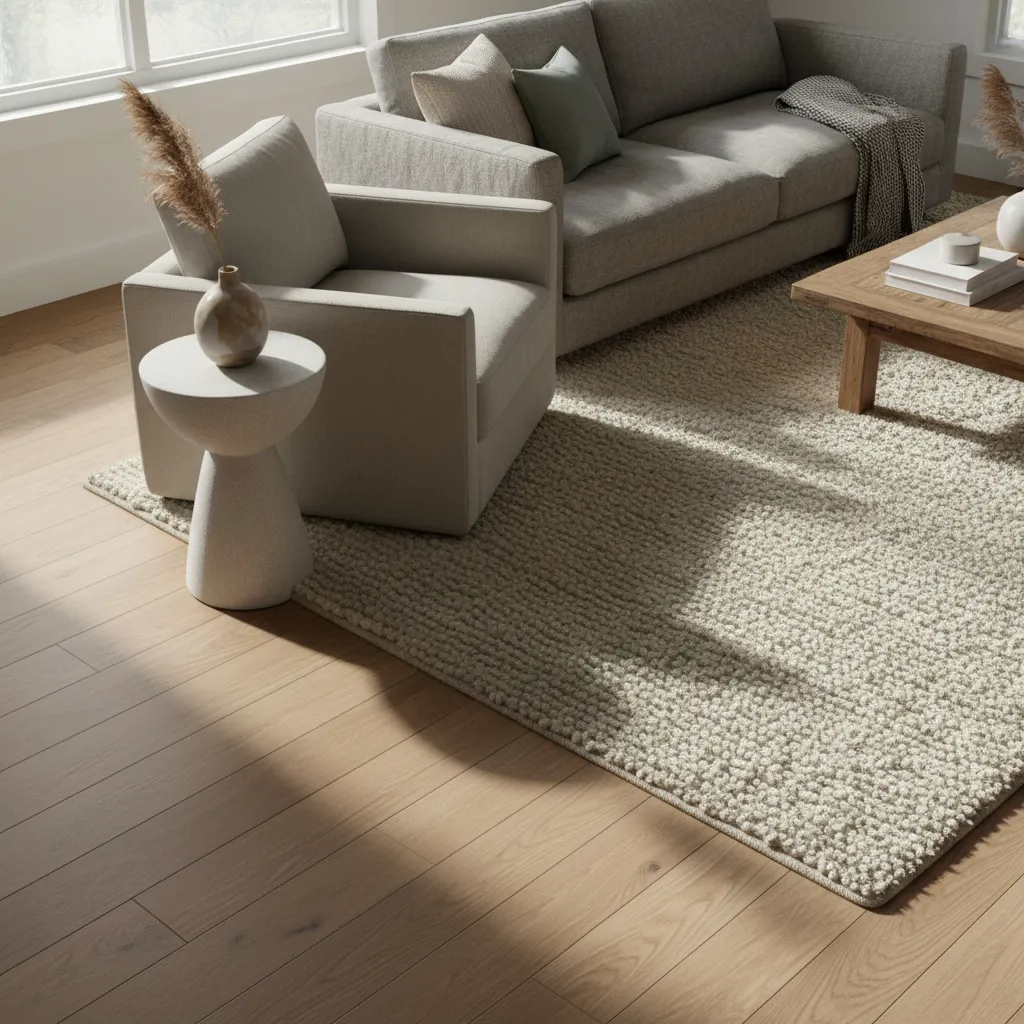
2. Layer Large Area Rugs and Runners to Hide Ugly Spots

Covering your floor with a massive area rug is the fastest way to hide unsightly tiles. This simple addition instantly warms up a cold and sterile room.
An oversized rug acts as a visual anchor. It shifts the focal point away from the dated flooring and creates a cohesive palette for your furniture.
A beautiful rug is the foundation of a room, transforming a neglected floor into a curated canvas.
Selecting the Best Rug Materials

The texture of your rug matters immensely when masking harsh ceramic or porcelain tiles. You want materials that add tactile depth and cozy warmth.
Thick materials like wool or chunky jute effortlessly smooth out uneven grout lines. They also improve acoustic dampening in echoey rental spaces.
The biggest mistake I see in living rooms is a rug that is too small. Your rug should be large enough to anchor your main furniture pieces.
Emily Henderson, Style by Emily Henderson
- Chunky Jute: Brings an organic and earthy texture that beautifully contrasts with glossy and dated tile finishes.
- Vintage Turkish Wool: Features intricate patterns that distract the eye while providing incredible durability for daily use.
- Washable Synthetics: Highly practical for kitchens and entryways where spills are incredibly common on the underlying floor.
Strategic Placement with Runners

Do not overlook the power of a long runner in narrow spaces like hallways or galley kitchens. They draw the eye forward rather than straight down.
By guiding the spatial flow, runners make tight areas feel intentional. This helps greatly when planning furniture arrangement for long narrow living rooms.
Layering a vintage piece over a neutral jute base is a designer secret. It is one of the easiest modern living room decor ideas for renters.
Always use a high-quality rug pad underneath. It prevents slipping on slick tiles and adds a plush layer of comfort underfoot for daily living.
Designer Styling Secrets
- Always size up: Ensure your area rug is large enough to anchor your main furniture pieces to successfully shift focus away from the floor.
- Layer for a custom look: Place a patterned vintage rug over a large, neutral chunky jute base to add high-end texture and disguise uneven grout lines.
- Invest in a good rug pad: Use a thick, high-quality pad underneath to prevent slipping on slick tiles and add acoustic dampening to echoey rooms.
3. Assemble Interlocking Floating Floor Tiles and Deck Tiles

Interlocking floating tiles are the ultimate problem solver for renters dealing with unsightly flooring. They snap together effortlessly without any messy adhesives.
These durable squares easily cover cracked ceramics and dated linoleum. They bring a highly curated and architectural feel to a space without any renovation dust.
If you want to elevate your utilitarian spaces, floating tiles work wonders. They are a brilliant addition to smart stacked laundry room ideas where durability is key.
Floating floor tiles offer the architectural beauty of real wood with the brilliant convenience of a temporary rental hack.
You can choose from rich acacia wood, sleek composite materials, or soft rubber finishes. The raw wood texture introduces a warm organic element to cold rooms.
Because they sit slightly above the existing floor, they create excellent spatial flow. This slight lift also protects your original rental floor from heavy furniture.
Snap-together decking tiles are a fantastic temporary fix for ugly apartment balconies and patios, instantly warming up cold concrete.
Tara Bellucci, Apartment Therapy
Floating floor tiles provide unique advantages that other temporary solutions simply cannot match. Here is why design experts love using them in rentals:
- Instant Warmth: Wooden deck tiles introduce natural tactile depth to sterile and uninviting environments.
- Water Resistance: Composite finishes are completely waterproof, making them perfect for humid bathroom floors.
- Zero Damage: The grid backing rests gently on existing floors, protecting your security deposit entirely.
- Seamless Flow: They create a cohesive visual palette when extended from indoor spaces to small apartment patios.
When assembling these tiles, start from a focal point like a doorway or a prominent corner. This ensures the most visible areas look perfectly aligned and professional.
If you reach an awkward edge, you can easily trim the plastic backing of composite tiles with a utility knife. This ensures a custom fit around tricky baseboards.
The Installation Edge
- For a high-end designer look, alternate the direction of the wood grain in a basketweave pattern to add visual texture and hide minor subfloor imperfections.
- Use a rubber mallet to gently tap the tiles into place; this ensures a secure, flush connection without the risk of cracking the interlocking plastic tabs.
- If installing on a balcony or patio, leave a tiny gap near the edges to allow for natural material expansion and optimal water drainage during rain.
4. Roll Out Loose-Lay Temporary Sheet Vinyl Flooring

Sheet vinyl flooring offers a seamless way to instantly mask outdated tile. It provides a smooth, continuous surface that visually expands your room.
Imagine the cozy warmth of rich timber tones paired with soft ambient lighting. This simple upgrade instantly transforms cold spaces into a retreat.
Sheet vinyl is the ultimate renter secret for achieving a high-end, seamless floor without a single drop of glue.
Loose-lay vinyl is highly durable and completely waterproof. This makes it a fantastic option for damp environments like kitchens and bathrooms.
If you are exploring simple small bathroom ideas, adding a loose-lay vinyl sheet is an affordable trick. It enhances both flow and style.
Sheet vinyl is an excellent choice for moisture-prone areas like bathrooms and kitchens, offering a seamless, water-resistant surface.
Home Decor Editors, The Spruce
Step-By-Step Installation Guide

To achieve a flawless finish, proper preparation is key. Follow these practical steps to secure your temporary flooring perfectly.
- Measure carefully: Calculate your room dimensions and add a few extra inches to account for any uneven walls.
- Clean the tiles: Sweep and mop the existing floor thoroughly to remove debris that could cause noticeable bumps.
- Roll and cut: Lay the vinyl flat and use a heavy duty utility knife to trim the edges precisely along the baseboards.
- Secure the edges: Apply double-sided renter tape along the perimeter to keep the sheet flat without damaging the tile.
Pro Renter Hacks
- Let the vinyl roll sit in the room for 24 hours before cutting to allow it to acclimatize and prevent later buckling.
- Use a sharp new blade in your utility knife and a metal straight edge to ensure perfectly crisp lines along your baseboards.
- Apply a small amount of heat from a hairdryer when eventually removing the double-sided tape to ensure no residue is left on the original tiles.
5. Use a Door Clearance Checklist Before Installing Any Temporary Floors

Before rolling out a plush velvet rug or thick deck tiles, you must check your doors. Adding temporary layers can easily block a door from opening.
This simple step preserves your spatial flow. When looking at how to style a console table in an entryway like a pro, a stuck door easily ruins the calm vibe.
The Temporary Flooring Clearance Checklist

Use this checklist to ensure your new finishes will not cause daily frustration. A warm and inviting room requires smooth and effortless movement.
- Measure the Gap: Use a simple ruler to check the space between the raw wood floor and the bottom of the door.
- Check Material Thickness: Compare your gap to the height of your chosen material, like interlocking vinyl or a thick wool pile.
- Test the Swing Path: Open the door fully to ensure the floor height remains consistent across the entire spatial flow.
- Account for Rug Pads: Always add an extra quarter inch to your math if you plan to use a non-slip pad beneath woven textiles.
A beautiful room must first be a functional room. True design elevates your daily routine without creating new obstacles.
It is crucial to measure the clearance under doors before purchasing temporary flooring. If the material is too thick, the door will bind and damage the new surface.
Bob Vila Experts, Common Flooring Installation Mistakes
If your clearance is tight, skip the thick interlocking tiles. Instead, opt for low-profile vinyl options or a beautiful flat-weave linen runner.
In tight quarters, like those found in simple small bathroom ideas, every fraction of an inch matters. Measure carefully to maintain your elegant aesthetic.
The Seamless Swing Secret
- Stack common coins like nickels under the door to visualize exactly how much clearance you have before buying materials.
- Choose flat-weave textiles or ultra-thin vinyl planks for entryways to ensure the door glides without dragging on the new surface.
- Always include the height of a non-slip rug pad in your final calculation as these can add an unexpected eighth of an inch.
Elevate Your Floors, Protect Your Deposit
You deserve a beautiful home that reflects your personal style, even if you are renting.
Hiding ugly floor tiles is simpler than you think. Peel-and-stick vinyl offers a perfect fix.
These temporary upgrades provide a cozy, sophisticated foundation without risking your deposit.
Embrace these practical design hacks. Step into a space that feels curated and beautifully yours.
Common Renter Flooring Dilemmas Solved
If applied and removed correctly, they are safe. Always do a patch test in a hidden corner and use gentle heat during removal.
Yes, but deep grout lines might show through thinner vinyl. Opt for thicker luxury vinyl planks or use a temporary underlayment.
Sweep regularly and use a damp mop with mild soap. Avoid harsh chemicals or soaking the floor, which can ruin the adhesive.
Absolutely. Layering a large, plush area rug over your existing tiles can completely shift the room aesthetic and add warmth.
