Table of Contents
- Boho-Chic Aesthetics with Terracotta and Sage Palettes
- Scandi-Minimalist Designs with Raw Wood and White Space
- Abstract Line Art and Botanical Sketches Using Paint Pens
- Modern Geometric Color Blocking with Metallic Accents
- Faux-Ceramic Texture Techniques for a Contemporary Look
- The Final Stroke: Crafting Your Cozy Narrative
- Design Dilemmas Solved
Infusing your home with warmth often begins with the smallest details.
Wooden heart accents provide the perfect canvas for blending the relaxed, layered textures of Bohemian style with the clean, functional lines of Scandinavian design.
These simple shapes offer a sophisticated way to add personality to any room without overwhelming your existing decor.
Transforming these pieces does not require a massive budget or advanced artistic skills.
By focusing on a palette of muted earth tones and crisp whites, you can create high-end looks using leftover craft paint or sample pots from your local hardware store.
This approach allows you to experiment with various patterns and finishes while maintaining a cohesive and polished aesthetic throughout your living space.
Whether you are styling a cozy shelf or looking for the perfect handmade gift, these painting techniques will elevate your DIY projects to a professional level.
Embrace the beauty of imperfection as you explore geometric motifs and organic textures.
With just a few brushes and a clear vision, you can craft timeless decor that feels both intentional and welcoming.
Boho-Chic Aesthetics with Terracotta and Sage Palettes

Embrace the warmth of the desert and the calm of the forest with a boho-chic palette. This style relies heavily on earthy terracotta and muted sage green.
These colors create an inviting atmosphere that feels grounded and serene. They transform simple wooden hearts into sophisticated statement pieces.
Design is not just about how it looks, but how the space makes you feel; grounded, calm, and inspired.
Creating Organic Textures

Perfection is not the goal here. The charm of boho design lies in its raw and organic finish. Aim for a look that feels hand-touched and authentic.
Use a dry brush technique to let the natural wood grain peek through the sage paint. This adds tactile depth and prevents the piece from looking flat.
Matte finishes are essential for this aesthetic. Avoid high-gloss sealers, as they can make the decor look plastic and artificial.
For inspiration on how these textures play out in a larger space, you can explore dark boho bedroom inspirations that utilize similar finishes.
Color Blocking with Earth Tones

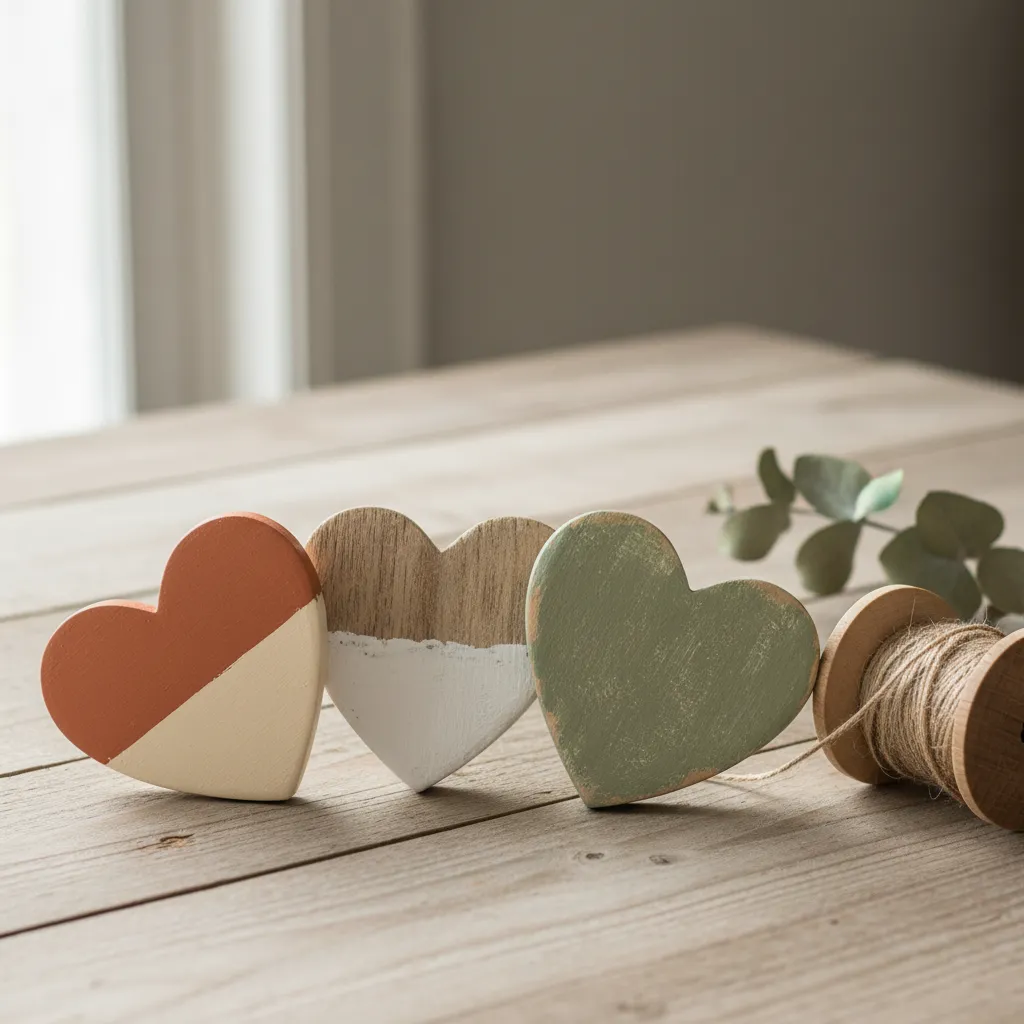
Modernize the rustic look by using geometric color blocking. Tape off a diagonal section of the heart and paint one half terracotta and the other cream.
This creates a sharp visual contrast that draws the eye without overwhelming the space. It balances the rustic wood with clean, modern lines.
When styling these pieces, consider the spatial flow. Grouping three hearts in varying sizes creates a pleasing vignette that guides the eye upward.
Terracotta is a color that feels very grounding. It brings a sense of warmth and comfort to a space, making it perfect for areas where you want to relax.
Sue Wadden, Sherwin-Williams Director of Color Marketing
Choosing the Right Paint Type
Selecting the correct paint is crucial for achieving that velvety boho finish. The material dictates how the light interacts with the color.
| Paint Type | Finish Quality | Best Use Case |
|---|---|---|
| Chalk Paint | Ultra-matte, velvety | Best for distressing and vintage looks. |
| Milk Paint | Chipped, flaky, organic | Ideal for a truly aged, antique aesthetic. |
| Acrylic Matte | Flat, consistent color | Great for crisp geometric lines and blocking. |
Once your hearts are painted, pair them with natural fibers. Hang them using jute twine or macramé cord to enhance the organic vibe.
You can also place them near seasonal plant pots to create a cohesive connection between your decor and nature.
Artisan Styling Secrets
- Use a sea sponge to lightly dab a lighter shade of sage over your base coat for a weathered, stone-like texture that enhances the organic feel.
- Tuck a small sprig of dried eucalyptus or pampas grass into the jute hanging loop to add a natural, three-dimensional element to your wall display.
- To protect the matte finish without adding shine, apply a thin layer of clear furniture wax instead of polyurethane to keep the wood feeling soft and natural.
Scandi-Minimalist Designs with Raw Wood and White Space

The Scandinavian aesthetic thrives on the concept of “less is more.” This style focuses on celebrating the natural grain of the material.
Instead of covering the entire heart in opaque color, we use negative space as a design element. This approach highlights the organic texture of the wood.
Raw timber brings warmth to a room, while white paint adds a crisp modern edge. The contrast creates a sophisticated look that fits any season.
Simplicity is the ultimate sophistication. Let the natural wood grain tell its own quiet story.
The Dipped-Paint Effect

Creating a “dipped” look is the easiest way to achieve this style. It requires precision but yields a high-end result suitable for Valentine’s Day crafts or year-round decor.
Start by applying painter’s tape across the heart. You can place it horizontally for a classic horizon line or diagonally for dynamic asymmetry.
Press the tape edges down firmly. This prevents paint bleed and ensures that crisp, professional line that defines Scandinavian minimalism.
Apply two coats of matte white acrylic paint to the exposed area. Allow the paint to dry completely before peeling the tape away.
To create a truly harmonious Scandinavian look, avoid high-gloss finishes. A matte or eggshell finish absorbs light softly, mimicking the natural texture of the wood rather than competing with it.
Frida Ramstedt, The Interior Design Handbook
Linear Geometric Patterns

If you prefer more detail, try geometric linework. This technique uses thin white lines to create shapes without overwhelming the wood base.
Use a fine-liner paint pen for the best control. Draw simple chevrons, parallel lines, or triangles directly onto the raw wood surface.
This method pairs beautifully with wood burning techniques if you want to add dark contrast lines alongside the white paint.
Keep the design airy. The goal is to see more wood than paint. This balance ensures the piece feels organic rather than manufactured.
Material Checklist for Scandi Finishes
Achieving this specific look requires the right tools. Using the wrong finish can turn a chic project into a messy one. Here is what you need.
| Material | Specific Type | Why It Works |
|---|---|---|
| Paint | Matte Acrylic | Provides a non-reflective, chalky finish that looks modern. |
| Tape | Washi or Frog Tape | Low tack ensures it won’t pull up wood fibers upon removal. |
| Brush | Synthetic Flat Shader | Creates smooth strokes without visible bristle marks. |
| Wood Prep | 220-Grit Sandpaper | Ensures the raw wood is buttery smooth before painting. |
Sand your wooden hearts before applying any paint. A smooth surface ensures your geometric lines remain straight and do not bleed into the grain.
Once finished, style these hearts in a wooden bowl or string them up with jute twine. The natural tones will complement any neutral living space.
The Nordic Touch
- To achieve a razor-sharp line with the dipped effect, apply a thin layer of matte varnish over the tape edge before the white paint to seal the seal and prevent any color bleed.
- Always sand in the direction of the wood grain using 220-grit sandpaper to ensure the white paint settles smoothly without highlighting cross-grain scratches.
- For a professional Scandi finish, use a foam pouncing tool instead of a brush to apply the paint; this eliminates visible brushstrokes and maintains a consistent matte texture.
Abstract Line Art and Botanical Sketches Using Paint Pens

Paint pens are a secret weapon for achieving crisp, professional-looking designs on wood without the mess of traditional brushes.
They offer superior control, making them perfect for creating intricate patterns that require steady hands and fine lines.
This approach allows the natural texture of the wood to shine through, acting as a warm, organic backdrop for your art.
Mastering the Continuous Line Look

Abstract line art relies on fluidity. The goal is often to create a shape, face, or figure using one single, unbroken stroke.
The stark contrast of black ink against raw timber mimics the aesthetic found in easy simple wood burning ideas without the need for heat tools.
Keep your wrist loose and confident. If the line creates a slightly jittery texture, it simply adds to the authentic handmade charm.
Simplicity is the ultimate sophistication in modern organic design.
Sketching Simple Botanicals

Botanical sketches bring life to small wooden hearts. Ferns, vines, and wildflowers are excellent starting points for beginners.
These organic motifs pair beautifully with creative spring decorating ideas for a fresh, seasonal vignette.
Use a fine-tip white pen to add highlights to leaves. This creates depth and visually separates the foreground from the wood grain.
The details are not the details. They make the design.
Charles Eames, Eames Office
To ensure your sketches look professional and last for years, following the right preparation process is vital.
Paint Pen Success Checklist:
- Sand Smooth: Rough grain will ruin felt tips and cause ink to splatter. Always use 220-grit sandpaper first.
- Prime if Needed: If you want bold color, apply a clear acrylic sealer before drawing to stop ink from bleeding into the fibers.
- Shake Well: Vigorously shake the pen to mix the pigment. Test it on a scrap piece of paper before touching the wood.
- Seal the Deal: Once dried, finish with a spray matte varnish. This prevents the ink from scratching off during handling.
Artisan Sketching Secrets
- If your paint pen tip picks up wood dust, gently wipe it on a damp cloth to keep the ink flow smooth and consistent.
- Practice your continuous line movement on paper first to build muscle memory before committing to the porous wood surface.
- Layer for extra depth by using a metallic gold or silver pen to add tiny accents or stippling to your botanical sketches.
Modern Geometric Color Blocking with Metallic Accents

Transform plain wooden hearts into modern art pieces using geometric color blocking. This technique pairs matte finishes with striking metallic lines.
The contrast between raw wood, flat paint, and shimmering metal creates a sophisticated look. It moves the design away from rustic into chic territory.
Geometric patterns introduce a sense of order and flow to your vignette. These hearts look stunning when displayed on floating shelves or coffee tables.
Modern design isn’t about complexity; it is about the thoughtful balance of shape, color, and negative space.
Selecting the Right Metallic Medium

The type of metallic accent you choose defines the final texture. Gold leaf offers a luxurious, flaky texture that catches ambient light beautifully.
Metallic acrylic paint provides a softer, more uniform shimmer. It is easier to control and ideal for beginners wanting a subtle glow.
For precise lines, oil-based paint markers are incredibly effective. They allow you to draw thin geometric borders between color blocks easily.
This project is one of the most stylish top Valentines Day crafts for adults diy gift ideas to try. It feels curated rather than crafty.
Metallics are the new neutrals. They reflect light and open up a space, acting as jewelry for your room.
Jonathan Adler, Elle Decor
Creating Crisp Geometric Lines

The secret to professional-looking color blocking is the tape. Use high-quality painter’s tape to mask off specific sections of the heart.
Burnish the edges of the tape with a credit card before painting. This critical step prevents paint from bleeding underneath and ensures sharp lines.
Select bold, contrasting colors for the painted sections. You might find inspiration in 20 paint colors guaranteed to make your guests swoon for your palette.
Comparison of Metallic Application Methods
Choosing the right tool for your metallic accents depends on the desired finish and your patience level. See the breakdown below.
| Medium | Finish Texture | Durability | Best For |
|---|---|---|---|
| Gold/Copper Leaf | High-shine, organic texture | Delicate (needs sealant) | Statement pieces & luxury vibes |
| Acrylic Metal Paint | Soft shimmer, smooth | High (dries hard) | Large blocked areas |
| Oil Paint Pen | Reflective, flat | Moderate | Thin dividing lines |
| Rub ‘n Buff | Vintage, waxy luster | High (permanent) | Edges and rims |
When applying gold leaf, use a soft brush to sweep away excess flakes. This leaves a raw, organic edge that contrasts well with the sharp paint lines.
Allow the matte paint to dry completely before applying any metallic borders. This prevents smudging and keeps the geometric shapes distinct.
The Designer’s Edge
- Seal the edge of your painter’s tape with a thin layer of clear matte medium or the heart’s base color first to guarantee zero bleed under the lines.
- Peel away your masking tape while the paint is still slightly tacky and pull at a 45-degree angle to ensure the sharpest possible geometric transition.
- When using gold leaf, apply a dedicated gilding size (adhesive) sparingly with a detail brush to keep the metallic texture strictly within your geometric borders.
Faux-Ceramic Texture Techniques for a Contemporary Look

Modern interior trends are currently shifting away from high-gloss finishes. We are seeing a move toward organic, tactile surfaces that feel grounded and handmade.
Achieving a faux-ceramic look on wooden hearts instantly elevates them. This technique turns simple craft store cutouts into pieces that resemble artisan pottery.
The secret lies in thickening your acrylics to create dimension. This approach hides the wood grain completely, allowing the form to take center stage.
Texture is the silent language of design, turning a flat object into a storied piece.

The Baking Soda Blend
This is the most accessible method for beginners. By mixing baking soda into acrylic paint, you create a velvety, stonelike finish that absorbs light beautifully.
Mix one part baking soda with two parts acrylic paint. Stir until the consistency resembles fluffy frosting. Apply it in cross-hatch strokes for a natural look.
This texture is perfect for styling 22 Cozy Fireplace Looks for Any Room. The matte finish contrasts well with smooth mantels.
Texture is the thing that makes a room feel alive. It’s the difference between a showroom and a home.
Shea McGee, Studio McGee Design Philosophy
Joint Compound for Sculptural Depth
For a heavier, stucco-like appearance, joint compound is ideal. It allows you to build actual physical ridges on the wood surface.
Smear a thin layer of compound over the heart using a palette knife. Don’t smooth it out perfectly; the imperfections mimic old-world plaster walls.
This technique suits the aesthetic found in 20 Unique Dark Boho Bedroom Inspirations for a Mysterious and Cozy Retreat.

Texture Recipe Guide
Choosing the right medium depends on the final look you desire. Use this guide to mix your materials for the perfect faux-ceramic finish.
| Additive | Mixing Ratio | Final Texture Effect | Drying Time |
|---|---|---|---|
| Baking Soda | 1 part soda : 2 parts paint | Fine, sandy grit; velvety matte finish | 30-45 Minutes |
| Joint Compound | Apply directly, paint later | Heavy, sculptural ridges; stucco look | 2-4 Hours |
| Cornstarch | 1 tbsp per 1/4 cup paint | Chalky, smooth matte; minimal grit | 30 Minutes |
| Plaster of Paris | 1 part plaster : 2 parts water | Hard, stone-like shell; very durable | 1 Hour |
Once dry, lightly sand the high points of your texture. This reveals the “ceramic” detail and softens any sharp edges for a worn, vintage appeal.
The Potter’s Shortcut
- Apply paint in multidirectional ‘X’ strokes to mimic the hand-thrown look of real pottery rather than uniform brush lines.
- If your baking soda mixture feels too thick, add a few drops of water at a time to reach a spreadable, frosting-like consistency.
- Use a matte clear coat spray once fully dry to protect the tactile surface from fingerprints without adding any artificial shine.
The Final Stroke: Crafting Your Cozy Narrative
Painting wooden hearts is more than a simple craft; it is a way to infuse personal warmth and sophisticated charm into your living space.
Whether you chose the earthy grounding of terracotta or the clean lines of geometric color blocking, the result is a piece that is uniquely yours.
Don’t fear imperfections during the process. In the world of DIY decor, a brushstroke of character often speaks louder than flawless precision.
Design Dilemmas Solved
Chalk paint is your best bet. Its ultra-matte finish allows for easy distressing with sandpaper, creating that perfectly aged, velvety texture we love.
Yes, a light sanding is recommended. It removes rough splinters and opens up the wood grain, helping the paint adhere for a smooth, professional finish.
Use a clear matte polycrylic sealer. This protects the wood without adding an artificial shine, preserving the organic boho aesthetic you worked hard to create.
Try grouping them in odd numbers on a coffee table tray, or hang them with jute twine from a decorative branch for a natural, airy mobile effect.
