Table of Contents
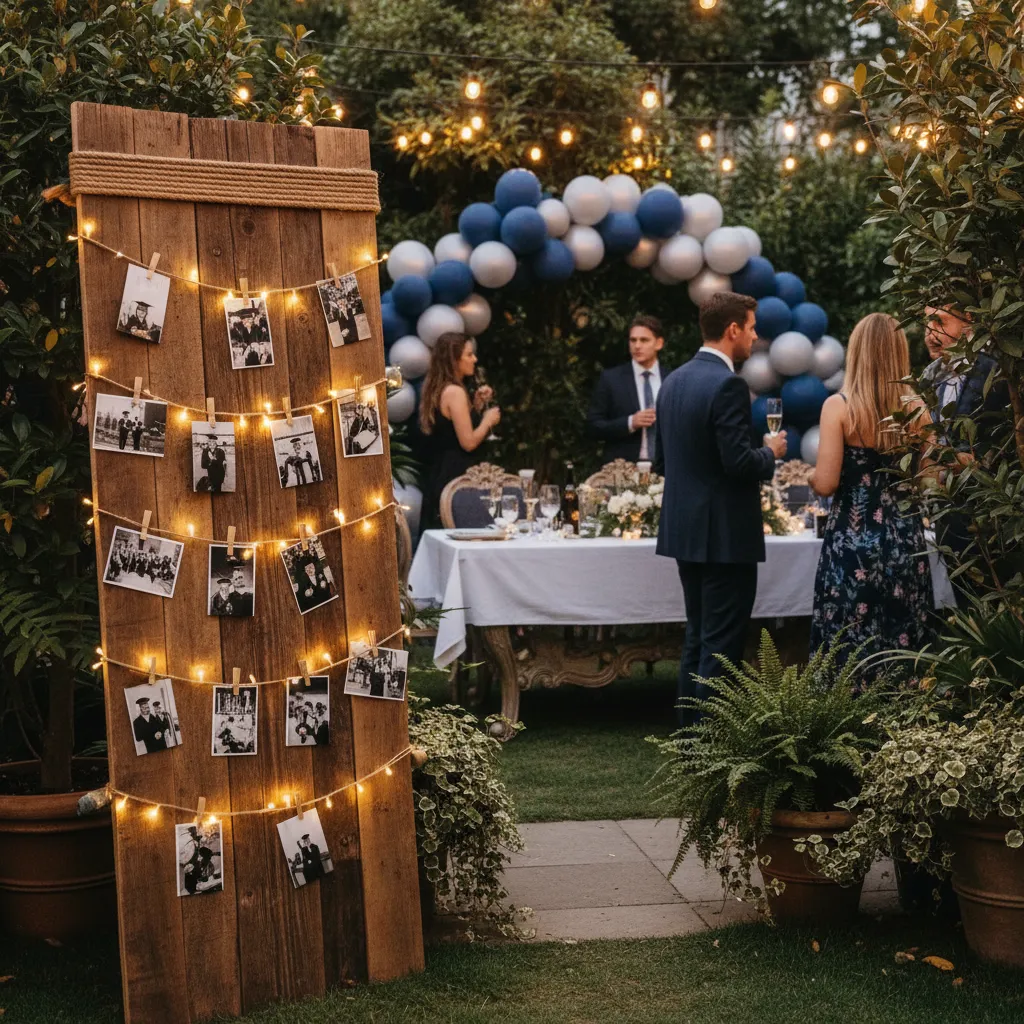
- Rustic “Through the Years” Photo Display Using Reclaimed Wood
- Modern Monochrome Balloon Garland Backdrop With School Colors
- Boho-Inspired Personalized Welcome Signage and Banners
- Interactive “Sweet Ending” Candy Bar Station on a Budget
- Dollar Store Hack: Graduation Cap Mason Jar Centerpieces
- Crafting Memories That Last
- Graduation Decor Queries Solved
Marking a high school milestone requires a setting that feels both personal and polished.
You do not need an enormous budget to create a sophisticated atmosphere; instead, focus on meaningful details that reflect your graduate’s unique journey.
By blending classic design principles with creative hand-made elements, you can transform any backyard or living room into an elegant venue for celebration.
Layering textures and curated color palettes can elevate simple DIY projects into high-end decor. Think about how lighting and spatial flow affect the mood of your guests.
We suggest using versatile materials that offer maximum visual impact without overwhelming your home’s natural aesthetic. These curated ideas prioritize functionality while ensuring every corner of your party is photo-ready and inviting.
Building these decorative pieces is a wonderful way to honor the hard work behind the diploma.
Whether you are updating a tabletop display or constructing a grand focal point, these tips help you achieve a professional look with ease.
Get ready to explore stylish solutions that turn a standard graduation party into a truly memorable event for friends and family alike.
Rustic “Through the Years” Photo Display Using Reclaimed Wood

Creating a focal point that celebrates the graduate’s journey adds immediate emotional depth to your event. A rustic display using reclaimed wood acts as a grounding element in your decor scheme.
The natural grain of aged timber contrasts beautifully with the glossy finish of printed photographs. This texture combination creates a sophisticated vignette that invites guests to linger.
Design is not just about how a space looks, but how it holds the memories of those who inhabit it.
Start by sourcing a clean shipping pallet or weathered barn boards to serve as your canvas. Sand down rough edges to prevent splinters while maintaining the wood’s organic character.
String sturdy jute twine horizontally across the boards to create rows for hanging photos. Secure the twine with small brass tacks or staples on the back for a seamless finish.
For a truly custom look, you can etch the graduation year into the top slat. Learning simple wood burning techniques can elevate this project from basic to bespoke.
Arrange photos chronologically from kindergarten to senior year to guide the viewer’s eye. This visual timeline improves the spatial flow of the party by creating a dedicated conversation area.
Your home should tell the story of who you are, and be a collection of what you love.
Nate Berkus, Nate Berkus Interiors
Styling the Display for Ambiance

Lighting is crucial for transforming a simple wooden board into a stunning evening feature. Draping warm-white fairy lights around the perimeter adds a soft, ambient glow as the sun sets.
To soften the hard lines of the timber, incorporate organic elements.
Weaving fresh greenery or implementing beautiful flower decoration ideas into the frame brings life and color to the rustic palette.
Functionality is key when setting this up outdoors. Ensure the structure is weighted at the base with sandbags hidden by burlap or potted plants to withstand wind.
Consider the finish of the wood carefully, as it sets the tone for the entire station. Use the comparison below to choose the right aesthetic for your party theme.
| Wood Finish Style | Visual Effect | Best Decor Pairing |
|---|---|---|
| Raw/Weathered Grey | Cool, organic, and coastal | Eucalyptus, white linens, silver accents |
| Dark Walnut Stain | Rich, moody, and formal | Warm fairy lights, gold clips, sepia photos |
| Whitewashed | Airy, bright, and shabby chic | Pastel florals, lace ribbons, colored prints |
| Charred/Burnt | Bold, industrial, and modern | Copper wire, succulent plants, matte prints |
Use mini wooden clothespins to attach the photos rather than glue or tape. This allows you to repurpose the photos in a scrapbook later without damaging them.
Place this display near the entrance or the gift table to maximize impact. It immediately establishes the celebratory mood and honors the graduate’s hard work through the years.
Designer DIY Hack
- Create visual cohesion by printing all photos in black and white or sepia; this unifies mismatched image quality from different decades and perfectly complements the rustic wood tones.
- Scan any original printed photos before displaying them outdoors to ensure precious one-of-a-kind memories aren’t damaged by direct sunlight, humidity, or wind.
- Can’t find a pallet? Repurpose an old wooden step ladder by stringing twine between the rungs; it offers the same rustic charm and acts as a self-standing structure.
Modern Monochrome Balloon Garland Backdrop With School Colors

Creating a focal point for your graduate’s celebration requires a blend of sophistication and school spirit. A monochrome balloon garland offers a modern twist on traditional decor.
Instead of chaotic primary colors, choose a single hue that represents the school and use varying shades of that color. This creates a curated, high-end look that feels intentional.
The secret to a professional finish lies in the variety of balloon sizes. You must mix five-inch, eleven-inch, and large twenty-four-inch balloons to achieve an organic spatial flow.
To elevate the arrangement, consider weaving in natural elements. Fresh greenery or faux stems can soften the latex look and bridge the gap between indoor and outdoor aesthetics.
For those interested in adding botanical touches, you can explore flower decoration ideas to seamlessly integrate blooms into your arch.
A backdrop isn’t just decoration; it is the anchor for every memory captured on camera.
Mastering Textures and Finishes

When working with a limited color palette, texture becomes your best design tool. Combining matte, pearl, and metallic finishes adds depth and visual interest to the installation.
Start with a matte base to absorb light, which looks incredible in flash photography. Then, layer in chrome or double-stuffed balloons to catch the ambient lighting of the room.
This layering technique transforms a simple DIY project into a stunning architectural feature. It ensures the vignette feels lush rather than flat or one-dimensional.
The key to a chic balloon installation is to think of it as a sculpture. Don’t just stack them; let them flow organically like a vine or a cloud, varying the sizes to create movement.
Mindy Weiss, Party Planning Expert & Lifestyle Author
Once your backdrop is secure, ensure the surrounding area complements the design. A cluttered table can distract from the visual impact of your garland.
For a cohesive look, match your serving area to the backdrop’s palette. You can find inspiration for matching decor in these simple table centerpieces that balance the room.
Below is a guide to selecting the right balloon finishes to maximize the texture of your monochrome display.
| Finish Type | Visual Effect | Best Application |
|---|---|---|
| Chalk Matte | Velvety, non-reflective, rich color depth. | Use as the primary base (70% of garland) for a sophisticated look. |
| Chrome / Metallic | High-shine, mirror-like reflection. | Use sparingly (10%) as “jewelry” to catch light and draw the eye. |
| Pearl / Satin | Soft sheen, subtle glow, elegant. | Great for blending transitions between the matte base and metallics. |
| Double-Stuffed | Custom opaque shades, muted tones. | Essential for creating unique, “muddy” colors that match specific decor. |
Constructing this backdrop requires patience and a sturdy frame. Use a backdrop stand or command hooks with fishing line to protect your walls while ensuring stability.
Remember to inflate your balloons a day early if possible. This allows the latex to settle and oxidize slightly, often resulting in that trendy, velvety matte finish naturally.
Pro Decorator Tips
- Create custom, opaque shades to match specific school colors by ‘double-stuffing’ balloons (placing one balloon inside another before inflating) to deepen the tone.
- Achieve a trendy, velvety matte finish by inflating balloons 24 hours prior to the event, allowing the latex to naturally oxidize and lose its cheap, shiny look.
- Use low-temperature glue dots to stick the smallest 5-inch balloons into gaps after you have hung the main garland structure to ensure it looks full from every angle.
Boho-Inspired Personalized Welcome Signage and Banners

First impressions set the tone for the entire celebration. A personalized welcome sign acts as the focal point of your entrance, grounding the space.
Opt for organic materials like raw plywood or frosted acrylic to capture that effortless bohemian vibe. These textures feel warm and inviting.
The signage serves a dual purpose by directing guests and establishing the color palette. It immediately signals the relaxed atmosphere of the party.
The most memorable party decorations are those that tell a personal story through natural texture and thoughtful placement.
Boho Style Secret
- Soften the rigid edges of wood or acrylic signs by draping a swag of dried pampas grass, palm spears, or eucalyptus over the top corner.
- Create a complete vignette by placing woven lanterns, a vintage rug, or potted succulents at the base of the easel to ground the display.
- Combine romantic, sweeping calligraphy for names with a clean, minimal serif font for the details to balance whimsy with readability.
Wooden Easel Displays

Using a wooden easel adds vertical interest and warmth to the entryway. You can stain the wood for a rich finish or leave it raw for a rustic look.
To make the piece truly unique, consider using simple wood burning techniques to permanently etch the graduate’s name.
Drape a garland of eucalyptus or dried florals over the top corner. This softens the hard edges of the wood and integrates natural greenery.
Position the easel at eye level to ensure readability. This placement naturally draws guests into the main party area without confusion.
Style Secret
- Weave battery-operated copper fairy lights into the eucalyptus garland to illuminate the display as the evening sets in.
- If placing the easel outdoors, secure the legs with heavy potted plants or inconspicuous weights to prevent it from tipping in the wind.
- Practice your wood burning design on a scrap piece of lumber first to master the heat intensity before etching the final piece.
Fabric and Macrame Banners

Fabric banners bring an element of softness to your party decor. Use unbleached cotton or linen draped over a sturdy piece of driftwood.
You can adapt fabric painting techniques to add inspiring quotes or the class year onto the canvas without ink bleeding.
Add texture by attaching macrame fringe to the bottom edge. This creates movement and visual depth when a light breeze hits the fabric.
Luxury is about touch and texture… It’s about creating an environment that feels good to be in.
Martyn Lawrence Bullard, Martyn Lawrence Bullard Design
Hang these banners behind the dessert table or near the photo booth. They provide a clean, neutral backdrop that highlights the subject.
Essential Boho Signage Materials
Gathering the right materials is crucial for achieving an authentic look. Focus on items that offer durability and visual warmth.
- Birch Plywood: Smooth grain perfect for staining or painting.
- Acrylic Sheets: Modern and sleek, ideal for writing with paint pens.
- Dried Florals: Bunny tails and pampas grass add volume and softness.
- Jute Twine: Use for securing florals or hanging lighter banners.
- Leather Straps: Great for hanging wooden signs from copper stands.
Layering these materials creates a curated vignette. Place lanterns or potted plants at the base of your sign to anchor the arrangement.
The Artisan’s Touch
- Iron your fabric banners immediately before hanging to remove creases and ensure a professional, high-end finish.
- Apply a light coat of fabric stiffener spray before painting to prevent ink bleeding and maintain crisp lettering.
- Layer different weights of jute and cotton twine to create custom macrame tassels that add rhythmic movement to your display.
Interactive “Sweet Ending” Candy Bar Station on a Budget

A candy station serves as both a stunning focal point and a sweet farewell for guests. It invites interaction while doubling as vibrant, edible decor.
To keep costs low without sacrificing style, focus on the display vessels rather than expensive props. The arrangement creates the luxury.
Curating the Vessel Collection

Uniformity is key to a polished look. Use clear glass apothecary jars in varying heights to establish visual interest and organic spatial flow.
You do not need to buy new jars. Scouring thrift stores for unique bowls is a great way to find vintage living room decor ideas that work here.
Mix crystal bowls with cylinder vases. The variation in texture and height guides the eye across the table, making the station feel curated.
Design is not just what it looks like and feels like. Design is how it works. A candy bar should be as functional as it is beautiful.
Color Palette and Flow

Stick to a strict color palette to maintain sophistication. A monochromatic scheme, such as all-white or shades of blue, looks high-end.
Position the table near the exit. This ensures good spatial flow, allowing guests to grab a bag as they leave without crowding the main party zone.
Treat the station like a dining arrangement. Incorporating simple centerpieces or greenery adds height and softness to the hard glass.
When styling a dessert table, symmetry is your best friend. Start with the tallest jar in the center and work your way out for a balanced, professional look.
Colin Cowie, Colin Cowie Lifestyle
Guest Count vs. Candy Quantity Guide
One common mistake is underestimating how much sugar guests will consume. Use this guide to ensure your jars remain plentiful and inviting.
| Guest Count | Total Candy Needed (Lbs) | Jars Required |
|---|---|---|
| 10-20 Guests | 5-8 lbs | 3-5 Jars |
| 20-50 Guests | 10-15 lbs | 5-7 Jars |
| 50-100 Guests | 20-25 lbs | 8-10 Jars |
| 100+ Guests | 30+ lbs | 12+ Jars |
Always provide metal scoops or tongs. Hygiene is a critical part of functionality, and silver or brass tools add a lovely metallic finish.
Use simple kraft paper bags or clear cellophane for takeaways. These textures feel organic and allow the candy colors to remain the star.
The Candy Curator’s Guide
- Create instant height and dimension by placing sturdy boxes or crates under your tablecloth to serve as hidden risers for shorter jars.
- To maximize your budget, use volume fillers like marshmallows or foam inserts at the base of larger vessels to make them appear full with less expense.
- Add a personalized touch by using printable cardstock labels tied with twine, which helps guests identify flavors while maintaining a cohesive aesthetic.
Dollar Store Hack: Graduation Cap Mason Jar Centerpieces

Transforming simple glass jars into a curated focal point is easier than you think. This project combines budget-friendly materials with high-end style.
The result is a sophisticated vignette that looks expensive but costs pennies. It is perfect for adding a warm ambient glow to your guest tables.
This design works because it balances the rustic texture of the jar with the clean lines of the paper cap. It creates an inviting atmosphere instantly.
True style is about creativity, not cost. A simple jar can become a glowing beacon of celebration with the right touch.
Gathering Your Materials

Start by collecting standard mason jars from your local dollar store. Look for jars with smooth sides to allow the light to filter through clearly.
You will need heavy black cardstock for the caps. The matte finish of the paper contrasts beautifully with the shiny glass surface.
Don’t forget the tassels. You can make these using embroidery floss in the graduate’s school colors to personalize the spatial flow of the room.
If you enjoy creating custom decor, you might also like these 22 DIY centerpieces to instantly elevate your table vibe.
Step-by-Step Assembly
Cut the cardstock into squares that are slightly wider than the jar mouth. This scale ensures the “cap” looks proportional to the base.
Glue a small button covered in paper to the center of the square. Attach your handmade tassel to this button for an authentic academic look.
Fill the jar before sealing it. Using battery-operated fairy lights creates a magical effect that enhances the mood of the party.
Lighting is the most important element of decoration. It creates the atmosphere and can change the entire feeling of a room.
Bunny Williams, Bunny Williams Interior Design
For a different approach, you can fill the jars with crinkle paper. This adds a pop of color and texture without needing batteries.
Comparing Filler Options
Choosing the right filler changes the functionality of the centerpiece. Here is a quick guide to help you decide on the best aesthetic.
| Filler Material | Visual Effect | Best Atmosphere |
|---|---|---|
| Fairy Lights | Warm, ambient glow | Evening dinner parties |
| Crinkle Paper | Matte, textured color | Daytime open houses |
| Rolled Diplomas | Thematic, clean white | Formal aesthetic |
| Gold Confetti | Sparkling, festive | Glamorous celebration |
If you want to expand your tablescape skills, explore our guide on 21 dining room table centerpiece ideas for more layout inspiration.
Arranging these jars in groups of three creates a balanced visual weight. Vary the height of the jars to keep the eye moving across the table.
This simple hack proves that you do not need to spend a fortune to achieve a polished look. It is all about how you layer light and texture.
Designer’s Pro Hack
- To keep the aesthetic clean, tape the fairy light battery pack to the underside of the cardstock cap so it remains hidden while the jar glows.
- Use glue dots or double-sided tape on the rim of the jar to secure the cap; this prevents messy glue strings and allows you to reuse the jars later.
- Create dynamic visual interest by grouping jars in odd numbers and elevating some on small pedestals or stacks of books in coordinating school colors.
Crafting Memories That Last
Celebrating this major milestone is about creating an atmosphere of love and nostalgia. Your decor should reflect the graduate’s unique journey through life.
A rustic photo display offers the perfect blend of sentimental value and sophisticated design. It anchors the party visually while sparking conversation among guests.
Remember to balance aesthetics with function. Ensure your structures are secure against the wind so the focus remains entirely on the celebration.
Ultimately, these DIY touches transform a simple party into a heartfelt send-off. Enjoy the process of building these memories as much as the event itself.
Graduation Decor Queries Solved
Wind is the enemy of outdoor decor. Use heavy sandbags hidden behind the base or drape them with burlap. If possible, drive stakes into the ground for extra stability.
Stick to a neutral base like natural wood or white. Introduce school colors subtly through ribbons, fresh flowers, or the photo mats themselves rather than bright streamers.
You can fake the look easily. Buy inexpensive pine boards from a hardware store. Distressing them with a hammer and applying a dark walnut stain mimics age perfectly.
Set up the heavy structural elements the day before. Save the photos and delicate floral accents for the morning of the party to prevent moisture damage.
