Table of Contents
- Level 1 Project: Geometric Minimalist Coasters to Master Straight Lines and Safety Basics
- Level 2 Project: Botanical Wooden Spoons for Practicing Fluid Curves and Nib Movement
- Level 3 Project: Personalized Monogram Gift Tags with Essential Pattern Transfer Techniques
- Level 4 Project: Textured Mandala Wall Art for Learning Pointillism and Fill Patterns
- Your Next Creative Spark
- Pyrography Design Dilemmas Solved
The gentle art of wood burning, also known as pyrography, offers a unique way to infuse your home with warmth and personal character.
By applying heat to raw timber, you can create intricate designs that bridge the gap between rustic charm and modern elegance. This craft allows you to transform simple household items into bespoke pieces of art that feel both timeless and deeply intentional.
Starting this creative journey does not require a massive budget or a professional studio; a basic wood burning kit and a few reclaimed wooden coasters or spoons are often all you need to begin.
Focusing on clean lines and organic shapes ensures your projects remain sophisticated; simplicity is often the key to achieving a high-end look on a DIY budget.
As you master the steady hand required for these techniques, you will find that wood burning is as much about the process as it is about the final result.
Whether you are labeling herb garden markers or detailing a serving board, these projects elevate your living space through functional beauty.
Embrace the rhythmic nature of the work and watch as your home evolves with every handcrafted detail.
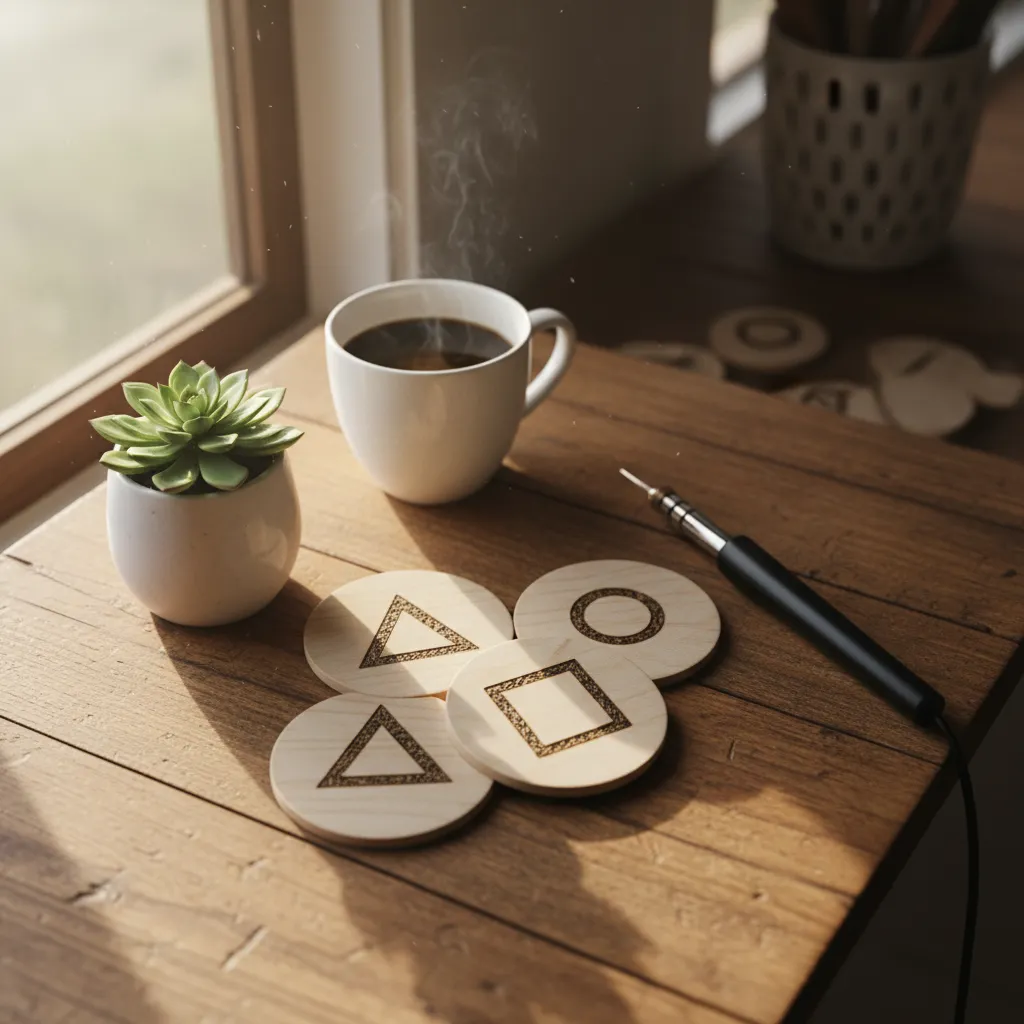
Level 1 Project: Geometric Minimalist Coasters to Master Straight Lines and Safety Basics

Starting a new creative hobby often feels overwhelming due to the complexity of advanced projects. We recommend beginning with small, functional items like drink coasters.
These small wooden canvases are approachable and low-stakes. They allow you to practice maintaining a consistent hand temperature without the pressure of a large art piece.
Visually, the high contrast of the dark, charred lines against pale birch or basswood creates a striking modern aesthetic. This look fits perfectly into a minimalist or Nordic-inspired home.
The beauty of pyrography lies in the contrast. Simple lines on raw wood create a warmth that manufactured decor simply cannot replicate.
Gathering Your Essential Materials

For this Level 1 project, the goal is to master the straight line. You do not need expensive equipment to achieve a professional result, but the right wood choice is critical.
We suggest using Basswood or Birch slices. These woods have a subtle grain that allows the pen to glide smoothly, preventing the nib from getting stuck in texture ridges.
Before you turn on the heat, you must sand the surface. Use 220-grit sandpaper to create a silky canvas. This step ensures your geometric lines remain crisp and do not bleed.
Functionally, these coasters serve a purpose beyond aesthetics. They protect your furniture while adding a tactile, organic element to your living space.
Once completed, these custom pieces make an excellent addition to your morning routine. They pair beautifully with curated coffee bar ideas for a cohesive look.
When working with wood, you are engaging with a living material. The grain direction matters, and patience is your most valuable tool.
Lora S. Irish, Woodworking Network Feature
The Step-by-Step Burning Process
Safety is paramount when working with heated tools. Always work in a well-ventilated area, as burning wood releases smoke and resins that can be irritating.
- Draft the Pattern: Use a graphite pencil and a ruler to lightly draw triangles, chevrons, or parallel lines directly onto the wood slice.
- Heat the Pen: Secure the universal shading point or a writing tip into your pen. Let it heat up on a stand for about five minutes.
- The First Burn: Hold the pen like a writing instrument. Apply gentle pressure and pull the pen towards you along the pencil lines.
- Consistency Check: Move at a slow, steady pace. Pausing in one spot will create deep scorch marks, while moving too fast results in faint lines.
- Seal the Deal: Once cool, erase visible graphite. Apply a food-safe mineral oil to protect the wood from moisture rings.
The final result provides a warm, ambient vibe to your table setting. The raw texture of the wood softens the rigidity of the geometric patterns.
You can style these coasters in stacks of four tied with twine. They look lovely placed near simple centerpieces on a dining table to add an artisanal touch.
Comparing Wood Options for Beginners
Choosing the correct timber can make or break your first experience. Softwoods are generally easier for beginners because they burn at lower temperatures.
| Wood Type | Burn Difficulty | Visual Grain | Best For |
|---|---|---|---|
| Basswood | Very Easy | Minimal/Clean | Intricate details and beginners |
| Birch | Easy | Subtle Waves | Plywood coasters and signs |
| Pine | Moderate | Heavy/Resinous | Rustic looks (watch for sap) |
| Oak | Hard | Uneven/Textured | Advanced textured projects |
Start with Basswood to build your confidence. As you master the temperature control, you can graduate to harder woods that require higher heat settings.
The Burner’s Blueprint
- Secure your ruler with low-tack painter’s tape to prevent slipping while drafting your geometric patterns for perfect symmetry.
- Keep a small brass brush nearby to gently clean carbon buildup off your pen tip every few minutes to ensure your lines stay crisp and dark.
- If your pen catches on the wood grain, try rotating the coaster so you are always pulling the pen toward your body for maximum stability and control.
Level 2 Project: Botanical Wooden Spoons for Practicing Fluid Curves and Nib Movement

Moving from straight lines to curves is the natural next step in your pyrography journey. Wooden spoons provide an accessible and functional canvas for this practice.
The curved surface of a spoon handle forces you to adapt your wrist angle constantly. This movement builds muscle memory that is essential for more complex art.
Botanical designs are particularly forgiving for beginners. The organic nature of leaves and vines means that a slightly wavering line looks intentional rather than messy.
Styling these pieces is just as rewarding as making them. A collection of burned spoons displayed in a crock adds warmth to any moody kitchen layout.
Mastering the Flow Point Nib

To achieve fluid curves, swap your universal tip for a rounded flow point or ball tip. This nib glides across the grain like a ballpoint pen on paper.
Standard sharp tips often snag on the wood grain when turning corners. A rounded tip eliminates this friction, allowing for buttery smooth vines and flower petals.
The key to fluid curves is to turn the wood, not just your hand. Treat the object as a moving canvas to maintain a consistent angle with your pen.
Simon Easton, Woodburning with Style
Top Botanical Motifs to Practice
Start with simple organic shapes that follow the length of the spoon handle. These designs elongate the tool visually and create an elegant, cohesive look.
- The Climbing Ivy: This pattern is perfect for practicing continuous, wavy lines that wrap around the handle.
- Wheat Stalks: These are ideal for learning how to lift the pen gently to create tapered, wispy ends.
- Fern Fronds: This design is excellent for repetition and consistency, building rhythm in your hand movements.
Once finished, these spoons make lovely gifts or decor. They can even serve as a rustic accent alongside spring dining table centerpieces.
Handmade decor brings a soul to your home that factory-finished items simply cannot replicate.
Finishing for Food Safety
Since these are kitchen tools, the finish is critical. Avoid chemical varnishes. Instead, opt for food-safe mineral oil or a beeswax blend.
Rub the oil in generously with a lint-free cloth. The oil will darken the wood slightly, increasing the contrast of your burned design and making it pop.
Reapply oil whenever the wood begins to look dry. This maintenance keeps the spoon functional and ensures your artwork lasts for years of cooking.
Artisan Burner’s Secret
- Sand your spoon handles to at least 400 grit before burning to ensure the ball tip glides effortlessly without catching on wood fibers.
- Practice ‘ghosting’ your curves by moving the pen just above the wood surface several times before committing to the actual burn to build muscle memory.
- Place the bowl of the spoon on a small sandbag or a rolled-up towel to stabilize it, allowing you to rotate the handle with much more precision.
Level 3 Project: Personalized Monogram Gift Tags with Essential Pattern Transfer Techniques

Moving beyond freehand sketching introduces a world of precision to your wood burning projects. This level focuses on pattern transfer.
We will create personalized monogram tags using birch slices. The raw bark edge provides a rustic, organic texture that feels cozy and refined.
These tags serve multiple purposes. Use them to elevate gift wrapping or as bespoke place cards for a dinner party setting.
Personalization is the ultimate luxury. It transforms a simple object into a cherished keepsake.
Gathering Your Artisan Materials

The success of this project relies on the right foundation. You need smooth wood surfaces to ensure the burning nib glides effortlessly.
Birch rounds are ideal because their light color offers high contrast for the burn marks. Ensure they are kiln-dried to prevent cracking.
Essential Supply List:
- Birch Wood Slices: Pre-drilled holes are convenient for threading twine.
- Graphite Transfer Paper: This material is cleaner than carbon paper and erases easily.
- 220-Grit Sandpaper: This paper is essential for prepping the surface.
- Washi Tape: This adhesive holds your pattern in place without leaving residue.
- Solid Point Tip: This tip is best for straight lines and consistent lettering.
Mastering the Pattern Transfer
Freehanding letters can be risky for beginners. Transferring a printed design guarantees crisp, professional-looking typography every time.
This technique allows you to replicate complex fonts that match your interior style. It bridges the gap between digital design and physical craft.
Wood is universally beautiful to man. It is the most humanly intimate of all materials.
Frank Lloyd Wright, Architectural Record
Step-by-Step Execution
- Surface Prep: Sand the face of the wood slice until it feels like glass. Any roughness will snag your pen tip.
- Layering: Place the graphite paper dark-side down on the wood. Tape your printed initial securely over it using washi tape.
- Tracing: Use a ballpoint pen to trace the letter outline with firm pressure. Check under a corner to ensure the line is transferring.
- The Burn: Remove the papers. Use a low heat setting to outline the transferred graphite lines first.
- Filling In: Turn up the heat slightly and shade the interior of the letters. Move slowly to create a consistent dark charcoal hue.
Once cool, thread velvet ribbon or jute twine through the hole. This small detail changes the entire vibe from rustic to sophisticated.
You can use these finished pieces as unique name cards for a Thanksgiving table setting to impress guests.
Sealing the wood is optional but recommended. A dab of mineral oil brings out the grain patterns and protects the burn from fading over time.
Artisan Insights
- Use a colored ballpoint pen for tracing your pattern; the contrast against the black printed ink helps you see exactly where you’ve already applied pressure.
- If you encounter a minor burn slip, keep a small scrap of 220-grit sandpaper handy to gently ‘erase’ light scorch marks before applying your final finish.
- Always test your heat settings on the back of the wood slice first to ensure the grain doesn’t cause the burner to jump or bleed into the fibers.
Level 4 Project: Textured Mandala Wall Art for Learning Pointillism and Fill Patterns

Stepping up to a level four project introduces the meditative art of mandalas. This design style shifts focus from simple outlines to complex textures.
You will learn to use heat to create depth rather than just drawing lines. It transforms a plain wood slice into a tactile focal point for any room.
The circular nature of the mandala draws the eye inward, creating a sense of balance. This fits perfectly if you love 20 Unique Dark Boho Bedroom Inspirations for a Mysterious and Cozy Retreat.
In wood burning, patience is your most valuable tool; texture is painted with time, not just heat.
Artisan Insight
- Layer your dots more densely in the center of mandala petals to create a natural gradient that adds realistic 3D depth.
- Vary your burner’s temperature slightly; use cooler settings for light shadows and hotter points for deep, tactile pits.
- Use a compass or paper template to lightly trace concentric circles before burning to ensure your patterns remain perfectly centered.
Mastering Pointillism and Stippling

Pointillism, often called stippling in pyrography, is the art of creating images using dots. You create darker areas by grouping dots closely together.
Spacing the dots further apart creates lighter, highlighted areas. This gradient effect adds a 3D quality that solid lines simply cannot achieve.
This technique requires a lower heat setting to prevent burning too deep too quickly. It allows for a slow, controlled build-up of shadows and depth.
The resulting texture feels organic and rich to the touch. It pairs beautifully with natural decor elements like raw linen or woven jute rugs.
Texture creates the illusion of depth on a flat surface, turning a simple drawing into a lifelike rendering.
Lora Irish, Great Book of Woodburning
Stipple Secrets
- Hold your burning pen perfectly perpendicular to the wood surface to ensure crisp, circular dots rather than elongated dashes.
- Work from light to dark by starting with sparse spacing and gradually increasing dot density to build natural-looking shadows.
- Keep your heat setting low to medium-low to prevent the wood grain from bleeding the burn into adjacent dots.
Essential Fill Patterns for Mandalas
Beyond dots, filling positive space with distinct patterns brings the mandala to life. Varying your fill patterns helps distinguish separate sections.
Consistent repetition is key to a professional look. If you are seeking a calm vibe, this repetitive motion acts as a creative meditation.
Try incorporating these patterns to elevate your wall art. They add visual interest that complements styles found in 15 Cozy Winter Decor Ideas for Your Home Sanctuary.
Texture Comparison Guide
Choosing the right fill pattern changes the mood of the piece. Use this guide to select the best texture for your mandala segments.
| Pattern Name | Visual Effect | Difficulty | Best Application |
|---|---|---|---|
| Stippling | Soft, sandy gradients | Intermediate | Creating curved shadows and 3D depth. |
| Cross-Hatching | Structured, geometric mesh | Beginner | Filling large background areas quickly. |
| Scales | Organic, flowing overlap | Advanced | Petals, animal motifs, or borders. |
| Scumbling | Random, scribbled texture | Beginner | Simulating foliage or rough surfaces. |
Experiment with these textures on a scrap piece of basswood first. This ensures you understand how the wood grain reacts to the heated nib.
Artisan Texture Secrets
- Maintain a steady hand and consistent burn time for each stroke to ensure your patterns look uniform across the entire segment.
- Rotate your wood piece frequently while working to keep your wrist in a comfortable, natural position for better control over complex shapes like scales.
- Layer your fill patterns by starting with a light scumble base and adding sharper cross-hatching on top to create a sense of rich, tactile depth.
Your Next Creative Spark
Wood burning does not have to be intimidating. These geometric coasters prove that simple lines can create stunning, sophisticated decor.
Remember, the secret is patience. Proper sanding and testing your heat settings are just as important as the actual burning process.
As you master these basics, you will build confidence. Enjoy the process of bringing organic warmth to your home, one burn at a time.
Pyrography Design Dilemmas Solved
Basswood and Birch are ideal choices. They have a fine, light grain and minimal sap, allowing the pen to glide smoothly without snagging.
Don’t panic. For shallow mistakes, use 220-grit sandpaper to gently remove the mark. Deeper burns may require a sharp craft knife to scrape away.
Yes, sealing is vital for functionality. Use a food-safe mineral oil or a poly-finish to protect the wood from moisture rings and fading.
Uneven speed is usually the culprit. Keep your hand moving at a steady pace and clean your nib regularly to remove carbon buildup.
