Is your laundry area a chaotic corner of chaos? A jumble of detergent bottles, lone socks, and towering machines crammed into a space that feels more like an afterthought than a room? You’re in the right place to change that.
A stacked laundry setup shouldn’t just be a space-saving necessity; it should be a powerhouse of efficiency and style, a command center that makes laundry day less of a chore and more of a seamless routine.
This is your creative playbook for transforming that vertical space into a feature that’s not only incredibly functional and organized but feels surprisingly beautiful.
We’ll explore genius layouts, decode the secrets of small-space storage, and walk through the practical steps to bring it all to life.
By the end, you’ll see your laundry closet not as a problem to be solved, but as a canvas for clever design.
Before You Begin: Dreaming Up Your Perfect Workflow
The most efficient spaces start with a little bit of soul-searching, not just a trip to the hardware store. Before you build a single shelf, let’s lay the groundwork for a design that works for you, not against you.
The Secrets of Vertical Style: Simple Rules for a Stunning Look
Design for a stacked unit is a unique challenge. It’s about making tall, bulky objects disappear and making every surrounding inch work harder. Here are a few simple secrets:
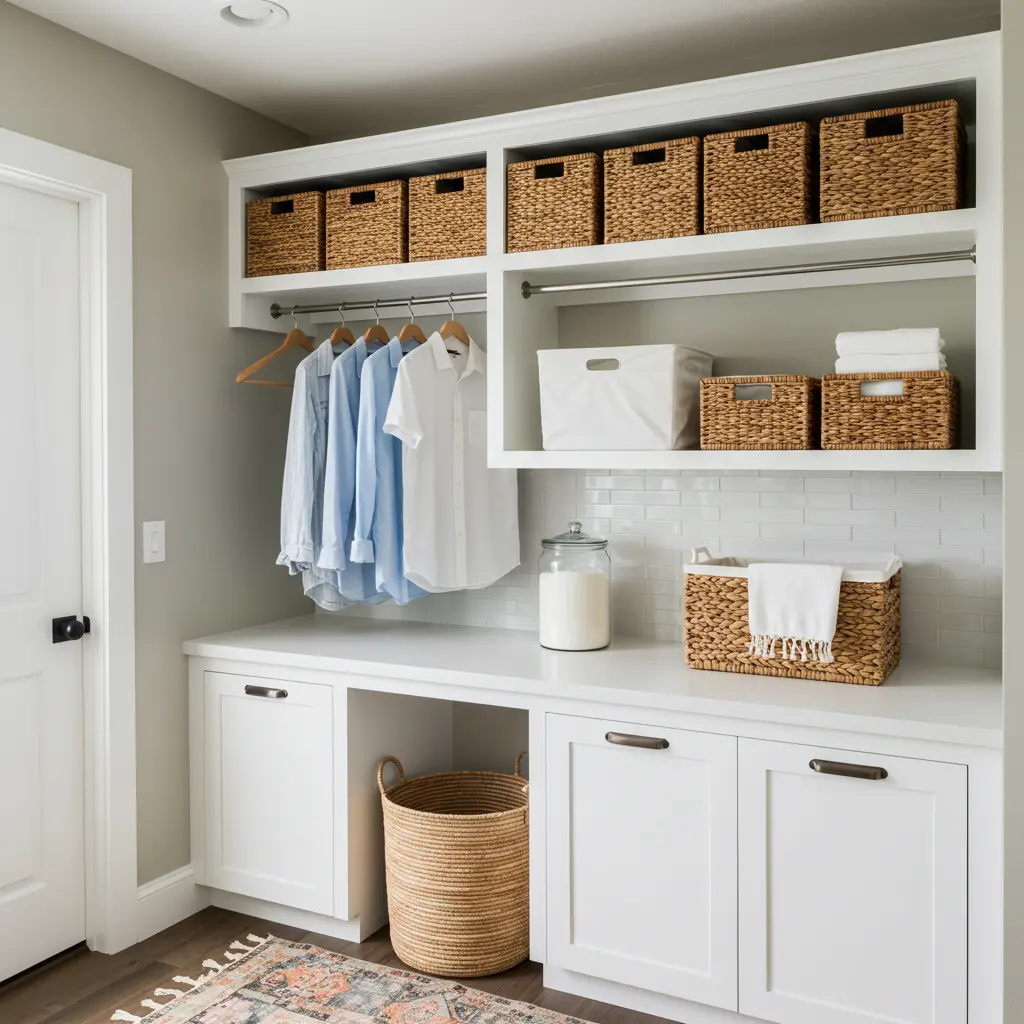
- Embrace the Vertical: Your machines are stacked, so your storage should be too. Think floor-to-ceiling. Tall, narrow cabinets, shelves that go right up to the ceiling, and wall-mounted solutions are your best friends.
- Create a “Built-In” Illusion: The single most effective way to upgrade a stacked laundry is to make it look intentional. Boxing in the washer and dryer with cabinetry or even a simple plywood surround instantly makes the space feel custom, integrated, and high-end.
- Light It Up: Small, functional spaces are often poorly lit. Good lighting is transformative. Use bright LED puck lights under cabinets, add a stylish ceiling fixture, or install a light inside the closet to banish shadows and make the space feel bigger and cleaner.
- Decant and Contain: Visual clutter is a major space-shrinker. Transfer powdered detergents, pods, and stain removers into clear, uniform containers like glass jars or canisters. Group smaller items in attractive baskets or bins. This simple step creates instant calm and order.
What’s the Real Cost? A No-Fuss Budget Breakdown
| The Approach | Estimated Cost | What Your Money Buys | The Little Extras (Don’t Skip These!) |
| The Weekend Warrior | $200 – $600 | • A fresh coat of paint • Sturdy floating shelves • Stylish baskets & jars | • A recessed dryer vent box • Anti-vibration pads for the machines • A wall-mounted lint bin |
| The Semi-Custom Solution | $700 – $2,500 | • Plywood or MDF for a built-in look • A butcher block countertop • Stock cabinetry from a big-box store | • A good quality saw blade for clean cuts • Water hammer arrestors for noisy pipes • Upgraded cabinet hardware |
| The Custom Dream Closet | $3,000 – $10,000+ | • Custom, floor-to-ceiling cabinetry • Professional tile work • Potential plumbing/venting relocation | • A consultation with a designer • A licensed plumber and electrician • Professional installation |
The Design Menu: Finding Your Signature Solution
Here are 18 genius ideas for your stacked laundry space. Each one comes with a breakdown to help you choose with confidence.
Foundational Layouts & Enclosures
1. The Seamless Built-In
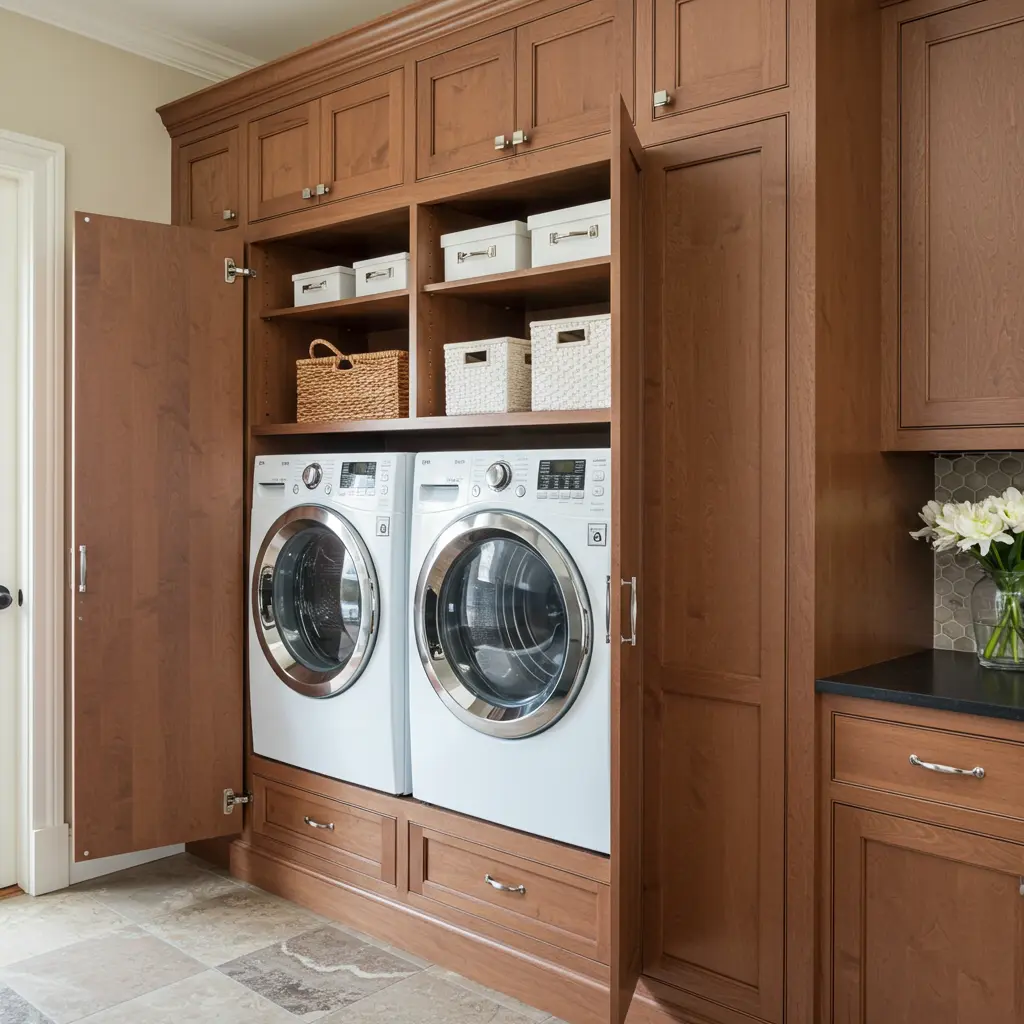
- Best For: Creating a truly high-end, custom look where the machines blend into the cabinetry.
- Key Consideration: Access is crucial. Ensure your design includes removable panels or enough wiggle room to pull the machines out for servicing.
- Pro-Tip: Ask your cabinet maker to include a dedicated tall, narrow cabinet right beside the stack. This is the perfect hidden spot for an ironing board, broom, or stick vacuum.
- Styling Cue: Choose a cabinet color and hardware style that matches the rest of your home (e.g., the kitchen) for a cohesive, seamless feel.
2. The Plywood Box Hack
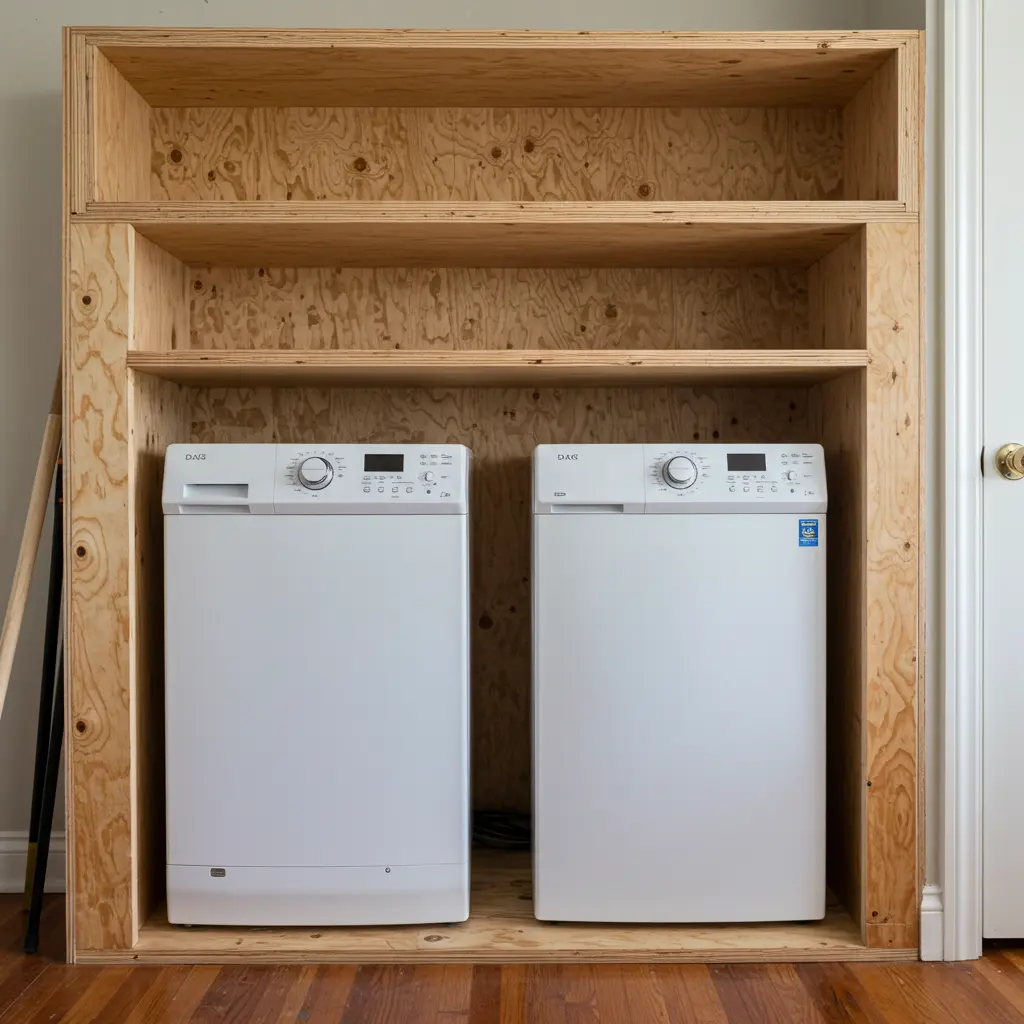
- Best For: DIYers who want the custom built-in look for a fraction of the price.
- Key Consideration: You need precise measurements of your machines, allowing for about an inch of “breathing room” on the sides and top.
- Pro-Tip: Use a high-quality hardwood plywood (like birch or oak) and a good primer. Paint it the same color as your walls to make the enclosure “disappear,” making the space feel bigger.
- Styling Cue: Add a simple, deep shelf made of the same plywood directly above the machines for a clean, minimalist look.
3. The Closet Conversion
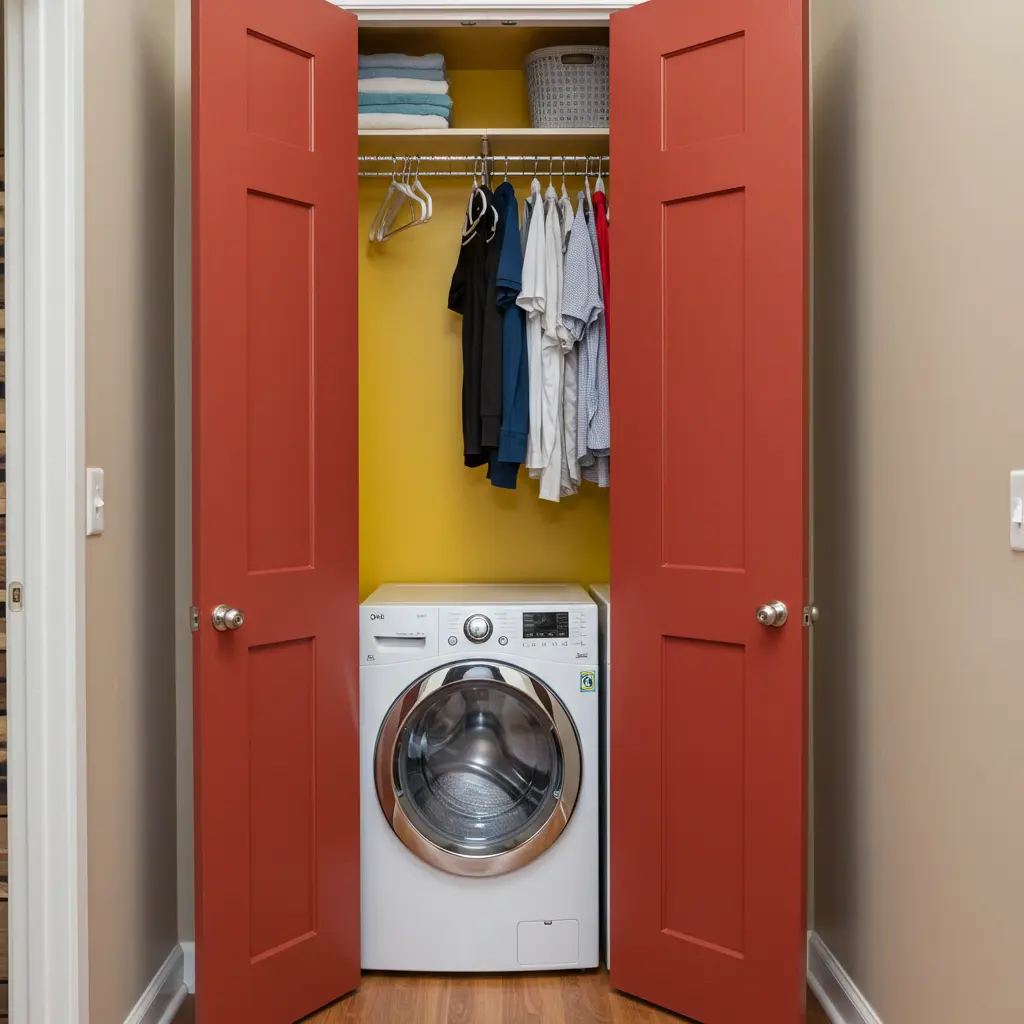
- Best For: Hiding the laundry completely in a hallway, mudroom, or guest room.
- Key Consideration: Doors! Bifold doors are a great space-saver as they don’t swing out far into the room. Pocket doors are even better if you have the wall space.
- Pro-Tip: Use the back of the doors for extra storage. Install small racks or hooks for holding stain remover sprays, lint rollers, and cleaning brushes.
- Styling Cue: Paint the interior of the closet a bold, unexpected color. It’s a fun surprise when you open the doors and makes the space feel special.
4. The Open-Concept Nook
- Best For: When the laundry is in an open area like a mudroom or basement and you want it to look neat and intentional.
- Key Consideration: Since everything is on display, keeping it tidy is paramount. This style works best for minimalists.
- Pro-Tip: Define the nook by painting the back wall an accent color or installing a fun wallpaper or tile backsplash. This visually separates it from the rest of the room.
- Styling Cue: Invest in a matching set of beautiful, high-quality baskets for the shelves to keep everything looking curated and organized.
Smart Storage Solutions
5. The Floor-to-Ceiling Cabinet

- Best For: Maximizing every single inch of vertical space for concealed storage.
- Key Consideration: This is often a semi-custom job, using a tall stock cabinet (like a pantry cabinet) and adding filler strips to make it look built-in.
- Pro-Tip: Install an electrical outlet inside the cabinet. It’s the perfect spot to hide charging stations for cordless vacuums or handheld steamers.
- Styling Cue: Opt for a Shaker-style cabinet door for a timeless look that works with nearly any decor style.
6. The Heavy-Duty Floating Shelves

- Best For: Providing easy-access, open storage in a stylish and airy way.
- Key Consideration: These must be installed correctly into wall studs using heavy-duty brackets to support the weight of detergents and other supplies.
- Pro-Tip: Make the bottom shelf deep enough to hold your laundry basket. This keeps it off the floor and makes transferring clothes much easier.
- Styling Cue: Use thick, reclaimed wood or a high-quality butcher block for the shelves to add warmth and a rustic, substantial feel.
7. The Rolling Laundry Cart
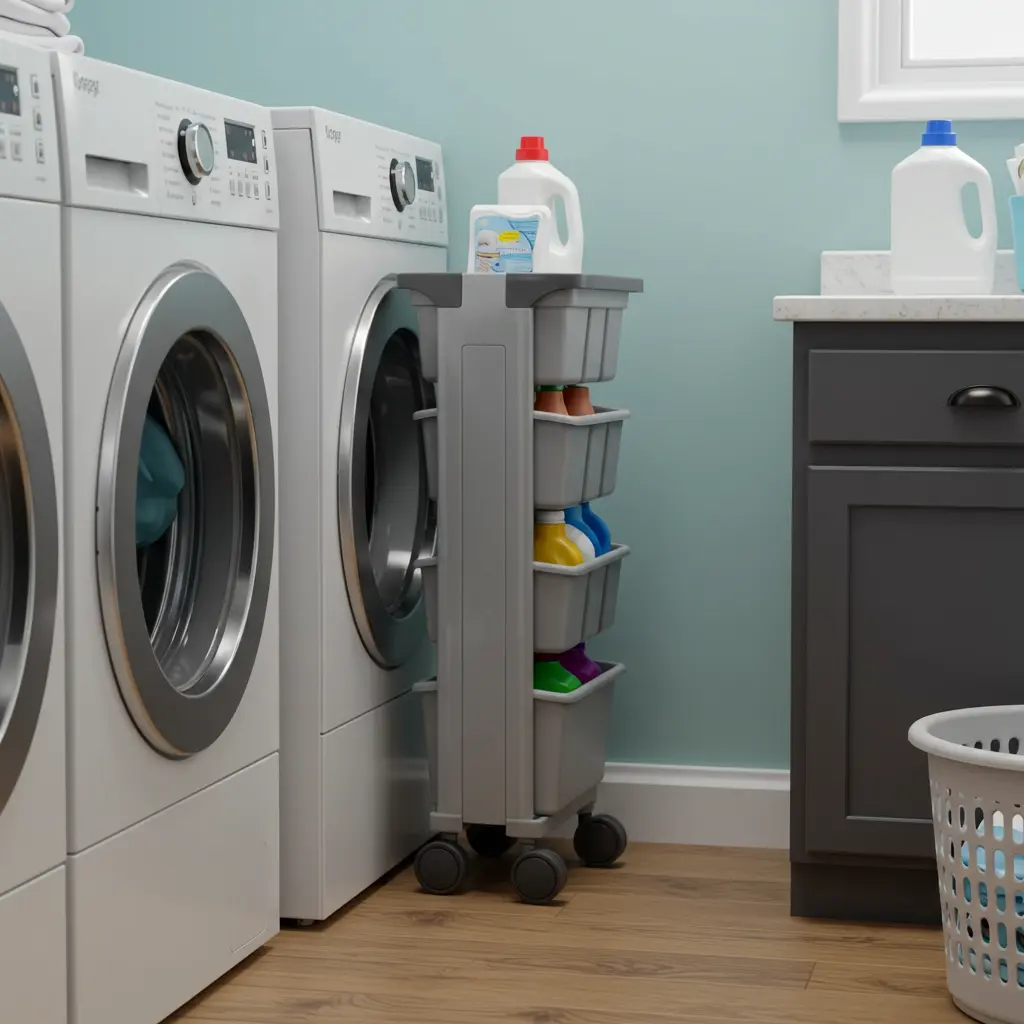
- Best For: Utilizing the awkward, narrow space between the machines and the wall.
- Key Consideration: Measure your gap carefully! You can find slim rolling carts online, or easily build a custom one to fit your exact space.
- Pro-Tip: This is the perfect storage spot for all the “ugly but necessary” items bleach, bulk detergent refills, and cleaning supplies.
- Styling Cue: Look for a metal or wire cart that adds a touch of industrial-chic style to the space.
8. The Wall-to-Wall Ledge

- Best For: A minimalist approach that provides a single, clean line for storage.
- Key Consideration: This is simply a deep, single shelf installed just above the machines, running from one wall to the other.
- Pro-Tip: Install a small tension rod or a thin dowel on the underside of the ledge. It’s an instant, hidden spot for hanging a few items on hangers to dry.
- Styling Cue: Line the ledge with decanted jars for detergent and pods, a small plant, and one or two neatly folded towels. Less is more here.
Functional Worksurfaces & Drying
9. The Waterfall Countertop
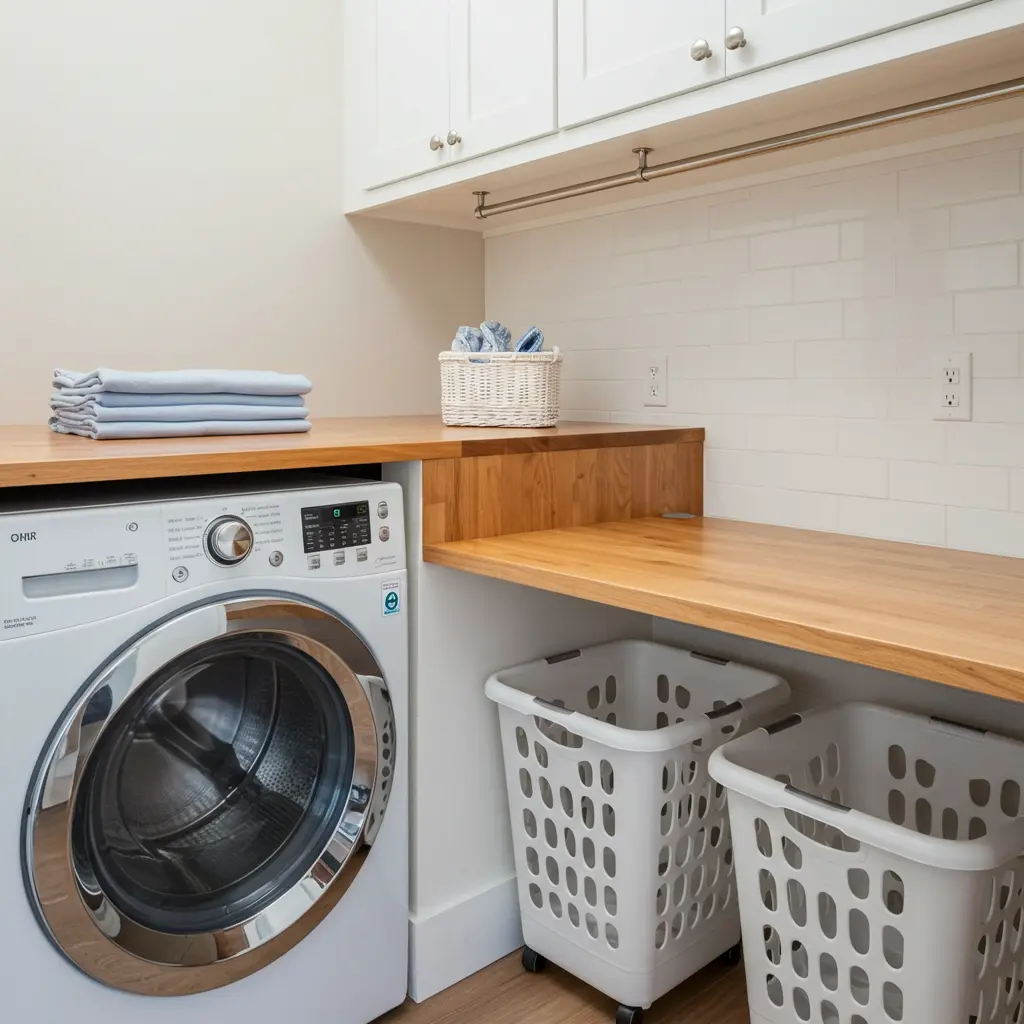
- Best For: Creating a dedicated folding surface next to the stack.
- Key Consideration: This involves building a sturdy support structure next to your machines and wrapping it in a countertop material (like butcher block or quartz) that continues down the side to the floor.
- Pro-Tip: Leave the space under the counter open. It’s the perfect parking spot for rolling laundry baskets, keeping the floor clear.
- Styling Cue: A light-colored wood like maple or a crisp white quartz for the countertop will keep the small space feeling bright and clean.
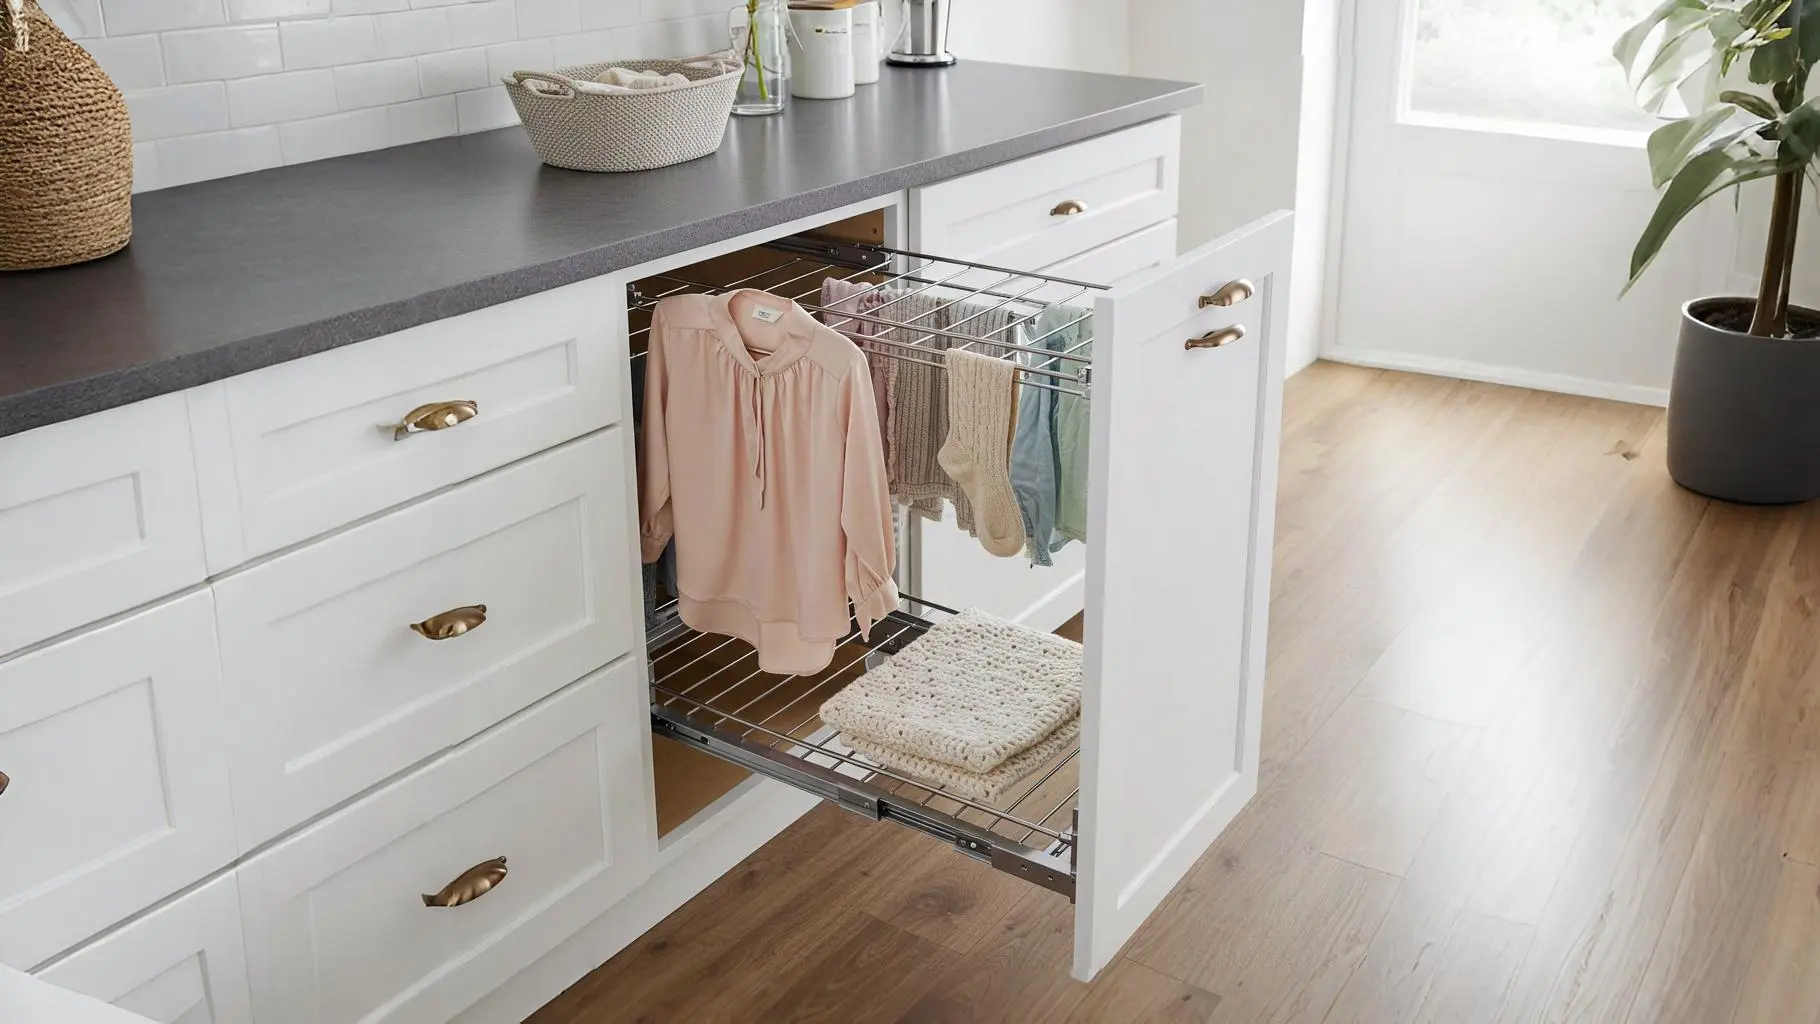
10. The Pull-Out Drying Rack
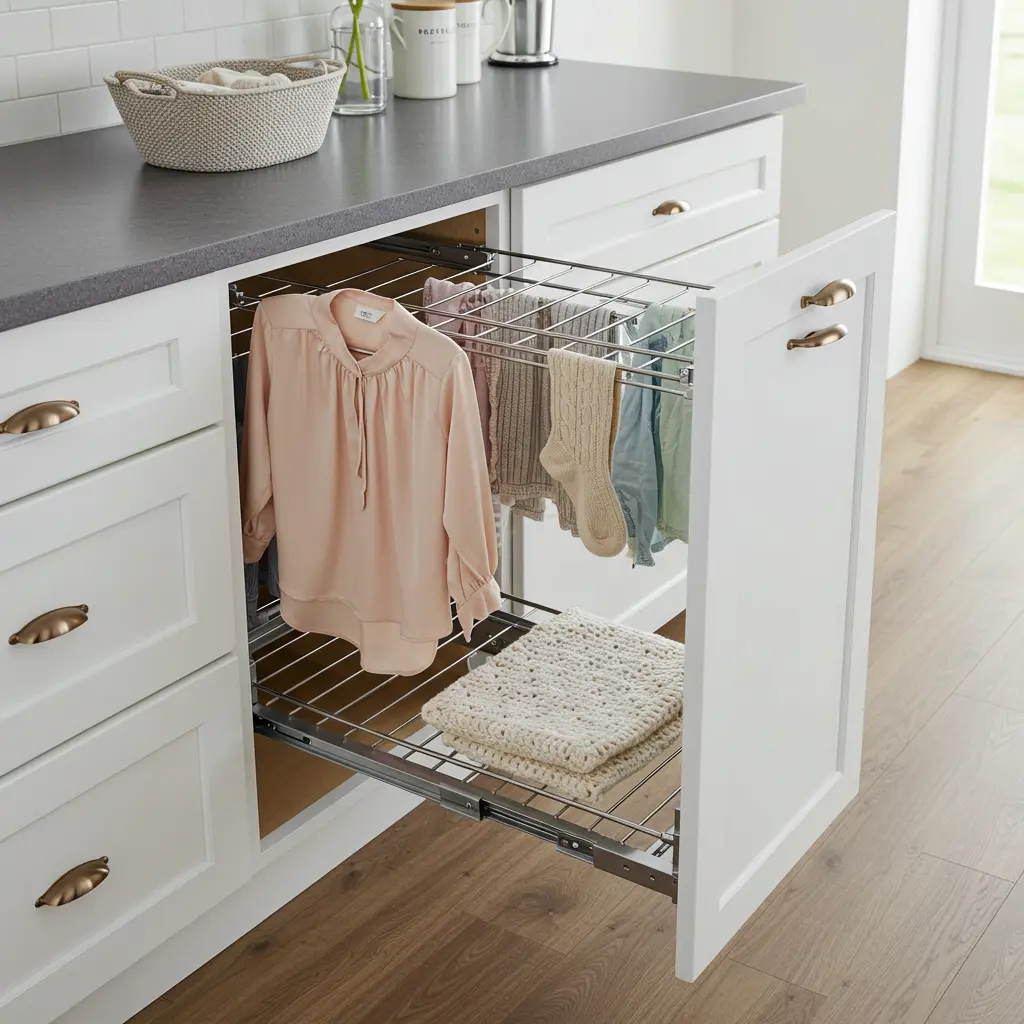
- Best For: A hidden solution for air-drying delicates without taking up any floor space.
- Key Consideration: These can be installed between cabinets or even within a custom drawer. Brands like Rev-A-Shelf offer many options.
- Pro-Tip: Install multiple racks at different heights to maximize your drying capacity within one cabinet bay.
- Styling Cue: The beauty of this is its invisibility! When closed, it’s completely hidden, contributing to a clean, uncluttered look.
11. The Wall-Mounted Accordion Rack
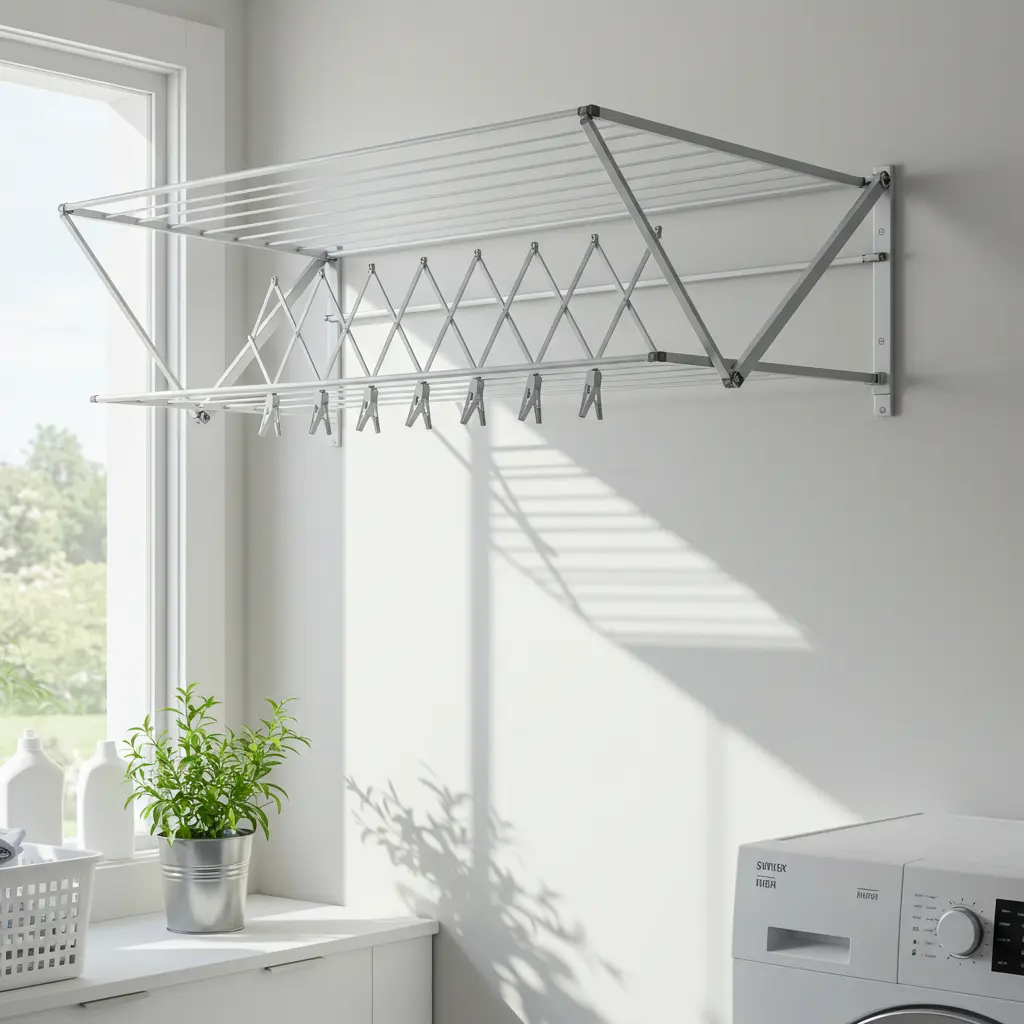
- Best For: Adding a significant amount of drying space in a slim, fold-away profile.
- Key Consideration: Install it high enough on the wall so that clothes can hang freely without touching the floor or any surface below.
- Pro-Tip: Look for a model made of a material that complements your decor, like natural wood for a farmhouse look or stainless steel for a modern one.
- Styling Cue: Even when it’s folded up, it adds a nice architectural element. Hang a single, beautiful wooden hanger on it as a permanent decorative touch.
12. The Clever Valet Rod
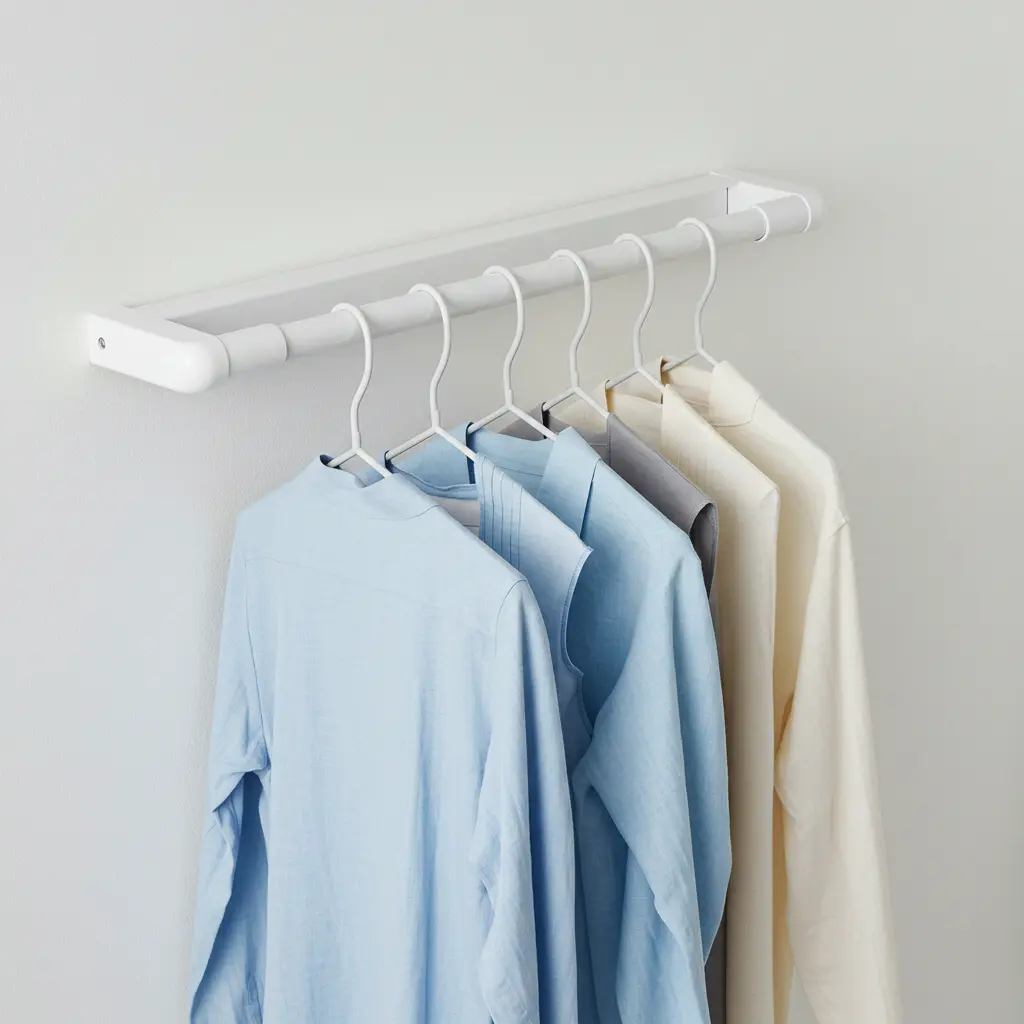
- Best For: A tiny, indispensable spot to hang clothes as they come out of the dryer.
- Key Consideration: These are small, retractable rods that can be mounted to the side of a cabinet or directly to the wall.
- Pro-Tip: Install one near your ironing or steaming station. It’s perfect for holding garments while you work on them.
- Styling Cue: Choose a finish that matches your cabinet hardware (e.g., matte black, brass, or nickel) for a coordinated look.
Finishing Touches That Make a Difference
13. The Bold Backsplash
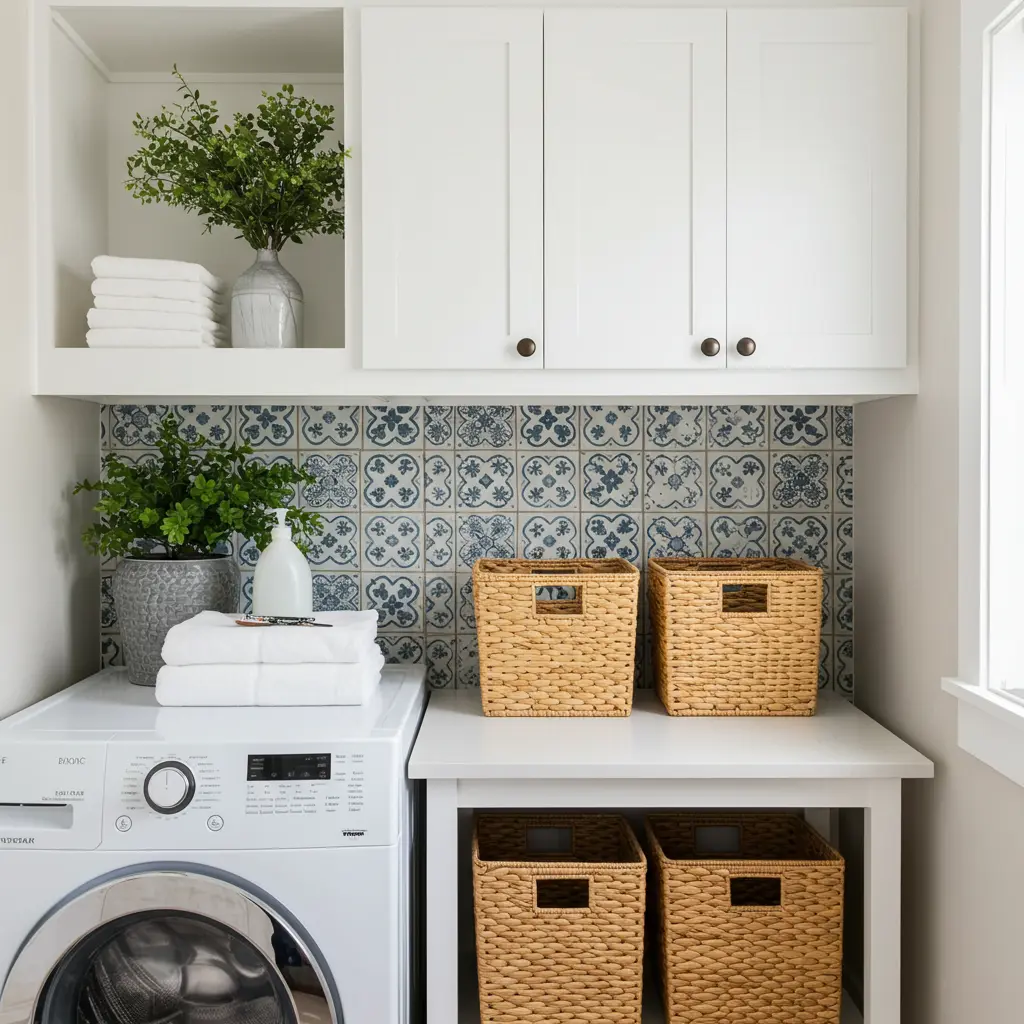
- Best For: Adding a major dose of personality and making the small space feel designed and intentional.
- Key Consideration: Peel-and-stick tile is a fantastic, renter-friendly, and budget-friendly option for this small application.
- Pro-Tip: Choose a pattern that you love but might be afraid to commit to in a larger space like a kitchen. A small laundry nook is the perfect place for a bold geometric or a fun floral.
- Styling Cue: Pull a color from the backsplash tile to use for your baskets or other accessories to tie the whole look together.
14. The Statement Floor
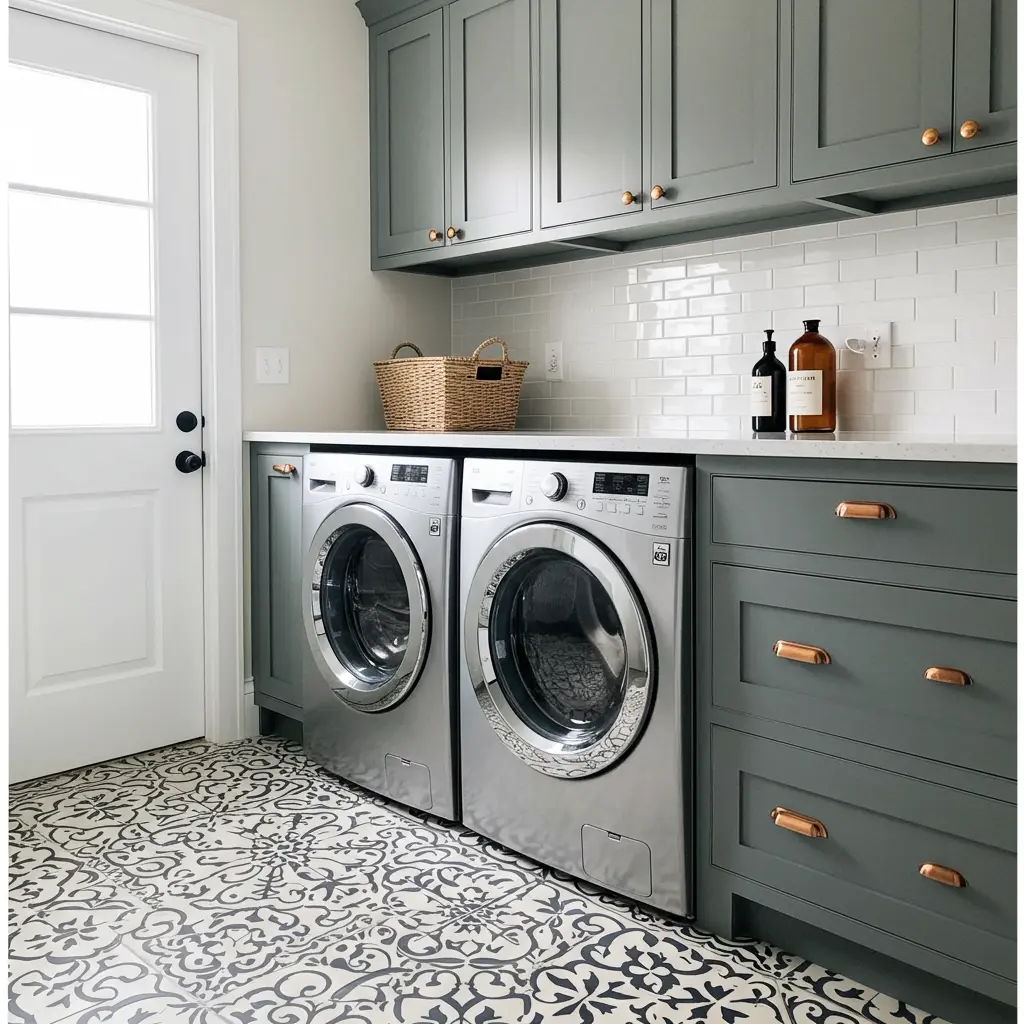
- Best For: Creating a high-impact design moment from the ground up.
- Key Consideration: In such a small footprint, you can often afford to splurge on a tile you truly love.
- Pro-Tip: Stenciling a pattern onto an existing vinyl or concrete floor with floor paint is a brilliant DIY alternative to re-tiling.
- Styling Cue: Keep the walls and cabinetry simple and neutral to let the beautiful floor be the star of the show.
15. The Hidden Pocket Door

- Best For: The ultimate space-saver, completely hiding the laundry without any door swing to account for.
- Key Consideration: This is a more involved renovation that requires opening up a wall, so it’s best done during a larger remodel.
- Pro-Tip: Choose a beautiful door! A rustic barn door on a sliding track or a sleek, frosted glass pocket door can become a major design feature in its own right.
- Styling Cue: Use statement hardware on your sliding door to treat it like a piece of functional art.
16. The Integrated Ironing Board

- Best For: Anyone who frequently irons but hates wrestling with a clumsy, full-size board.
- Key Consideration: These come in two main types: a fold-down, wall-mounted cabinet or a version that pulls out of a custom drawer.
- Pro-Tip: Install it at a comfortable height for you. Test it out before you commit to the final installation.
- Styling Cue: If you choose the cabinet version, paint it the same color as the wall to help it blend in seamlessly.
17. The Mounted Lint Bin

- Best For: A simple, genius solution that makes this daily task effortless.
- Key Consideration: It doesn’t have to be a “lint bin.” A sleek wall-mounted file holder, a small magnetic bin, or a cute metal bucket works perfectly.
- Pro-Tip: Mount it right next to the dryer at a convenient height. The easier it is to access, the more likely you are to use it every time.
- Styling Cue: Find a bin in a color or material that matches your other accessories for a chic, coordinated look.
18. The Artful Display
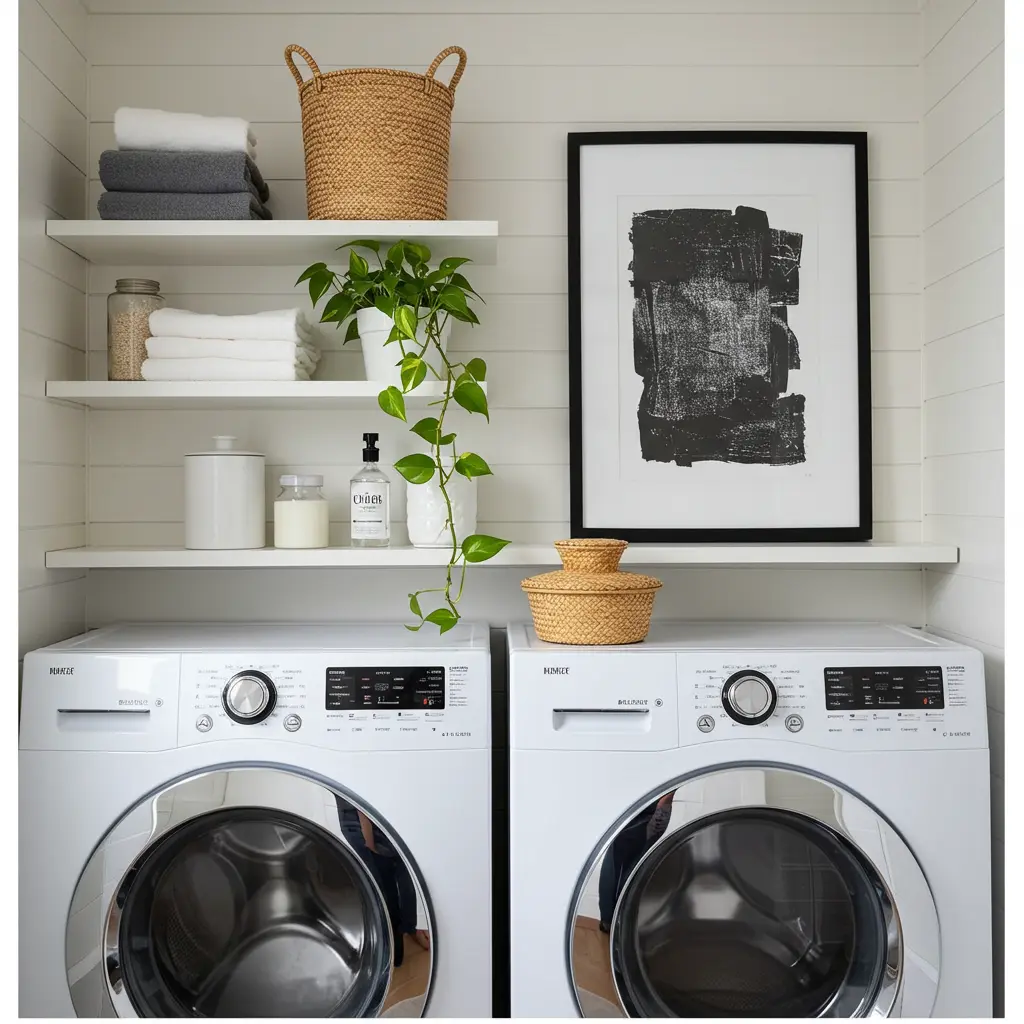
- Best For: Infusing a bit of soul and personality into a purely functional space.
- Key Consideration: Don’t clutter the space. One or two well-chosen pieces are all you need.
- Pro-Tip: Frame a beautiful, graphic art print or a favorite black-and-white photo and hang it on a side wall. It instantly elevates the space.
- Styling Cue: A small, hardy plant (a pothos or snake plant works well in low light) on a shelf adds a touch of life and organic color.
Conclusion: The Laundry Room, Reimagined
And just like that, you’re no longer looking at a cramped utility closet; you’re looking at a powerhouse of potential. You have the ideas, the inspiration, and the clever tricks to create a stacked laundry space that is organized, efficient, and genuinely a pleasure to be in.
This isn’t just about hiding your appliances; it’s about reclaiming a forgotten space and making it one of the hardest-working and smartest parts of your home.
It all starts with a single choice. Pick one idea that sparked your imagination, and take the first small step.
You’ve got this.
