
Is your kitchen backsplash a bland, forgettable space between the counter and the cabinets? Just a blank wall, not quite tying the room together? You’re in the right place to change that.
A kitchen backsplash shouldn’t just protect your walls from splatters; it should be the heart of your kitchen’s personality, a backdrop for family dinners, morning coffee, and cherished memories.
This is your creative playbook for transforming that wall into a feature that’s not only beautiful and functional but feels deeply, personally you.
We’ll explore charming materials, decode the secrets of farmhouse style, and walk through the practical steps to bring it all to life.
By the end, you’ll see your wall not as a problem to be solved, but as a canvas waiting for your story.
Before You Begin: Dreaming Up Your Perfect Kitchen
The most beautiful kitchens start with a little bit of soul-searching, not just a trip to the hardware store.
Before you pick up a single tool, let’s lay the groundwork for a design that complements your cabinets, countertops, and the overall feel of your home.
The Secrets of Style: Simple Rules for a Stunning Look
Design theory sounds intimidating, but it’s really just about what makes a space feel right. Here are a few simple secrets for a perfect farmhouse backsplash:
Getting the Scale Right: The material you choose should feel proportional to your kitchen. A tiny, busy mosaic might feel cluttered in a large, open kitchen, while wide shiplap planks might overwhelm a small galley space. A great rule of thumb: for a classic look, the scale of your backsplash pattern (the brick, tile, or plank size) should feel balanced with the scale of your cabinet doors.
Creating Balance with Texture: A rustic kitchen is all about texture. Your backsplash is the perfect place to add it.
- If you have busy granite or quartz countertops: Opt for a simple, single-color backsplash like shiplap or beadboard to avoid visual chaos.
- If you have simple, solid-color countertops: This is your chance to use a more textured, statement material like reclaimed wood or faux brick.
The 60-30-10 Color Secret (for Kitchens): This is a designer’s foolproof recipe for a harmonious kitchen color palette:
- 60% is your dominant color (usually your cabinets).
- 30% is your secondary color (this could be your backsplash and/or countertops).
- 10% is your accent (think hardware, lighting, and small decor).
Let the Star Shine: Decide what the focal point of your kitchen is. If you want your beautiful new backsplash to be the main event, keep the counter decor simple. If your range hood or open shelving is the star, choose a backsplash that acts as a beautiful, supporting backdrop.
What’s the Real Effort? A No-Fuss Project Breakdown
| The Approach | Estimated Cost | What Your Money Buys | The Little Extras (Don’t Skip These!) |
| The Weekend Refresh | $50 – $200 | • Paint & Stencils • Peel-and-stick tiles • Beadboard paneling | • Quality painter’s tape • A good utility knife • A stud finder & level |
| The Confident DIY | $200 – $700 | • Shiplap or wood planks • Faux brick or stone panels • Basic ceramic tile | • The right adhesive • A brad nailer (rent or buy) • A good caulk gun |
| The Skilled Project | $500 – $1,500+ | • Reclaimed wood • Quality Zellige-look tile • Stone veneer materials | • A tile saw (rent or buy) • The proper trowel & grout float • A high-quality sealer |
The Design Menu: Finding Your Signature Style
Here are the ingredients for your perfect rustic farmhouse backsplash. Each one comes with a breakdown to help you choose with confidence.
1. The Classic Shiplap

- Best For: Modern farmhouse, coastal, and transitional styles. The quintessential choice for a clean, bright, and textured look.
- Key Consideration: Wood and water require care. You must seal the planks with a high-quality, wipeable paint (like a satin or semi-gloss) and caulk the seam where the backsplash meets the counter.
- Pro-Tip: For a modern twist, install the shiplap vertically. It draws the eye upward and makes the ceilings feel taller.
- Styling Cue: Pair white shiplap with dark countertops, black hardware, and warm wood open shelving for the perfect modern farmhouse contrast.
2. The Charming Beadboard Panel
- Best For: Cottage, traditional farmhouse, and vintage-inspired kitchens. It’s affordable, easy to install, and full of character.
- Key Consideration: The grooves in beadboard can collect dust. A semi-gloss paint finish will make it much easier to wipe clean.
- Pro-Tip: Buy large 4×8-foot sheets and have the hardware store cut them to size. It’s faster and more cost-effective than installing individual planks.
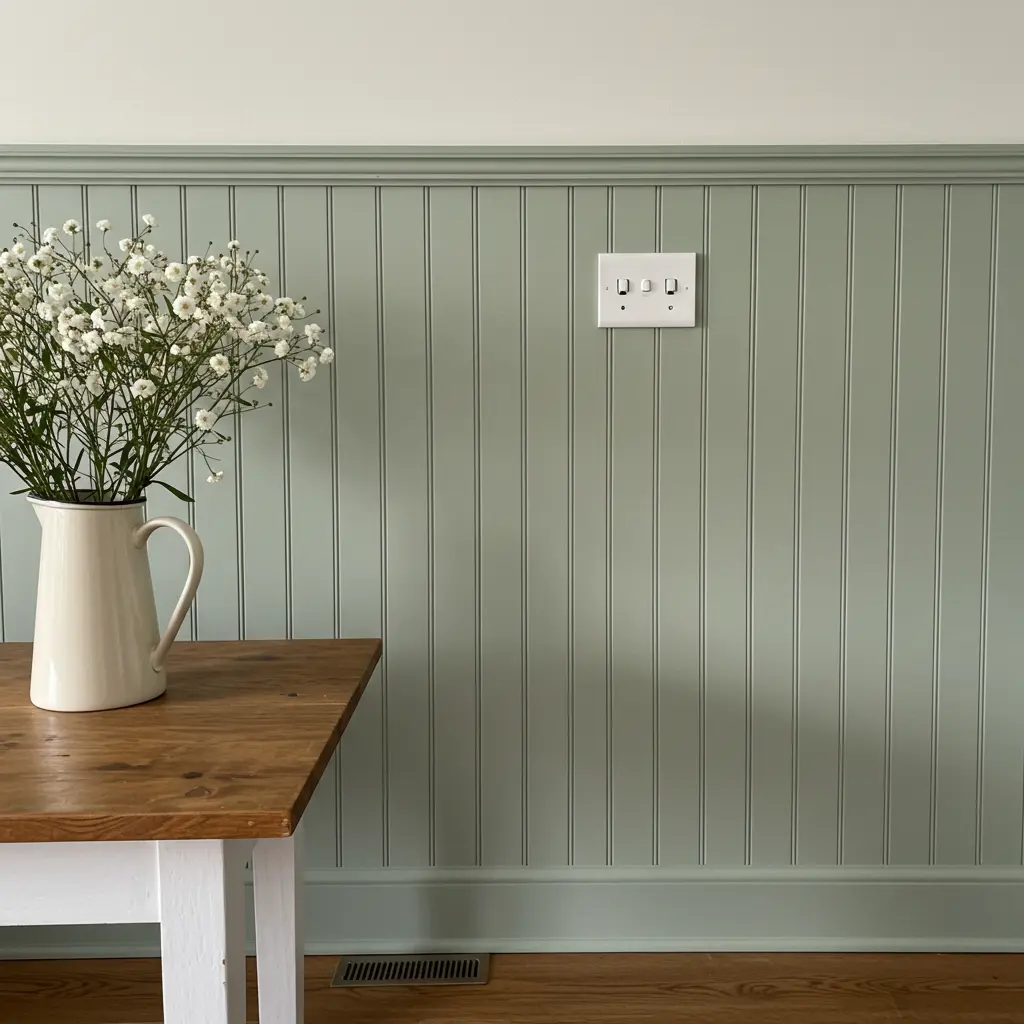
- Styling Cue: Paint beadboard a soft, muted color like sage green, dusty blue, or buttery cream for a cozy, charming cottage feel.
3. The Rustic Reclaimed Wood
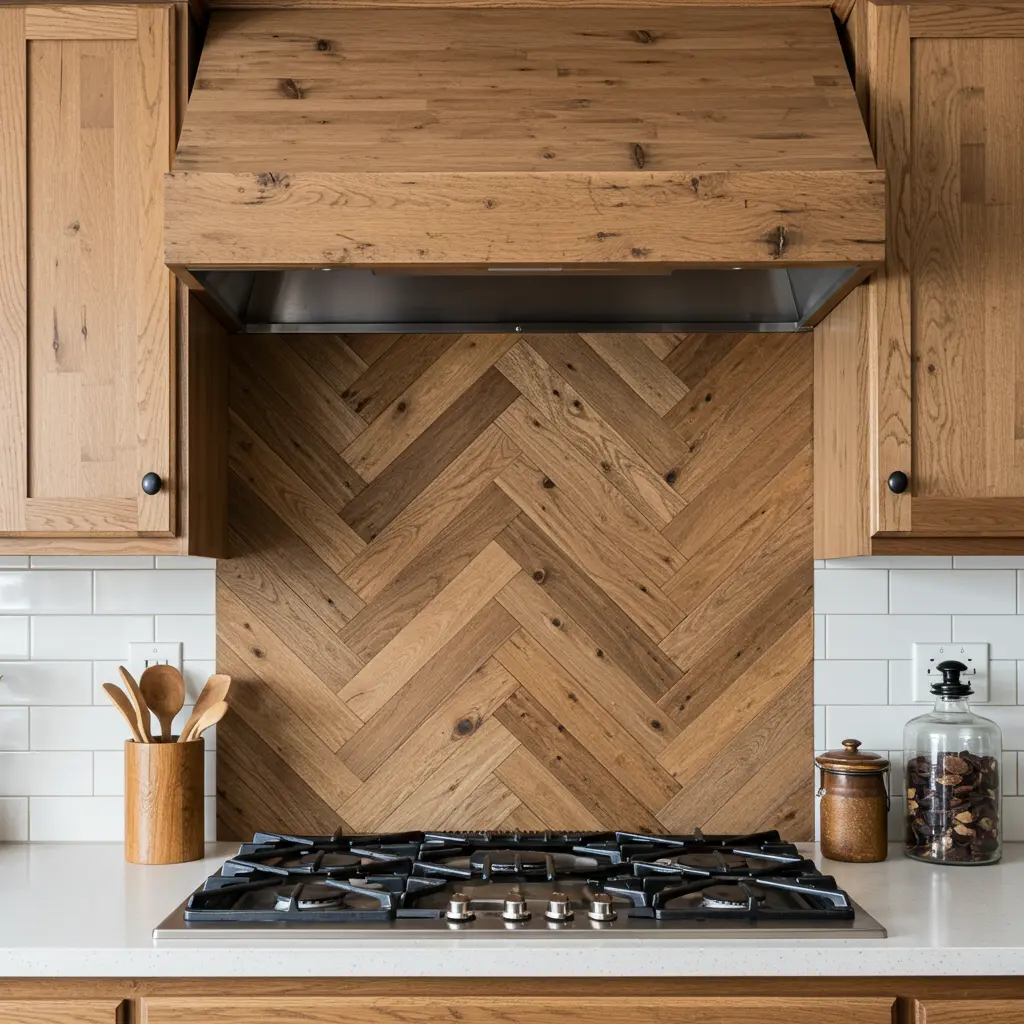
- Best For: Industrial farmhouse, cabin, and true rustic styles. It brings unparalleled warmth, history, and texture.
- Key Consideration: Sealing is non-negotiable, especially behind a stove where you’ll need a fire-retardant sealer or a stainless steel panel. Ensure the wood is well-cleaned and pest-free.
- Pro-Tip: Create a herringbone or chevron pattern for a high-end, custom look that turns your wall into a work of art.
- Styling Cue: Let the wood be the star. Pair it with simple, solid-color countertops (like white quartz or black soapstone) and understated hardware.
4. The Timeless Faux Brick Veneer
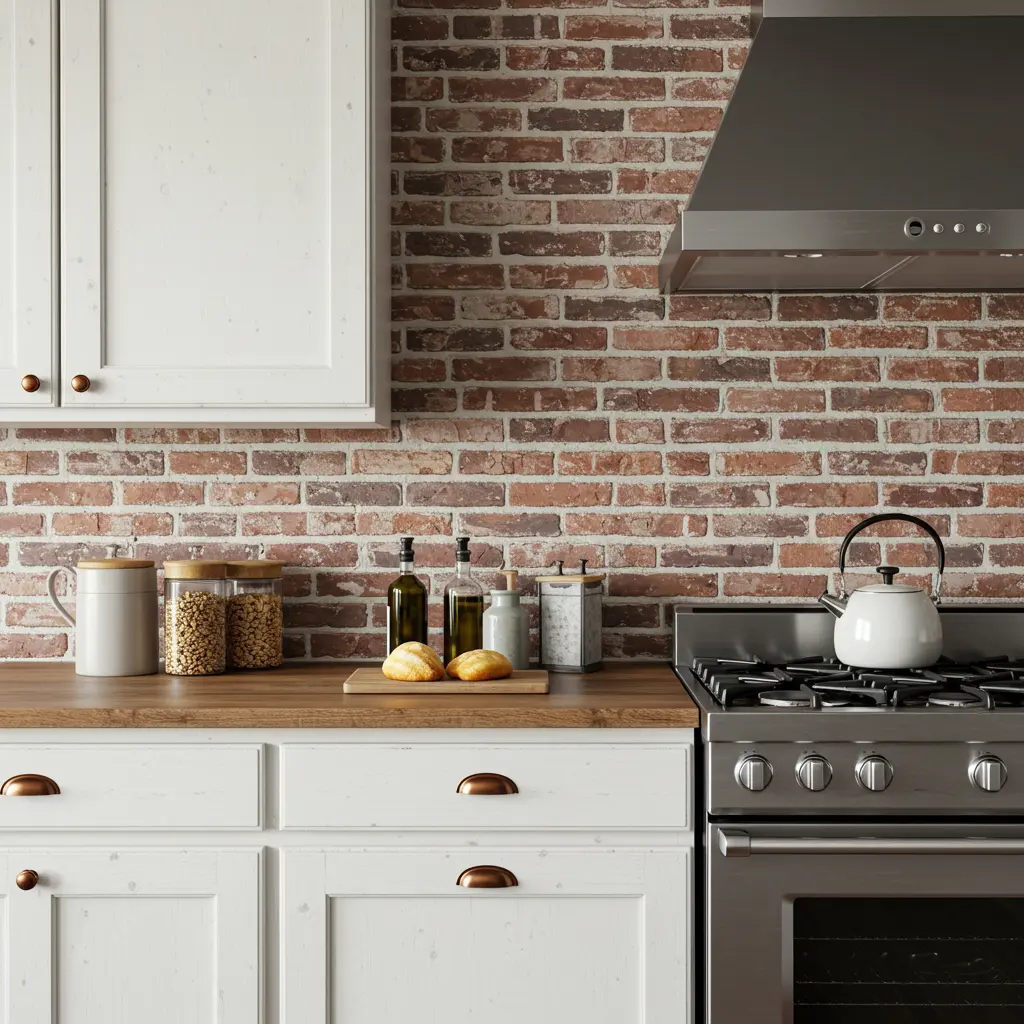
- Best For: Industrial farmhouse, rustic loft, and historic-inspired spaces. It adds incredible old-world character without the weight of real brick.
- Key Consideration: These are thin, real brick slices or panels. Installation is similar to tile, requiring mortar and grout.
- Pro-Tip: For a German schmear or limewashed look, apply white mortar or paint unevenly over the brick faces after installation, wiping some of it off to reveal texture.
- Styling Cue: White or whitewashed brick keeps the kitchen feeling bright and open, while traditional red brick creates a cozy, tavern-like atmosphere.
5. The Vintage Pressed Tin

- Best For: Eclectic farmhouse, Victorian, and vintage styles. It adds shine, pattern, and a unique historical element.
- Key Consideration: Comes in various finishes (tin, copper, bronze, white). The raw metal finishes can be sharp, so handle with gloves.
- Pro-Tip: Use construction adhesive and small brad nails to secure the panels. An overlapping nailing edge on the tiles makes for a nearly seamless installation.
- Styling Cue: A distressed white or antique silver tin backsplash adds subtle pattern and reflects light beautifully, making it great for smaller or darker kitchens.
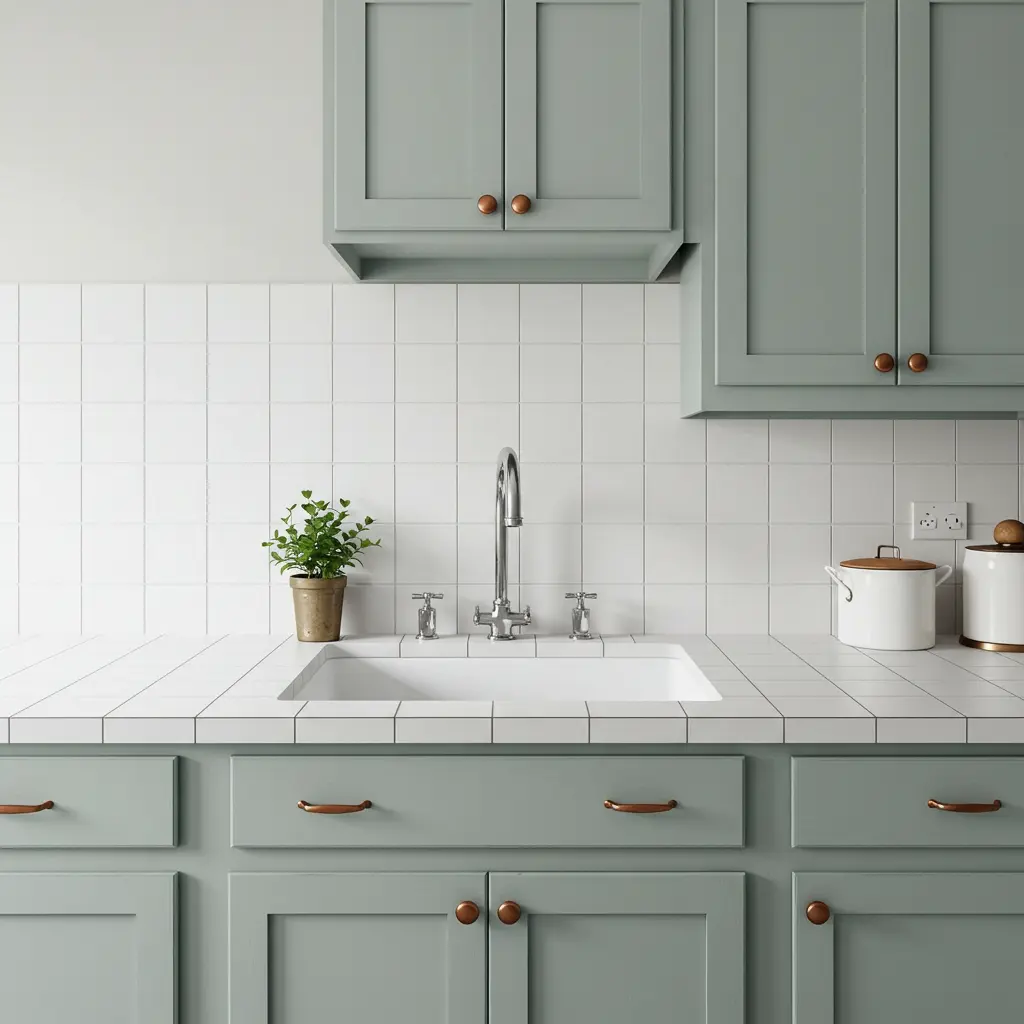
6. The Easy Peel-and-Stick Subway Tile

- Best For: Renters, budget renovations, and beginner DIYers. Get the classic farmhouse look in an afternoon with no grout or mess.
- Key Consideration: Quality matters. Higher-end versions have realistic texture and stronger adhesive. The wall must be perfectly clean, dry, and smooth for them to stick properly.
- Pro-Tip: Overlap the “grout lines” of each tile sheet exactly as the manufacturer directs. This is the secret to making it look like a real, continuous tiled surface.
- Styling Cue: Choose a classic white 3×6-inch subway tile and use a fine-tip black sharpie to color in the indented grout lines for a high-contrast, graphic look before you install.
7. The Authentic Subway Tile (with a Twist)

- Best For: Anyone wanting the most timeless, durable, and versatile farmhouse backsplash.
- Key Consideration: While the tiles themselves are cheap, installation requires tools like a tile saw, trowel, and grout float. It’s a skilled but very achievable DIY project.
- Pro-Tip: The magic is in the grout. Use a dark grey or black grout with white tile. It makes the pattern pop, adds a vintage/industrial feel, and won’t show stains as easily.
- Styling Cue: For a softer look, choose a tile with a slightly wavy, handmade texture and pair it with a light grey or beige grout.
8. The Earthy Faux Stone
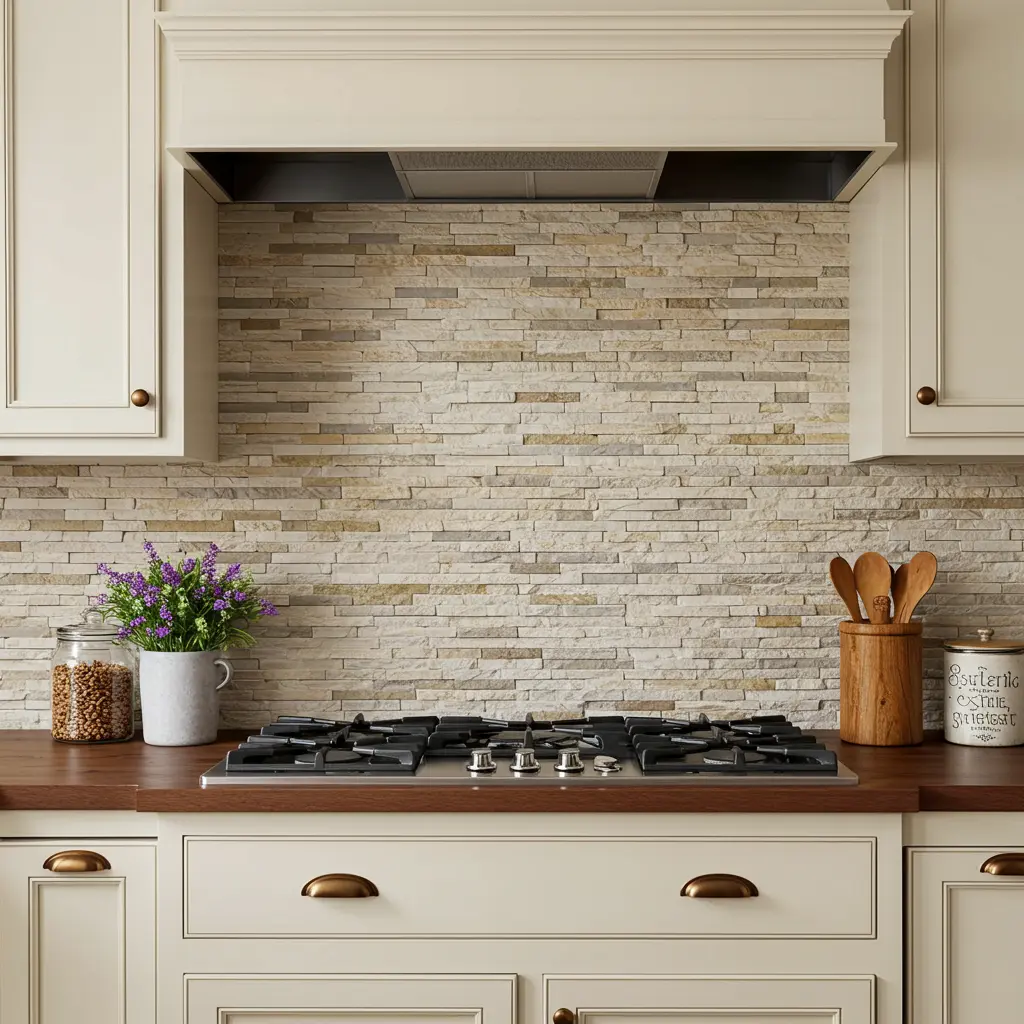
- Best For: Tuscan, French country, and rustic mountain-style kitchens. Adds substantial, organic texture.
- Key Consideration: Materials like Airstone are lightweight and can be cut with a hacksaw, making them much more DIY-friendly than traditional stone veneer.
- Pro-Tip: Before you begin, lay out your stone pattern on the floor. Mix pieces from different boxes to ensure a natural-looking blend of colors and shapes.
- Styling Cue: Pair a warm, creamy stacked stone backsplash with cream-colored cabinets and a butcher block countertop for a warm, inviting, old-world feel.
9. The Budget-Friendly Stencil

- Best For: The ultimate budget-friendly project, renters, and anyone with a creative flair.
- Key Consideration: Patience is key. This requires a steady hand and careful alignment. Use a stencil brush or small foam roller with very little paint to prevent bleeding under the stencil.
- Pro-Tip: Purchase two of the same stencil. You can cut the second one to fit perfectly into corners and around outlets without ruining your main one.
- Styling Cue: Use a Moroccan tile or barn quilt stencil pattern in a simple two-color scheme (like white on grey) to mimic the look of expensive cement tile.
10. The Utilitarian Galvanized Metal

- Best For: Industrial farmhouse and functional, no-fuss kitchens. It’s durable, easy to clean, and adds a unique, utilitarian shine.
- Key Consideration: You can buy flat sheets or corrugated panels. Flat sheets give a smoother, more modern look, while corrugated adds rustic texture.
- Pro-Tip: Frame the edges of the metal sheet with small wood trim painted to match your cabinets for a clean, finished, and built-in look.
- Styling Cue: The cool, silvery tone of galvanized metal looks fantastic paired with warm wood tones and bright, bold accent colors like red or yellow.
11. The Functional Chalkboard Paint
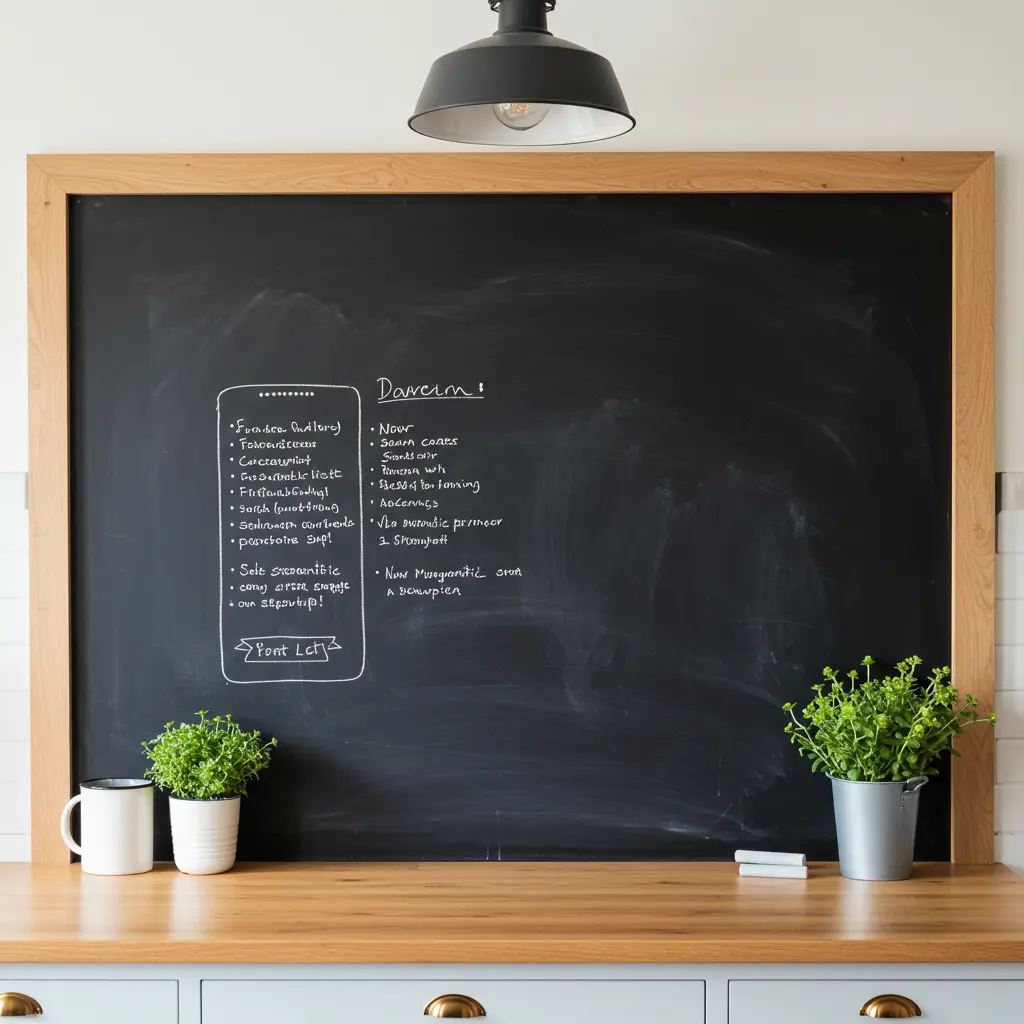
- Best For: Families, busy kitchens, and adding a fun, interactive element.
- Key Consideration: For the best results, apply multiple thin coats and “season” the final surface by rubbing the side of a piece of chalk over the whole thing and erasing it.
- Pro-Tip: Use magnetic primer on the wall before applying the chalkboard paint. Now your backsplash is also a magnetic bulletin board!
- Styling Cue: Frame the chalkboard area with wood trim to define the space and create a focal point for grocery lists, weekly menus, or kids’ artwork.
12. The Clever Hardwood Floor Planks

- Best For: A unique, custom look, especially if you have leftover flooring from another project.
- Key Consideration: Use engineered hardwood or vinyl plank, which are more stable and water-resistant than solid hardwood. You must seal the seams well.
- Pro-Tip: Use a high-quality, heavy-duty construction adhesive. The tongue-and-groove system makes installation relatively straightforward.
- Styling Cue: Run the planks horizontally to make your kitchen feel wider. The wood tones will perfectly complement white or cream cabinets.
13. The Imperfect Zellige-Look Tile

- Best For: An earthy, organic, and slightly Mediterranean take on the farmhouse style.
- Key Consideration: The charm of these tiles is their irregularity in color, texture, and shape. Embrace the imperfection! Tiling can be tricky as no tile is perfectly flat.
- Pro-Tip: Stack the tiles vertically in a grid pattern (instead of a running bond) and use a minimal grout line. This highlights the beautiful, handmade quality of each individual tile.
- Styling Cue: A glossy, off-white Zellige-look tile reflects light beautifully and adds incredible character while remaining neutral enough to work with any decor.
14. The Simple Paint-Job Refresh
- Best For: An ultra-fast, ultra-cheap update, or as a temporary fix while you save for a bigger project.
- Key Consideration: This only works if your existing tile is in good condition. Prep is 90% of the job. You must thoroughly clean, de-gloss, and prime the tile for the paint to adhere.
- Pro-Tip: Use a specialty tile and tub paint kit. They are specifically formulated for durability and adhesion in wet environments.
- Styling Cue: Paint ugly, dated tiles a crisp, clean white. It will instantly brighten your kitchen and make the whole space feel brand new.
15. The Bold Patterned Cement Tile
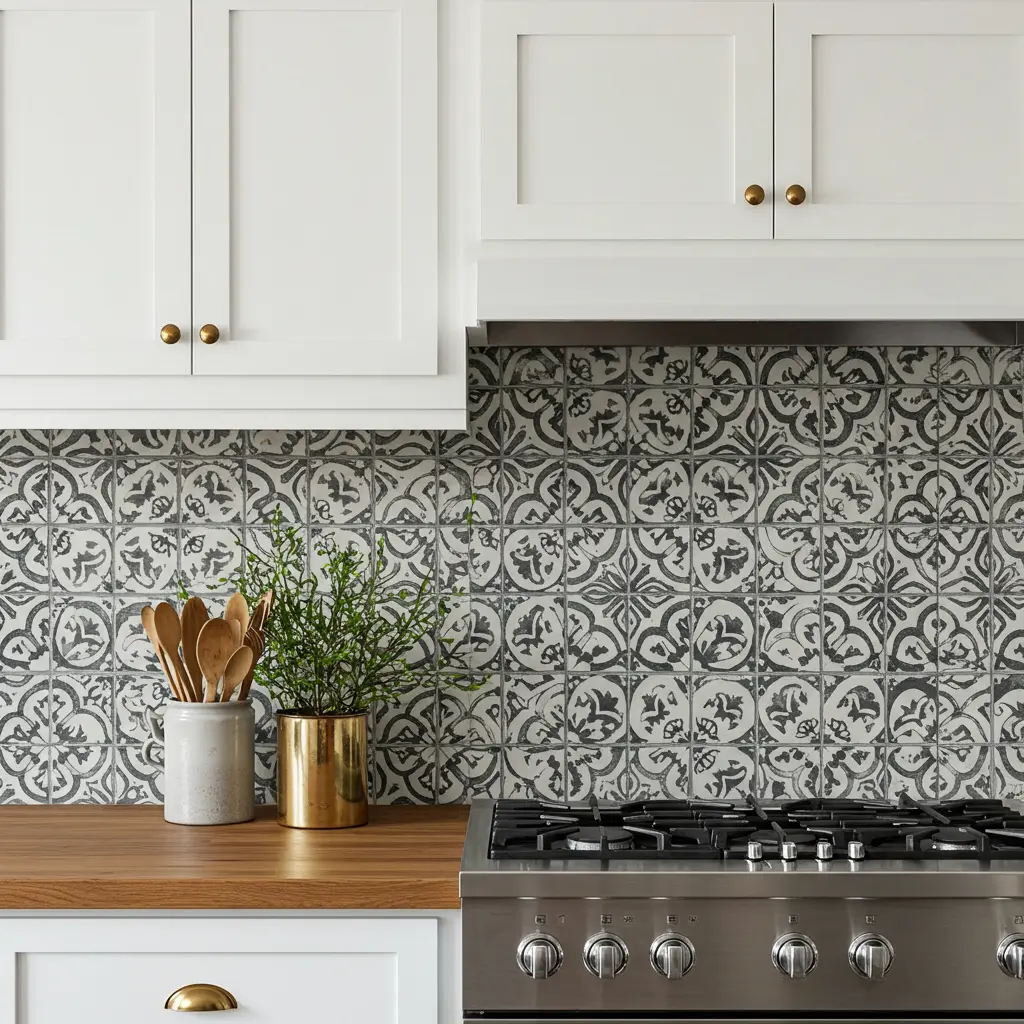
- Best For: Making the backsplash the undeniable star of the kitchen. Perfect for modern farmhouse or eclectic styles.
- Key Consideration: Real cement tiles are heavy, expensive, and porous (requiring frequent sealing). Ceramic or porcelain lookalikes offer the same visual punch with far less maintenance.
- Pro-Tip: Pick one statement pattern and use it for the entire backsplash. Don’t mix and match. The pattern is the star.
- Styling Cue: Choose a black and white geometric or floral pattern. It’s bold but classic and will pair beautifully with simple shaker cabinets and butcher block counters.
Conclusion: Your Kitchen’s Next Act
And just like that, you’re no longer just looking at a wall you’re looking at a world of possibilities. You have the ideas, the inspiration, and the know-how to create a backsplash that is beautiful, functional, and the true heart of your home.
This isn’t just about protecting your walls; it’s about infusing your kitchen with character, warmth, and a story that is uniquely yours.
It all starts with a single choice. Pick an idea that made your heart skip a beat, and take the first small step. You’ve got this.
