
Is your tote bag a little… beige? Just a plain canvas bag doing its job, but not sparking any joy? You’re in the right place to change that.
A tote bag shouldn’t just carry your groceries or books; it should be a wearable piece of your personality, a backdrop for your daily adventures, and a canvas for your creativity.
This is your creative playbook for transforming that blank bag into a feature that’s not only useful and unique but feels deeply, personally you.
We’ll explore charming designs, decode the secrets of style, and walk through the practical steps to bring it all to life.
By the end, you’ll see your bag not as a boring essential, but as a blank canvas waiting for your story.
Before You Begin: Dreaming Up Your Perfect Design
The most beautiful projects start with a little bit of inspiration, not just a trip to the craft store.
Before you uncap a single tube of paint, let’s lay the groundwork for a design that you’ll be proud to carry for years to come.
The Secrets of Style: Simple Rules for a Stunning Look
Design theory sounds intimidating, but it’s really just about what makes a design feel right. Here are a few simple secrets:
Placement & Proportion: Your design should feel at home on the bag, not like it’s falling off the edge or getting lost in the middle. A great little trick: use the rule of thirds. Imagine the bag is divided into a 3×3 grid, and place your main design element where the lines intersect.
Creating Balance: A bold design is a strong visual statement. You can balance it in two ways:
- Symmetrical Balance: Think of a monogram perfectly centered on the bag. This creates a classic, clean, and formal feeling.
- Asymmetrical Balance: Imagine a spray of flowers blooming from the bottom-left corner. This feels more modern, dynamic, and relaxed.
The 3-Color Rule: This is a foolproof recipe for a harmonious color palette, especially for beginners:
- Choose a main color for the biggest part of your design.
- Choose a secondary color that complements it.
- Choose a pop of accent color (maybe a bright or metallic) for the smallest details.
Embrace Negative Space: The blank canvas of the bag is part of the design! A simple, small design can often have more impact than one that covers the entire surface. Let your creation breathe.
What’s the Real Effort? A No-Fuss Project Breakdown
| The Approach | Estimated Cost | What Your Money Buys | The Little Extras (Don’t Skip These!) |
| The 30-Minute Makeover | $15 – $30 | • A canvas tote bag • 1-2 fabric paint pens or a small bottle of fabric paint | • Cardboard insert • Painter’s tape • An iron (for heat setting) |
| The Afternoon Project | $30 – $60 | • A set of fabric paints • A few quality brushes • A pack of tote bags | • A paint palette • Round sponge pouncers • Pencils for sketching |
| The Polished Design | $60 – $100 | • Premium fabric paints or acrylics + textile medium • A full set of artist brushes • Stencils or custom stamps | • A good quality sealant spray • Fine-tip paint pens for details • A heat press (for serious crafters) |
The Design Menu: Finding Your Signature Style
Here are the ingredients for your perfect tote bag. Each one is simple, easy, and designed for maximum impact with minimal stress.
Minimalist & Geometric
1. The Perfect Polka Dots

- Best For: True beginners who want a playful, timeless pattern.
- Key Consideration: Consistency is key. Decide if you want a random scatter or a neat grid before you start.
- Pro-Tip: For flawless circles, dip a round sponge pouncer, a wine cork, or the back of a pencil eraser in paint.
- Styling Cue: A black and white polka dot bag is endlessly chic and pairs with literally everything.
2. The Bold Color Block
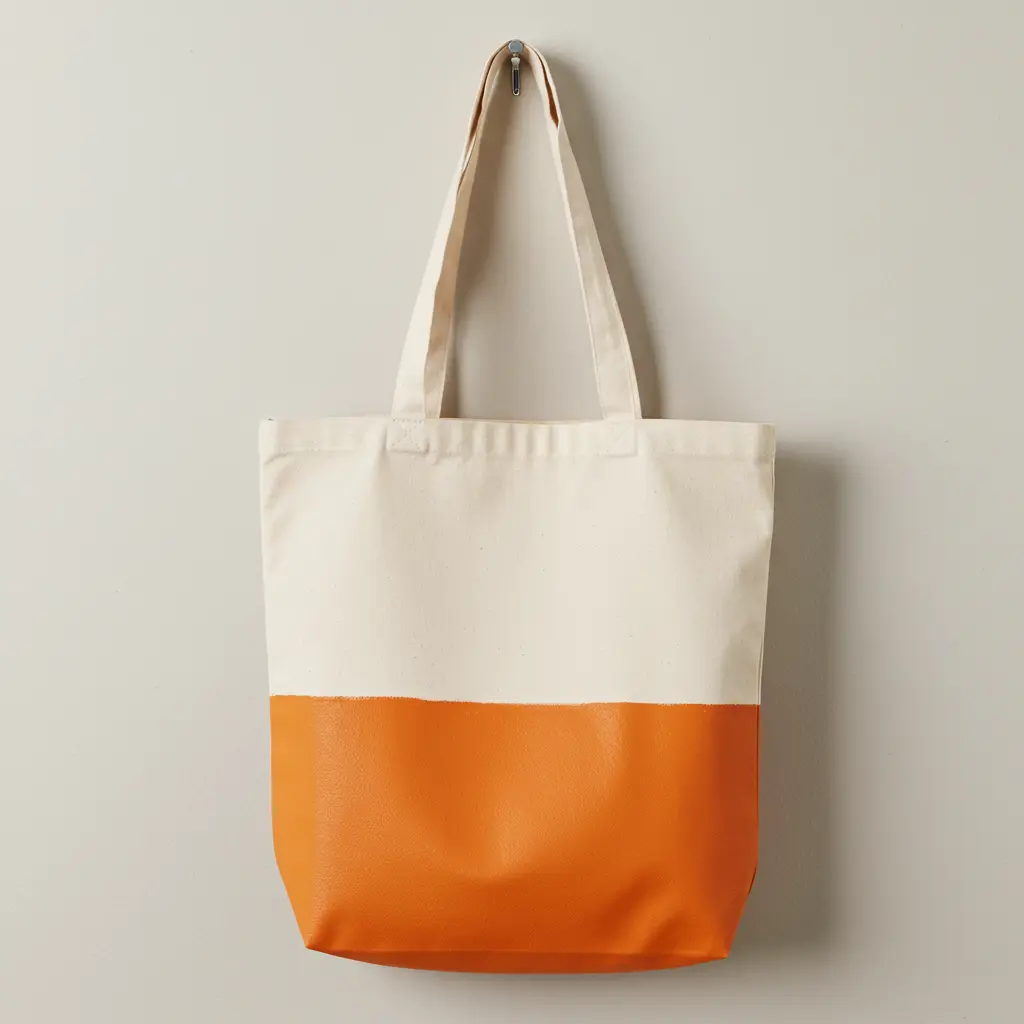
- Best For: Creating a modern, high-impact look with zero drawing skills required.
- Key Consideration: Use high-quality painter’s tape and press the edges down firmly to get super crisp lines.
- Pro-Tip: Paint away from the tape edge, not towards it, to prevent paint from bleeding underneath.
- Styling Cue: A tote with a bottom third dipped in a bold color looks professionally made and is great for hiding dirt.
3. The Simple Stripe
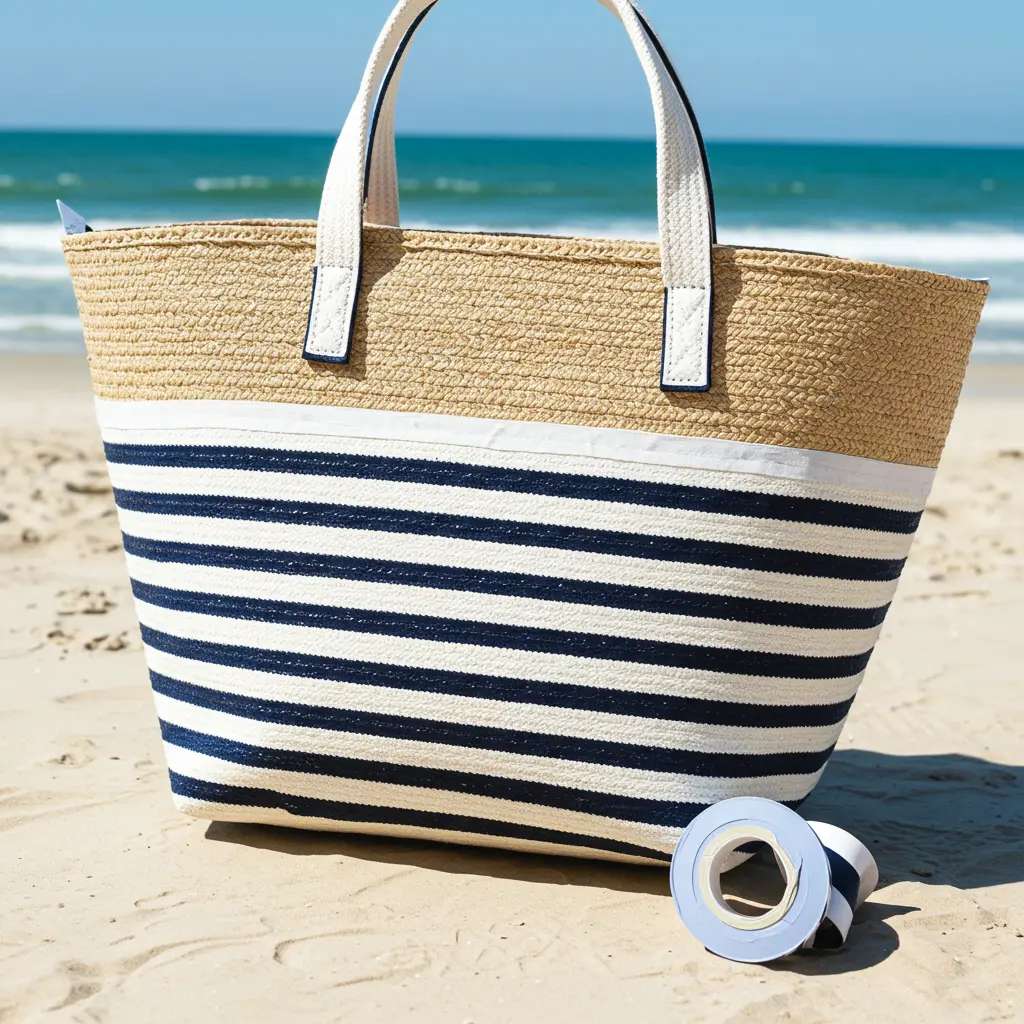
- Best For: A classic, preppy, or nautical vibe.
- Key Consideration: Measure and mark your lines with a pencil and ruler before taping to ensure they’re perfectly parallel.
- Pro-Tip: Try a single, thick, off-center stripe for a more modern, asymmetrical take on the classic pattern.
- Styling Cue: Navy and white stripes are a timeless combination, perfect for a beach day bag.
4. The Abstract Brush Strokes

- Best For: Artistic souls who believe in “happy accidents.” There is no way to mess this up.
- Key Consideration: Choose a limited color palette (2-3 colors) to keep it from looking chaotic.
- Pro-Tip: Use a dry, flat brush with very little paint on it to create a textured, rustic look with each stroke.
- Styling Cue: Bold, black brushstrokes on a natural canvas bag have a sophisticated, Japanese-inspired feel.
5. The Minimalist Line Art

- Best For: A chic, understated, and very on-trend look.
- Key Consideration: This looks best when done with confidence. Practice the design on paper first.
- Pro-Tip: Use a fine-tip fabric marker or paint pen for the ultimate control and a clean, consistent line.
- Styling Cue: A simple, single-line face profile or abstract shape in a corner is the epitome of minimalist cool.
Nature-Inspired
6. The Stamped Leaf Print

- Best For: Bringing the beauty of nature directly onto your bag.
- Key Consideration: Choose fresh, sturdy leaves with prominent veins, like maple or fern leaves.
- Pro-Tip: Paint a thin layer of fabric paint onto the leaf, then press it firmly onto the bag. Use a roller or your fingers to ensure the whole leaf makes contact.
- Styling Cue: Use autumnal colors like gold, rust, and forest green for a beautiful, seasonal accessory.
7. The Citrus Slice Stamp

- Best For: A cheerful, summery design that’s incredibly easy to make.
- Key Consideration: Blot the cut side of a lemon, lime, or orange on a paper towel to remove excess juice before painting.
- Pro-Tip: After stamping the half-circle, use a small brush to add a few lines and a center dot to enhance the “slice” effect.
- Styling Cue: This bright, zesty pattern makes the perfect tote for a trip to the farmer’s market.
8. The Simple Dandelion
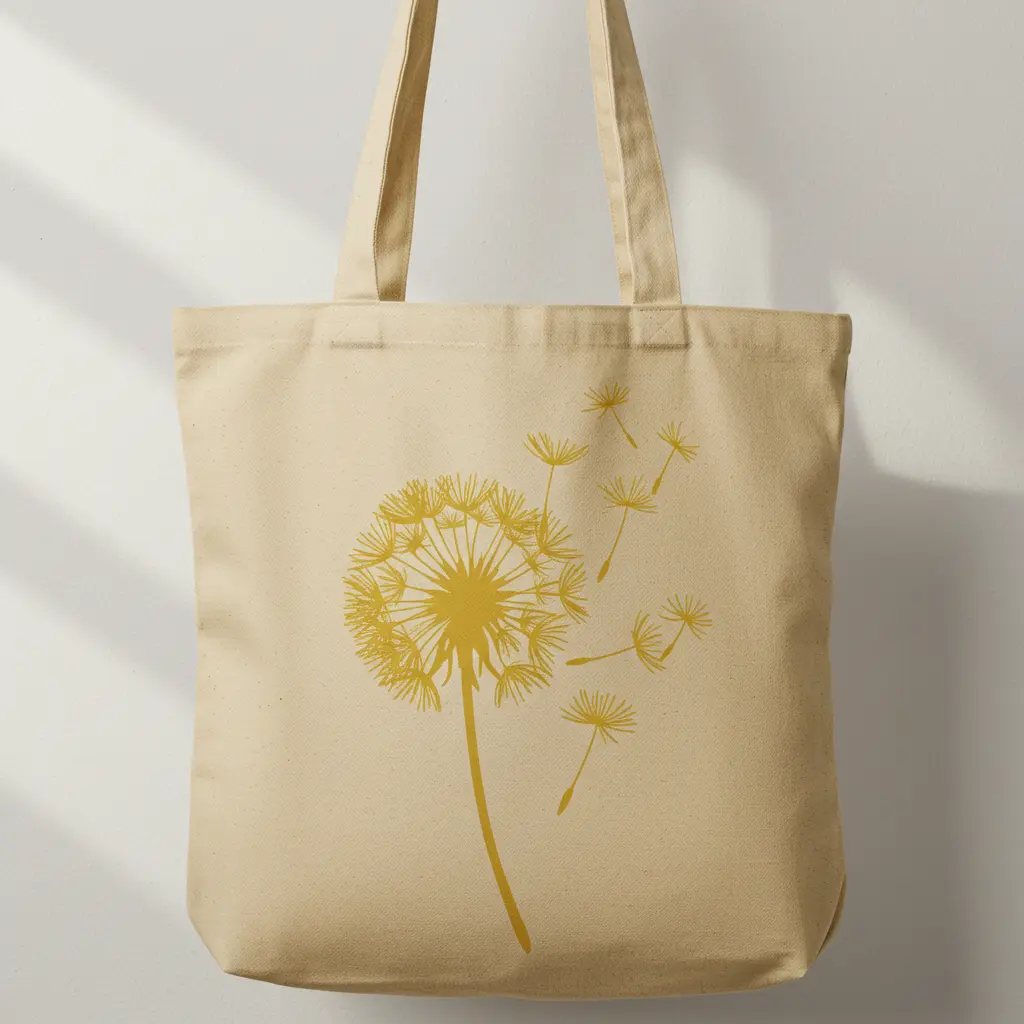
- Best For: A whimsical, delicate design that looks more complicated than it is.
- Key Consideration: Draw a simple stem and a center dot. The magic is in the details.
- Pro-Tip: Use a fine-tip pen or the skinny end of a brush to draw simple straight lines radiating from the center, adding tiny “v” shapes or dots at the ends.
- Styling Cue: A single dandelion with a few “seeds” blowing across the bag creates a beautiful sense of movement.
9. The Sun & Moon Motif

- Best For: A celestial, boho-inspired design.
- Key Consideration: Use round objects like bowls or tape rolls as stencils to get perfect circles for your sun and moon.
- Pro-Tip: Paint the sun in a warm metallic gold and the moon in silver for a magical, shimmering contrast.
- Styling Cue: Place a crescent moon on one side of the bag and a sun on the other for a balanced, mystical look.
10. The Daisy Chain
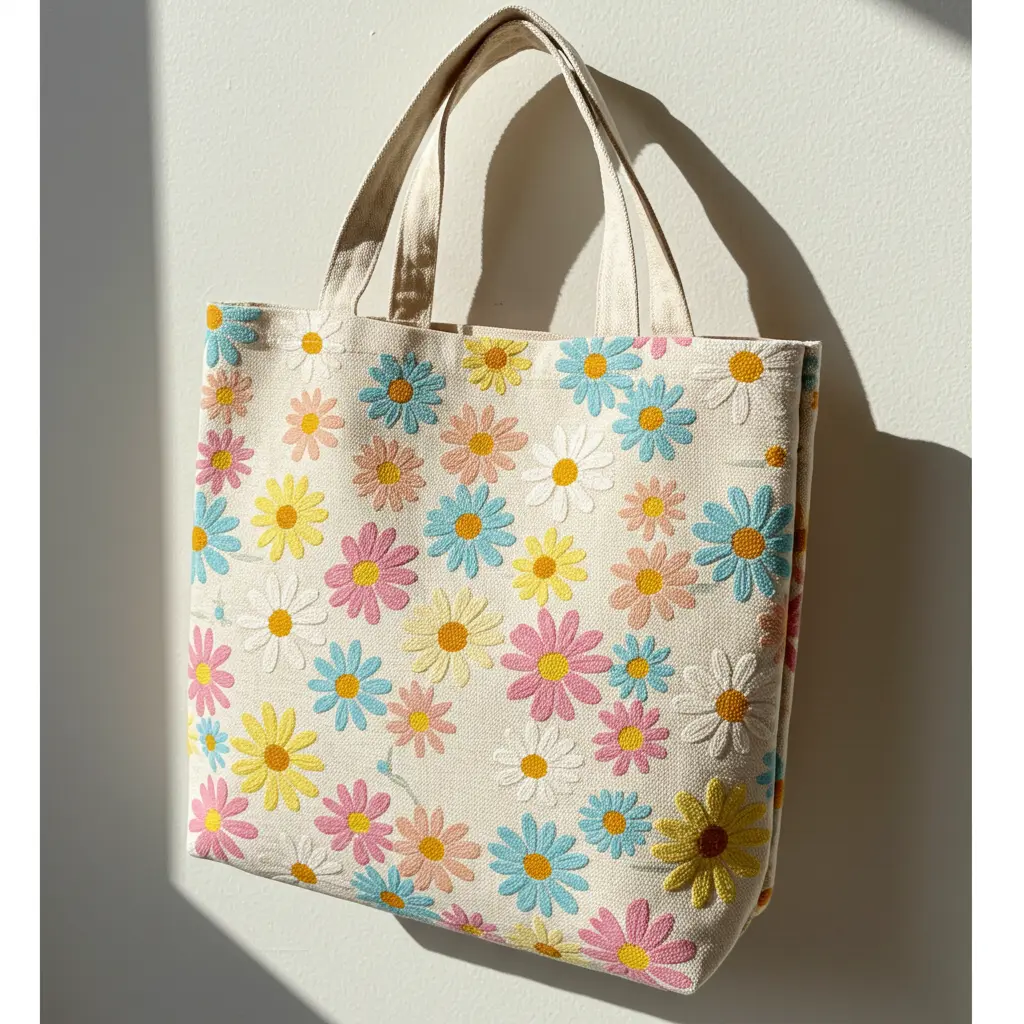
- Best For: A sweet, retro, and endlessly cheerful pattern.
- Key Consideration: A daisy is just a yellow dot surrounded by simple white oval or teardrop petals. Don’t overthink it!
- Pro-Tip: Use your thumbprint to make the petals! Dip your thumb in white paint and press it around the yellow center for a rustic, handmade look.
- Styling Cue: A chain of daisies along the top or bottom of the bag adds a perfect pop of floral charm.
Playful & Typographic
11. The Classic Monogram
- Best For: A personalized gift or a sophisticated, custom-look accessory.
- Key Consideration: Choose a font that reflects your style a serif font for a classic look, or a sans-serif for a modern feel.
- Pro-Tip: Print your chosen initial in a large font, cut it out to create a stencil, and trace it onto your bag with a pencil before painting.
- Styling Cue: A large, single initial in a bold color is a timeless statement.
12. The Favorite Quote
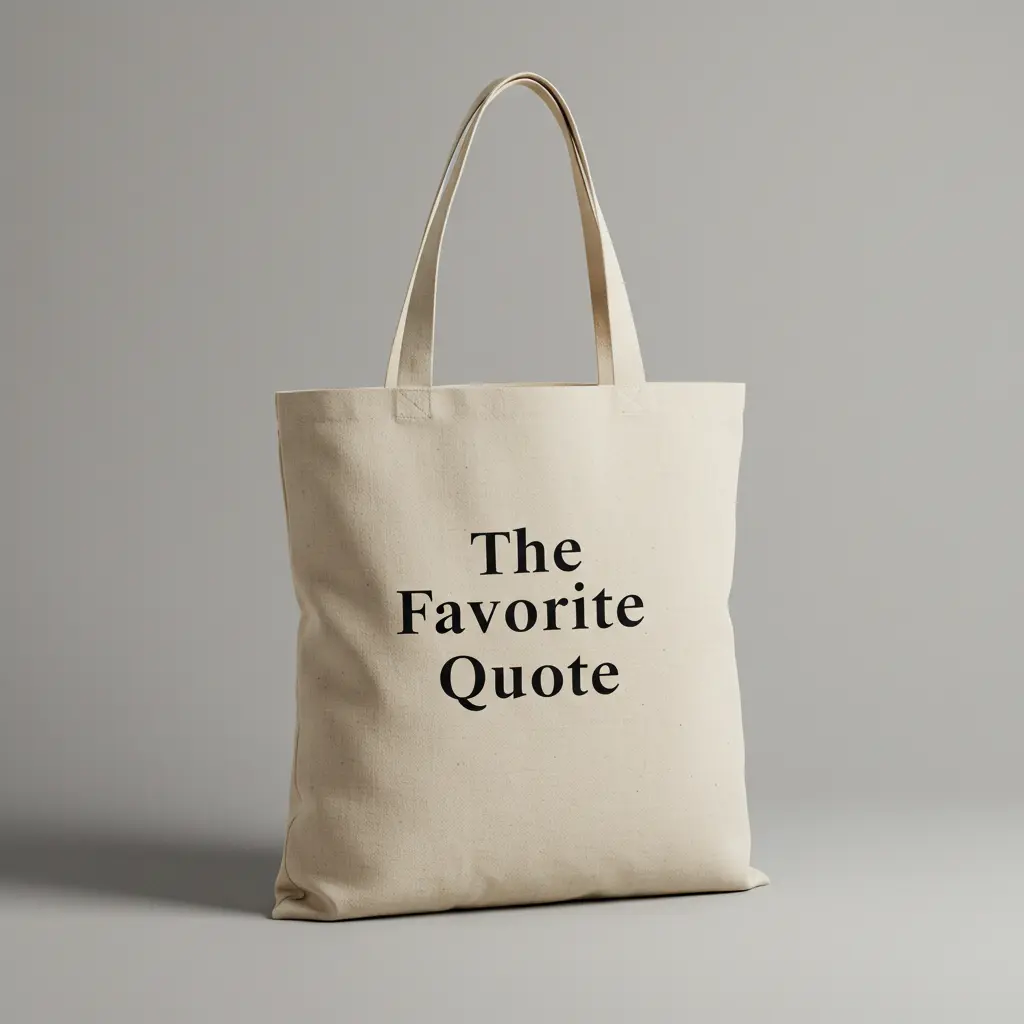
- Best For: Book lovers, wordsmiths, and anyone with a message to share.
- Key Consideration: Shorter is better. A few powerful words will have more impact than a long paragraph.
- Pro-Tip: Use fabric paint pens for the best control. For a fun look, alternate between a simple print and a cursive font.
- Styling Cue: Center a book-related quote like “So many books, so little time” for the perfect library tote.
13. The Pet Paw Prints

- Best For: Proud pet parents who want to show off their furry friend.
- Key Consideration: A paw print is just one large oval with four smaller circles on top. You don’t need your actual pet’s help for this one!
- Pro-Tip: Create a pattern of prints that look like they’re walking up the side of the bag for a cute, dynamic design.
- Styling Cue: Keep it simple with black paw prints for a graphic, versatile look.
14. The Coffee Cup Doodle

- Best For: Coffee aficionados and lovers of cozy mornings.
- Key Consideration: A simple silhouette of a mug is all you need.
- Pro-Tip: Draw a simple “C” shape, then add a straight line on top and an oval at the bottom. Use three wavy vertical lines above it to represent steam. Voilà!
- Styling Cue: Place a single, small coffee cup doodle in the corner for an understated nod to your favorite beverage.
15. The Spine of a Book

- Best For: A clever, subtle design for any bibliophile.
- Key Consideration: Use painter’s tape to create the crisp rectangle of the book’s spine.
- Pro-Tip: Paint the “spine” a solid color, then use a fine-tip pen to add a fictional (or favorite) title and author.
- Styling Cue: Paint a stack of 3-5 colorful book spines at the bottom of the bag to create a “shelf” of your favorite reads.
Creative Techniques
16. The Splatter Paint Bag

- Best For: Expressive painters who love a bit of controlled chaos.
- Key Consideration: This gets messy! Do this outside and wear old clothes.
- Pro-Tip: Water down your fabric paint slightly. Load up a brush and flick your wrist towards the bag to create dynamic splatters and drips.
- Styling Cue: A black tote with neon and white splatters has a cool, 80s-inspired artistic vibe.
17. The Sponge Stamp Shapes

- Best For: Creating repeating patterns with a cool, textured effect.
- Key Consideration: Use a household sponge and cut it into simple shapes like hearts, stars, or triangles.
- Pro-Tip: Use the sponge relatively dry (dampened, not soaked with paint) to get a rustic, slightly faded stamp impression.
- Styling Cue: A pattern of stamped triangles in a few complementary colors looks modern and geometric.
18. The Ombre Dip-Dye

- Best For: A beautiful, watercolor-like effect that looks incredibly professional.
- Key Consideration: The fabric must be damp for the color to bleed and blend properly.
- Pro-Tip: Water down your fabric paint in a container. Dip the bottom of the damp bag into the paint, then slowly pull it out. The color will naturally creep up the fibers and create a gradient.
- Styling Cue: A dip-dye in a serene ocean blue is perfect for a breezy, beach-ready bag.
19. The Finger-Painted Flowers
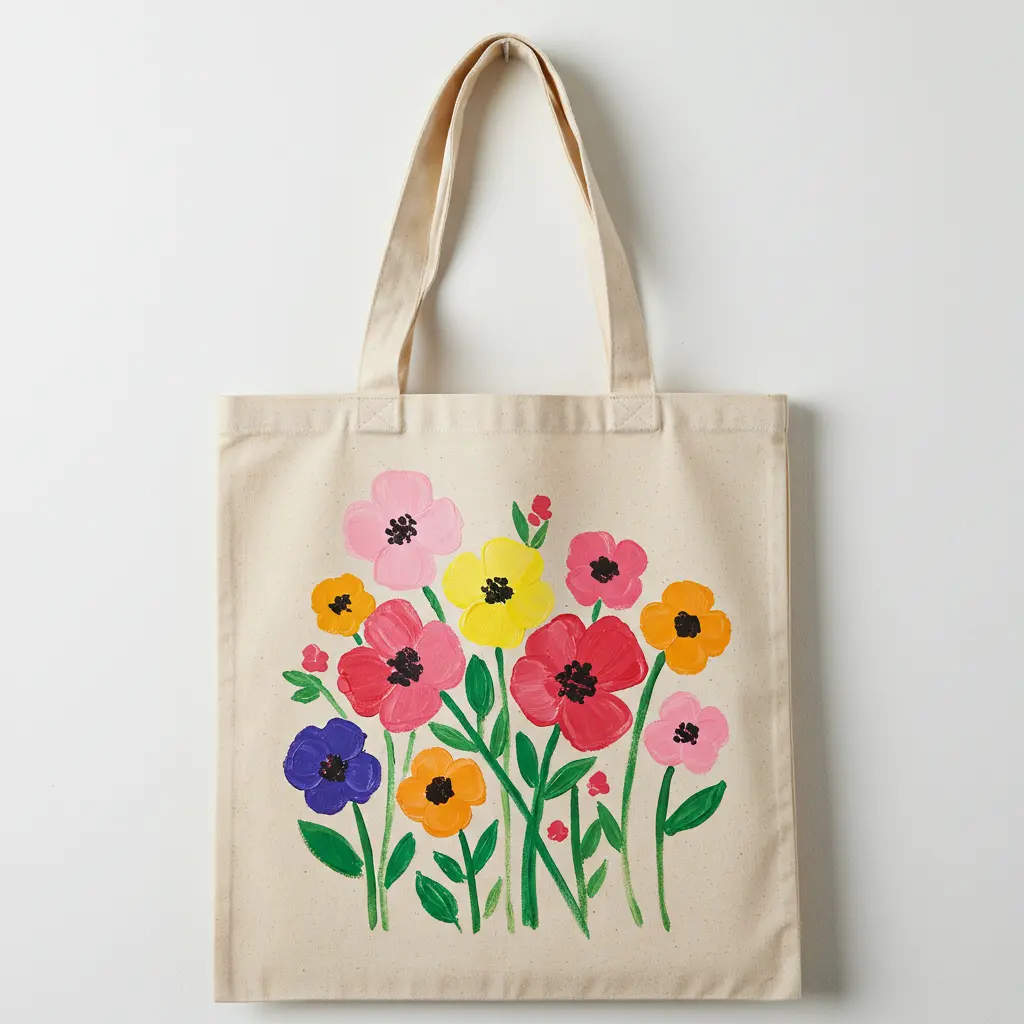
- Best For: A truly handmade, tactile project that’s fun for all ages.
- Key Consideration: Keep a damp cloth nearby to clean your fingers between colors.
- Pro-Tip: Use your fingertip to dot a circle of petals, then use a different finger (or clean one) to dot a contrasting center. It’s that easy.
- Styling Cue: Create a whole field of colorful, impressionistic wildflowers across the bottom of the bag.
20. The Doodle Grid
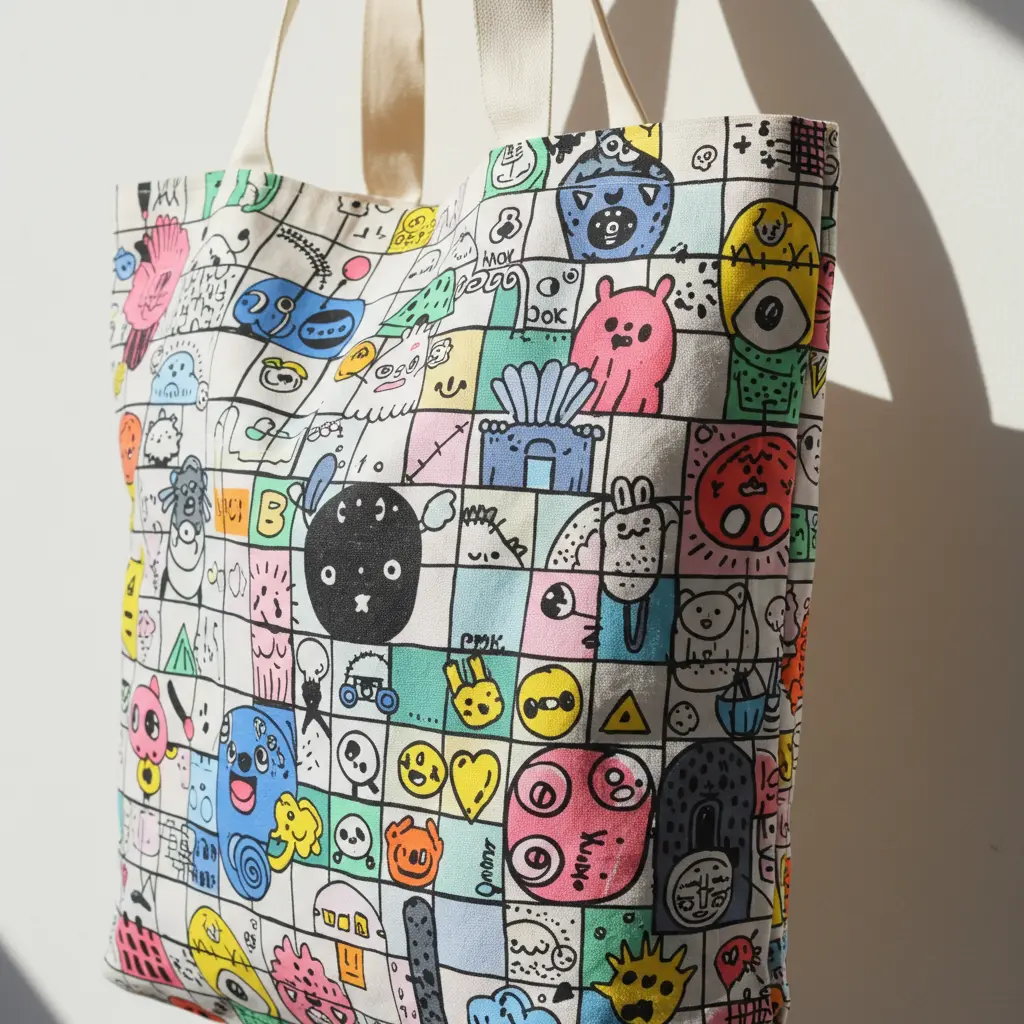
- Best For: Anyone who loves to draw but feels intimidated by a big blank canvas.
- Key Consideration: Use a ruler and pencil to draw a light grid (e.g., 3×4 squares) on your bag.
- Pro-Tip: Fill each square with a different, simple black-and-white pattern: stripes, dots, squiggles, checkerboards, etc. It’s like a sampler of your creativity.
- Styling Cue: This bold, graphic design makes a major statement and shows off your artistic flair.
The Practical Stuff: Prep, Paint & Care
- Prep is Everything: Pre-wash and iron your tote to remove sizing. Most importantly, slide a piece of cardboard inside the bag. This is non-negotiable; it prevents paint from bleeding through to the other side.
- Choose Your Paint: Use paints specifically made for fabric. They are designed to be flexible and permanent. You can also use regular acrylic paint mixed with a “textile medium” (available at craft stores).
- The All-Important Heat Set: This is the crucial final step! Once the paint is completely dry (wait 24 hours), turn the bag inside out and iron it on a high setting (no steam). This permanently sets the paint, making it washable.
- Caring for Your Creation: Turn the bag inside out and wash on a gentle, cold cycle. Tumble dry low or hang to dry to preserve your masterpiece for as long as possible.
A Few Common Missteps (And How to Avoid Them)
- Forgetting the Cardboard: This will result in a painted-shut bag or a messy design on the back.
- Using Too Much Water: Adding too much water to your paint will cause it to feather and bleed into the fabric fibers.
- Not Heat Setting: Your beautiful design will wash away in the laundry. Don’t skip this step!
- Overcomplicating It: The most charming bags are often the simplest. Choose an easy design and execute it well.
Conclusion: Your Wardrobe’s Next Act
And just like that, you’re no longer just looking at a tote bag you’re looking at a world of possibilities. You have the ideas, the inspiration, and the know-how to create a custom accessory that’s functional, stylish, and a true reflection of you.
This isn’t just about making a bag; it’s about making a statement and carrying a little piece of your own art with you wherever you go.
It all starts with a single choice. Pick a design that made you smile, and take the first small brushstroke. You’ve got this.
