Is your garden just a collection of plants? Is your patio a perfectly nice, but “painfully silent,” space that’s missing that final layer of magic? You’re in the right place to change that, and you won’t believe how easy it is.
A DIY fountain isn’t just an ornament; it’s the “beating heart” of your outdoor space, a gateway to instant tranquility. It’s the upgrade your friends will be talking about all season.
This is your creative playbook for transforming simple materials into a stunning water feature that feels deeply, personally you. Forget expensive contractors and complicated plumbing.
We’ll explore breathtaking designs, decode the secrets to a professional finish, and walk through the practical steps to bring your vision to life. This is the glow-up your garden has been begging for.
By the end, you’ll see an old flowerpot not as clutter, but as a cascading oasis waiting to happen.
Before You Begin: The Oasis-Creator’s Mindset
The most impressive fountains start with crafting a vibe, not just moving water. Before you begin, let’s lay the groundwork for a design that is clever, cohesive, and “shockingly simple” to create. The goal is to set a mood, not just fill a space.
The Secrets of Style: Simple Rules for a Stunning Fountain
“DIY fountain” doesn’t have to mean “a leaky bucket.” These simple secrets are what elevate a weekend craft into a professional-looking piece of landscape art. Everyone will ask where you bought it.
The Sound is Everything: A fountain’s number one job is to sound amazing. Want a gentle trickle? Let water flow over a smooth, rounded surface. Craving a louder, more dramatic splash? Have the water fall from a greater height into a deeper basin. “This is your soundscape”.
Pump Power is Non-Negotiable: The pump is the heart of your fountain. Don’t just grab the cheapest one. A solar-powered pump is amazing for placing your fountain anywhere the sun shines, with zero wiring. An electric pump offers more consistent power for larger or shaded projects. Always choose a pump slightly more powerful than you think you need.
Clarity is Your Secret Weapon: Nothing ruins the vibe faster than green, murky water. To keep it crystal clear, add a few drops of a fountain algaecide every few weeks. For a natural approach, a small piece of copper pipe in the basin can also help deter algae growth.
Lighting Changes the Game: This is the hack that separates the amateurs from the pros. A simple, waterproof LED spotlight placed in the basin and aimed up at the flowing water will make your fountain look “absolutely magical” at night. It’s a small cost for a massive impact.
What’s the Real Cost? A No-Fuss Budget Breakdown
| The Approach | Estimated Cost | What Your Money Buys | The Little Extras (Don’t Skip These!) |
| The Upcycler’s Dream | $20 – $40 | • A small solar or electric fountain pump • Tubing & waterproof sealant • Using pots, cans, or bowls you already own | • A good drill with a ceramic bit • A bag of decorative river rocks • A bottle of fountain algaecide |
| The Hardware Store Haul | $50 – $100 | • A larger, more powerful pump • A new basin (like a large planter or tub) • New terracotta pots or a half-barrel | • Waterproof LED puck lights • A level to ensure it’s straight • Higher quality tubing |
| The Zen Landscaper | $100 – $200+ | • A high-end disappearing fountain kit • Large, unique stones or a custom basin • Premium materials like bamboo or copper | • A ground fault circuit interrupter (GFCI) outlet • Pond liner for custom builds • Professional-grade landscape adhesive |
The Design Menu: Finding Your Signature Garden Vibe
Here are the ingredients for your perfect DIY fountain. Each one comes with a breakdown to help you choose with confidence. You’re not just building a fountain; you’re choosing an aesthetic.
Natural & Rustic
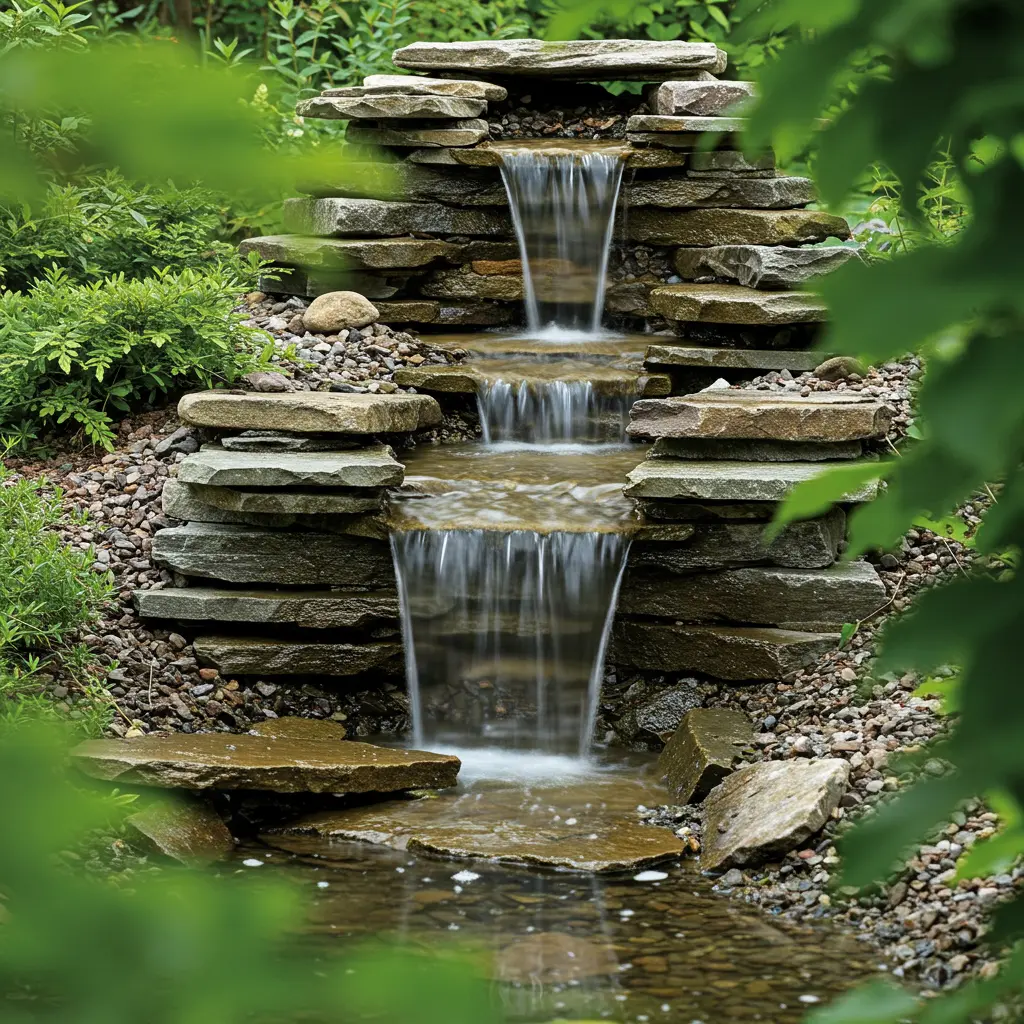
1. The Stacked Stone Fountain
Best For: Creating an organic, “straight-from-nature” look that blends seamlessly into any garden bed.
Pro-Tip: Choose flat, wide stones for the most stable stack. Drill a hole through the center of each one before stacking them over the pump’s tube. The secret to a professional look is using a hidden underground basin (a simple bucket or tub works perfectly) covered with a screen and pebbles.
Styling Cue: Surround the base with lush ferns, hostas, and moss. It will look like a natural spring that’s “always been there”.
2. The Upcycled Barrel Fountain
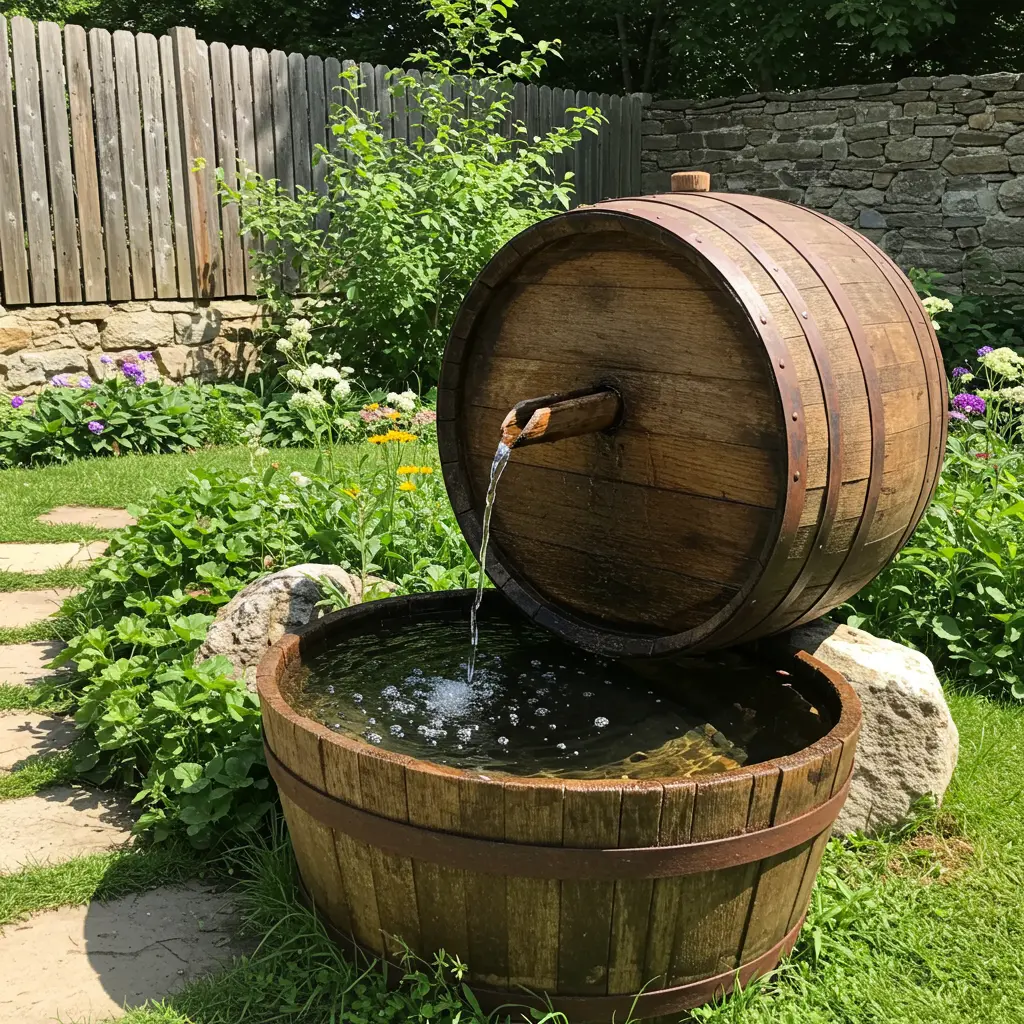
Best For: A high-impact, farmhouse-chic statement piece for a patio or deck corner.
Pro-Tip: Use a real half whiskey barrel for authentic character. Line the inside with a small pond liner to guarantee it’s waterproof and will last for years. Plant trailing flowers like creeping jenny around the edge to soften the look.
Styling Cue: Pair this with galvanized metal planters and a string of Edison bulb lights for the “ultimate rustic patio” vibe.
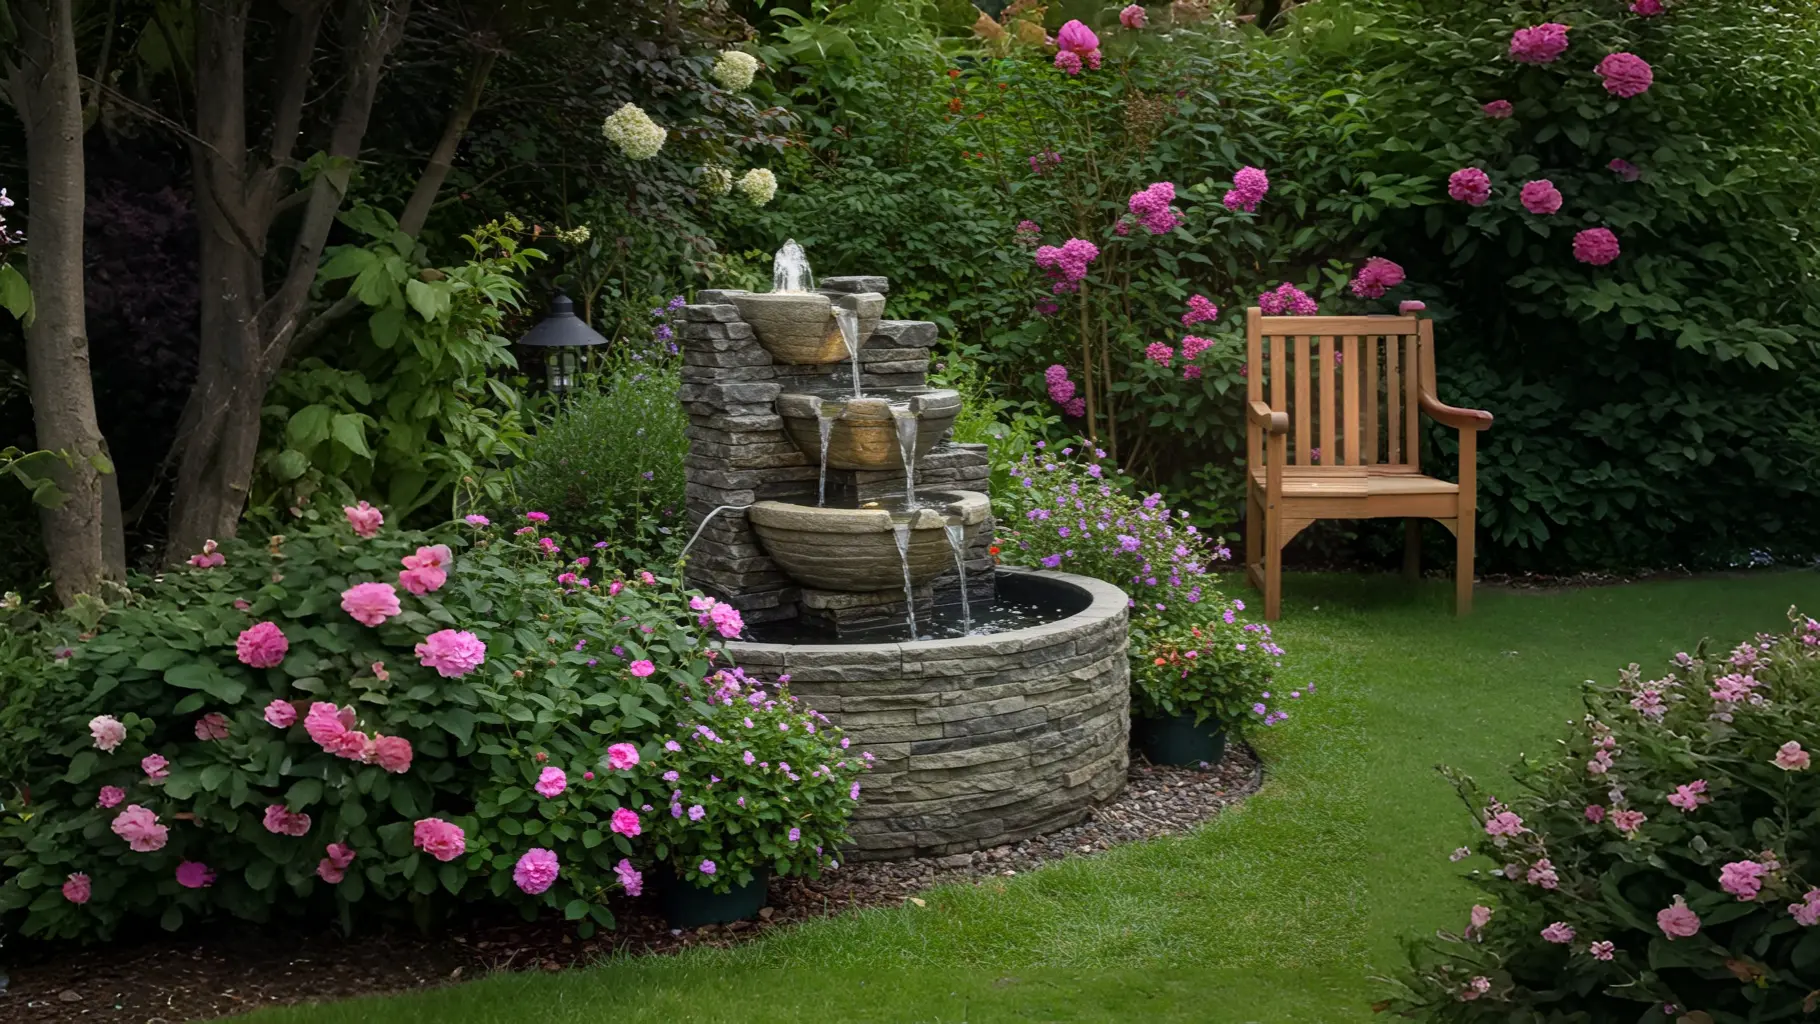
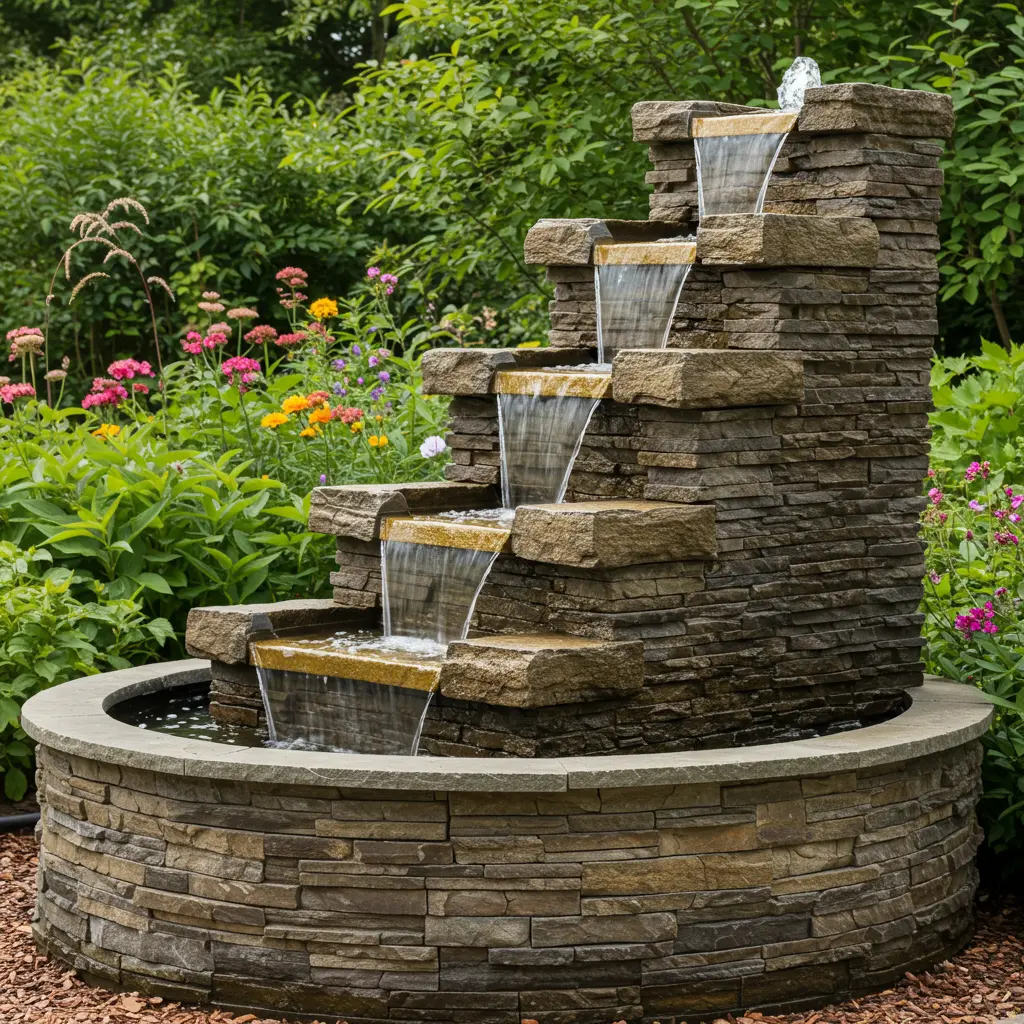
3. The Tiered Rock Waterfall
Best For: A more ambitious project that creates the dramatic sound and look of a real waterfall.
Pro-Tip: Create a gentle slope in your garden bed using packed soil. Cover it with a pond liner, and then strategically arrange flat rocks to create a series of small, cascading falls. Hide the tubing underneath the rocks, running from a basin at the bottom to the highest point.
Styling Cue: This is a showstopper. Make it the focal point of a backyard seating area, surrounded by ornamental grasses that will sway in the breeze.
Charming & Whimsical
4. The Recycled Watering Can Fountain
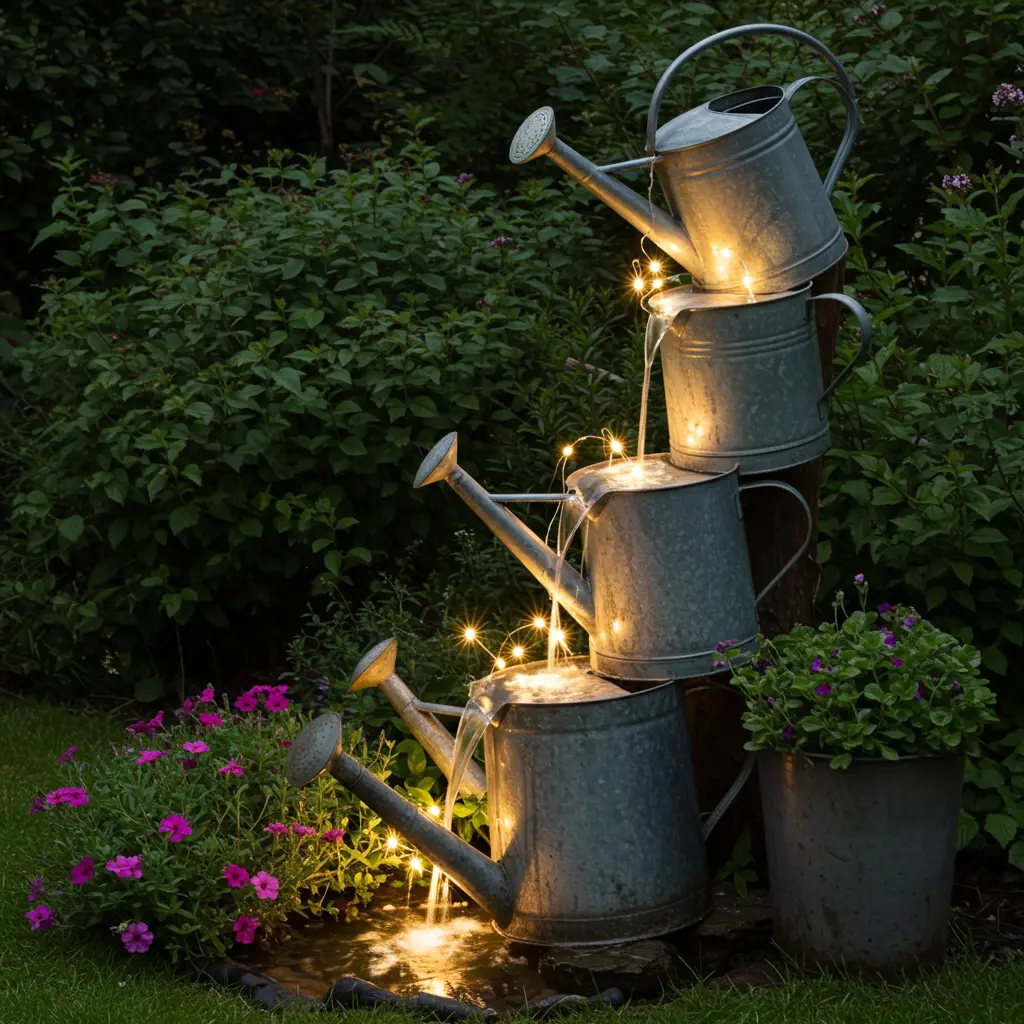
Best For: A playful, cottage-core accent for a small porch or flower garden.
Pro-Tip: Use several galvanized watering cans of different sizes. Mount them on a post or wall so they cascade into each other. For a constant “raining” effect, seal the holes in the spout and drill a single hole in the bottom for the water to pour from.
Styling Cue: Let a climbing clematis or morning glory vine grow up and around the display. Add a few solar-powered fairy lights for a touch of “nighttime magic”.
5. The Clay Pot Fountain
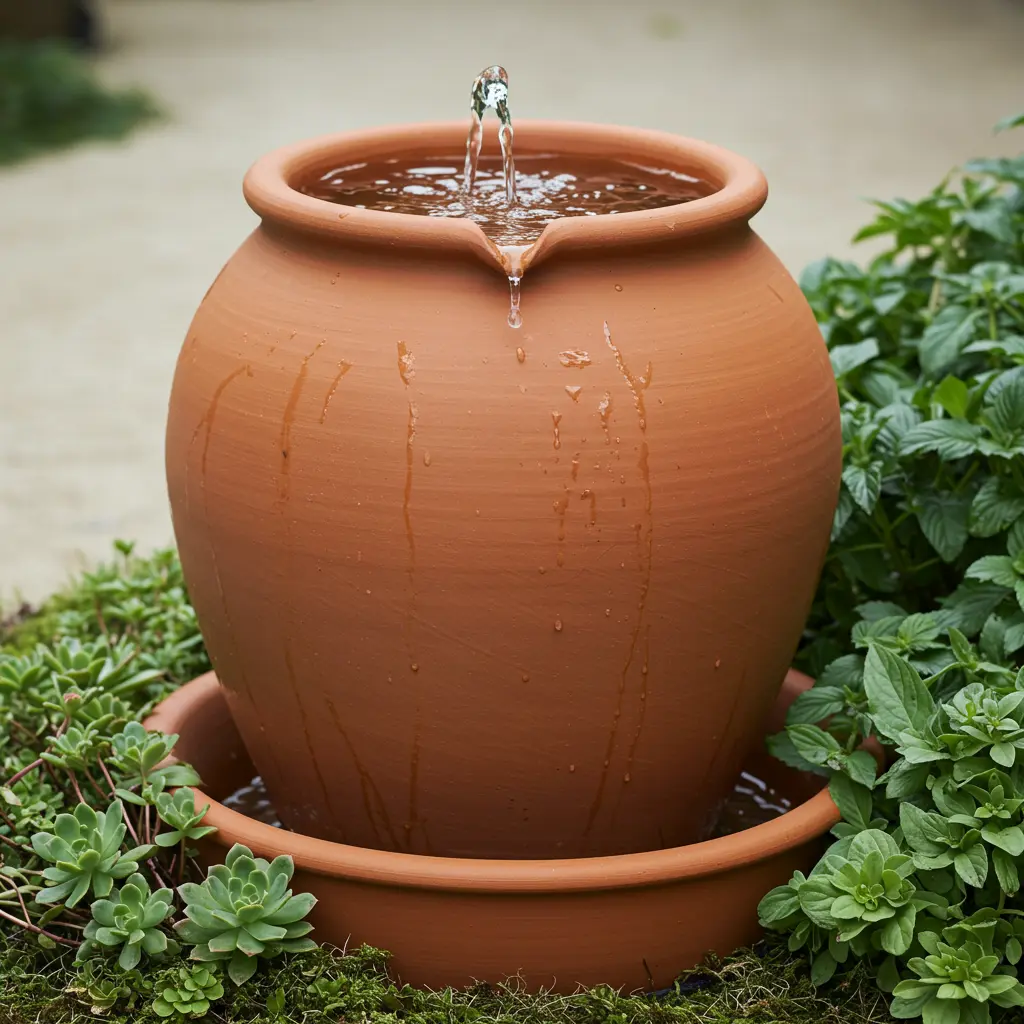
Best For: A classic, budget-friendly project with a timeless Mediterranean courtyard feel. This is the perfect beginner fountain.
Pro-Tip: Buy three terracotta pots in decreasing sizes. Plug the hole of the largest (your basin), then stack the others inside using bricks or small, overturned pots as risers. Drill a hole in the middle pots for the pump tube. It’s “easier than it looks” and the result is stunning.
Styling Cue: Place it on a sunny patio corner surrounded by pots of lavender, rosemary, and geraniums to complete the European aesthetic.
6. The DIY Teapot Fountain

Best For: A quirky, “Alice in Wonderland” conversation starter for a tea garden or breakfast nook.
Pro-Tip: The trick is the “endless pour.” Mount a teapot on a copper pipe that runs up through the center of a teacup and into the teapot’s base. The pipe is hidden by the stream of water, making it look like it’s floating and pouring forever.
Styling Cue: Set this up on a small table surrounded by pots of mint and chamomile. It’s an “unforgettable detail”.
Modern & Sleek
7. The Minimalist Bamboo Fountain
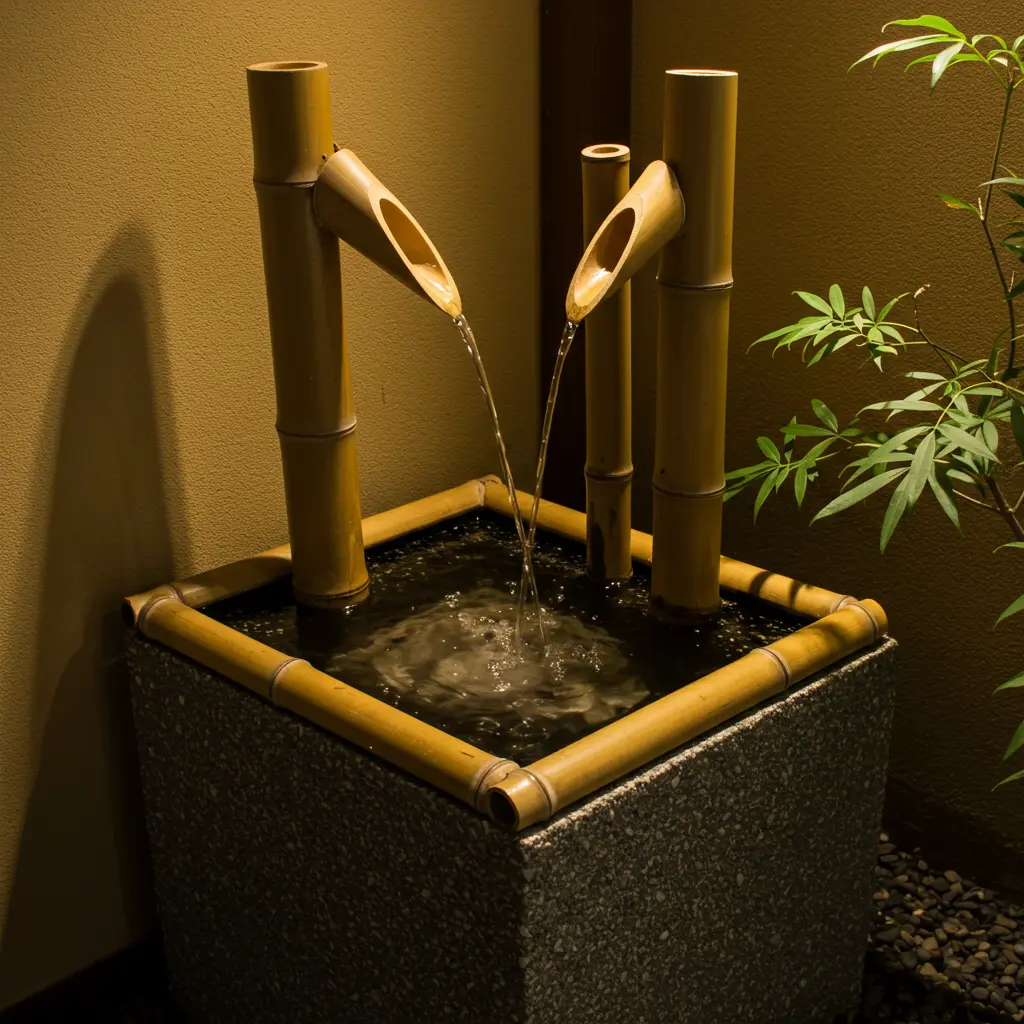
Best For: Creating a rhythmic, meditative sound in a small, modern space or balcony.
Pro-Tip: You can buy inexpensive bamboo fountain kits online, or make your own. The key is the “shishi-odoshi” or “deer-scarer” design, where a piece of bamboo slowly fills with water, then tips over to create a gentle “clack” sound. It’s incredibly calming.
Styling Cue: Place it in a simple ceramic bowl filled with smooth black stones. This is all about “less is more”.
8. The Solar-Powered Birdbath Fountain
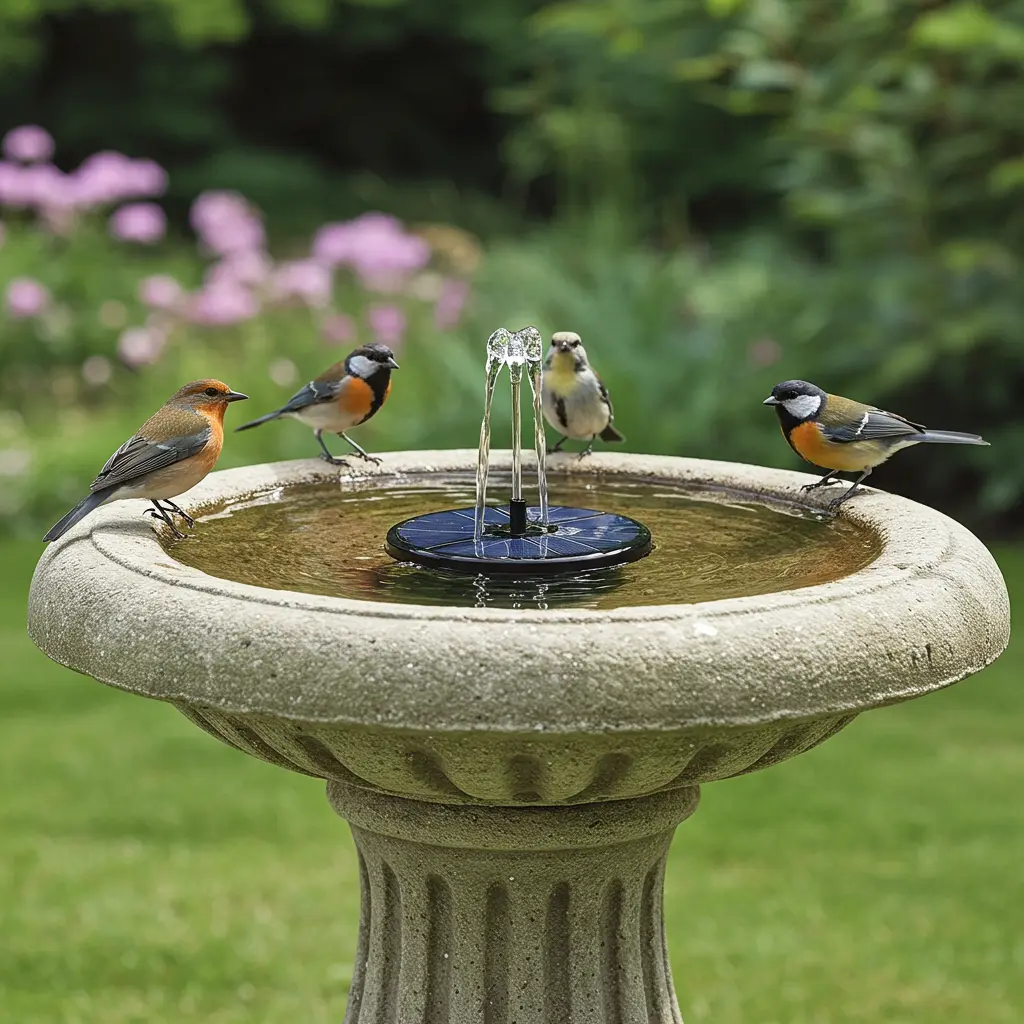
Best For: The absolute easiest, no-fuss way to add moving water to your yard in five minutes.
Pro-Tip: Don’t just drop the solar pump in. Add a layer of river stones or colorful sea glass to the bottom of your birdbath first. This will anchor the pump and elevate the look from a plastic gadget to a “thoughtful design element”.
Styling Cue: Position the birdbath where you can see it from a window. You’ll get endless enjoyment watching the birds “splash and play”.
9. The Glass Bowl Fountain
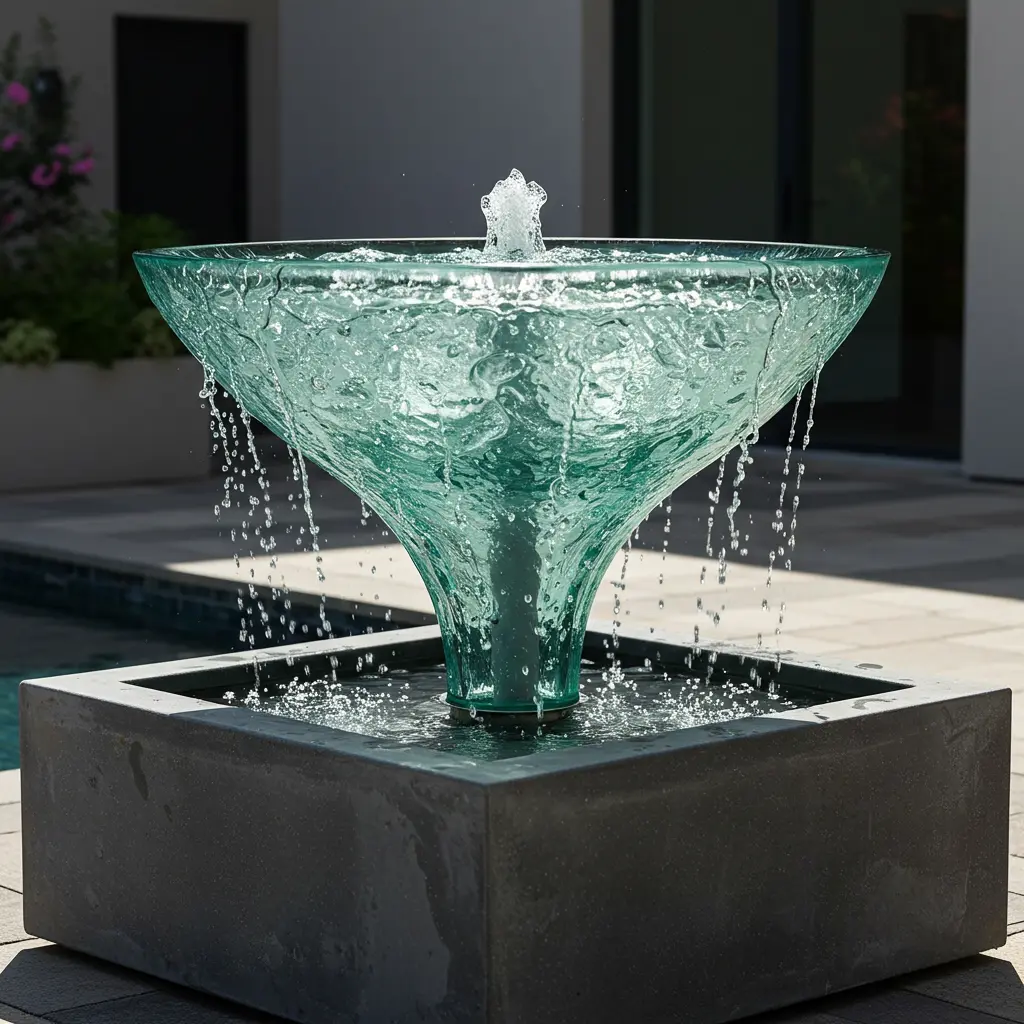
Best For: A chic, artistic centerpiece for a modern patio table or indoor sunroom.
Pro-Tip: Choose a thick, heavy glass bowl. The magic is in what you put inside. Instead of plain rocks, try filling the bowl with colorful glass beads, polished stones, or even waterproof LED lights to make the whole thing glow.
Styling Cue: Place it on a coffee table on your covered patio. The sound of the water will be a “perfect companion” for your morning coffee or evening cocktail.
10. The Rock Basin Fountain
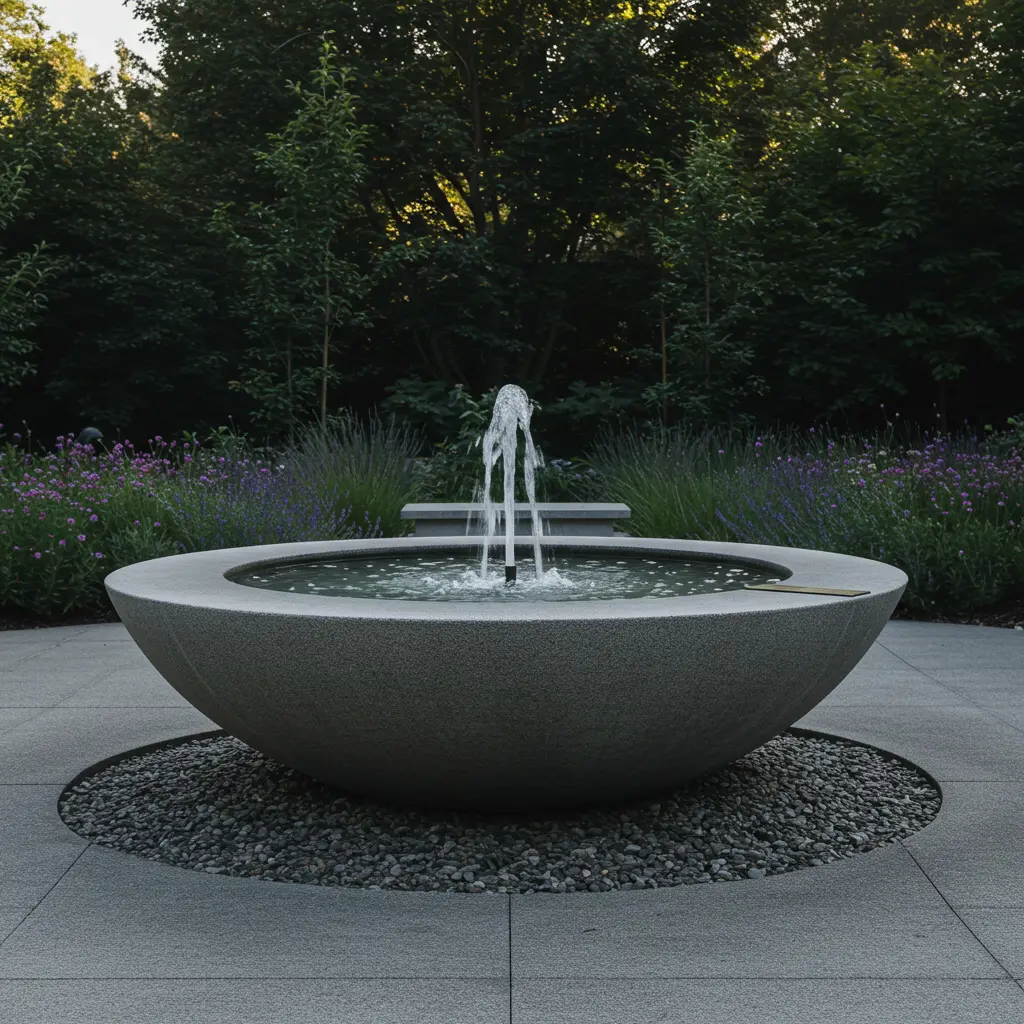
Best For: A minimalist, modern, and “impossibly chic” water feature that whispers instead of shouts.
Pro-Tip: Find a large, interesting rock with a natural depression, or use a masonry bit to carefully carve one out. Place a very small pump in the basin below, with a tube that just barely pokes out in your rock’s bowl, creating a gentle, bubbling effect.
Styling Cue: Place this in a bed of black river rocks or surrounded by minimalist succulents for a “high-design, zen garden” feel.
Conclusion: Your Personal Oasis Awaits
And just like that, you’re no longer just looking at a boring corner of your yard you’re looking at a world of creative, tranquil possibilities. You have the ideas, the insider tips, and the know-how to create a stunning DIY fountain that looks expensive but is shockingly affordable. This isn’t just about a weekend project; it’s about “transforming your space” and creating a personal retreat.
It all starts with a single choice. Pick the idea that made you say “I need that,” grab a fountain pump, and take the first step. The soothing sounds of your own private oasis are closer than you think.
You’ve got this.
