Are your walls screaming for personality? A blank space over the sofa that feels more like an empty pause than a statement? You’re in the right place to change that.
A canvas shouldn’t just be a decoration to fill a void; it should be the heart of a room’s character, a backdrop for your life’s memories, and a reflection of your unique creativity.
This is your creative playbook for transforming that blank canvas into a masterpiece that’s not only beautiful and impressive but feels deeply, personally you.
We’ll explore mesmerizing techniques, decode the secrets of a professional finish, and walk through the practical steps to bring your vision to life.
By the end, you’ll see that blank canvas not as an intimidating challenge, but as a story waiting for you to tell it.
Before You Begin: Prepping Your Masterpiece
The most beautiful art starts with a little bit of preparation, not just a spontaneous splash of paint. Before you open a single tube, let’s lay the groundwork for a design that will look amazing and last for years.
The Secrets of Style: Simple Rules for a Stunning Look
Art theory sounds complex, but it’s really just about what makes a piece feel right on the wall. Here are a few simple secrets:
- Prime Your Canvas: Even if your canvas says it’s “pre-primed,” applying one or two fresh coats of gesso and letting it dry will create a far superior, less absorbent surface. Your paint will glide on more smoothly and the colors will be more vibrant.
- Plan Your Composition: A great painting has balance. Decide your focal point before you start. Will it be centered for a calm, formal feel? Or will you use the “rule of thirds” (placing the main interest off-center) for a more dynamic, modern look?
- The 60-30-10 Color Secret: This designer’s foolproof recipe for a harmonious color palette is your best friend.
- 60% is your main background color. This sets the overall mood of the piece.
- 30% is your secondary color. This supports the main color and creates interest.
- 10% is your accent color. This is your “wow” factor a pop of a contrasting, vibrant color that makes the whole painting sing.
- Know When to Stop: This is the hardest rule for any artist. Sometimes, one more brushstroke can be one too many. Step back from your painting often. If you love it, it’s done. Overworking a piece can muddy your colors and kill the initial energy.
What’s the Real Cost? A No-Fuss Budget Breakdown
| The Approach | Estimated Cost | What Your Money Buys | The Little Extras (Don’t Skip These!) |
| The First-Timer’s Kit | $25 – $75 | • A multi-pack of student-grade canvases • A basic set of acrylic craft paints • A starter pack of assorted brushes | • A bottle of Gesso for priming • A roll of painter’s tape • A disposable paint palette |
| The Hobbyist’s Studio | $80 – $250 | • Higher quality, gallery-wrapped canvases • Artist-grade heavy body or fluid acrylics • A pouring medium or modeling paste | • A sturdy tabletop easel • A palette knife set • A spray varnish for sealing |
| The Serious Artist’s Setup | $300 – $1,000+ | • Large-scale, professional-grade canvases • A full set of premium artist paints (like Golden or Liquitex) • Specialty materials like gold leaf & alcohol inks | • A professional standing easel • Custom framing costs • A set of high-quality brushes |
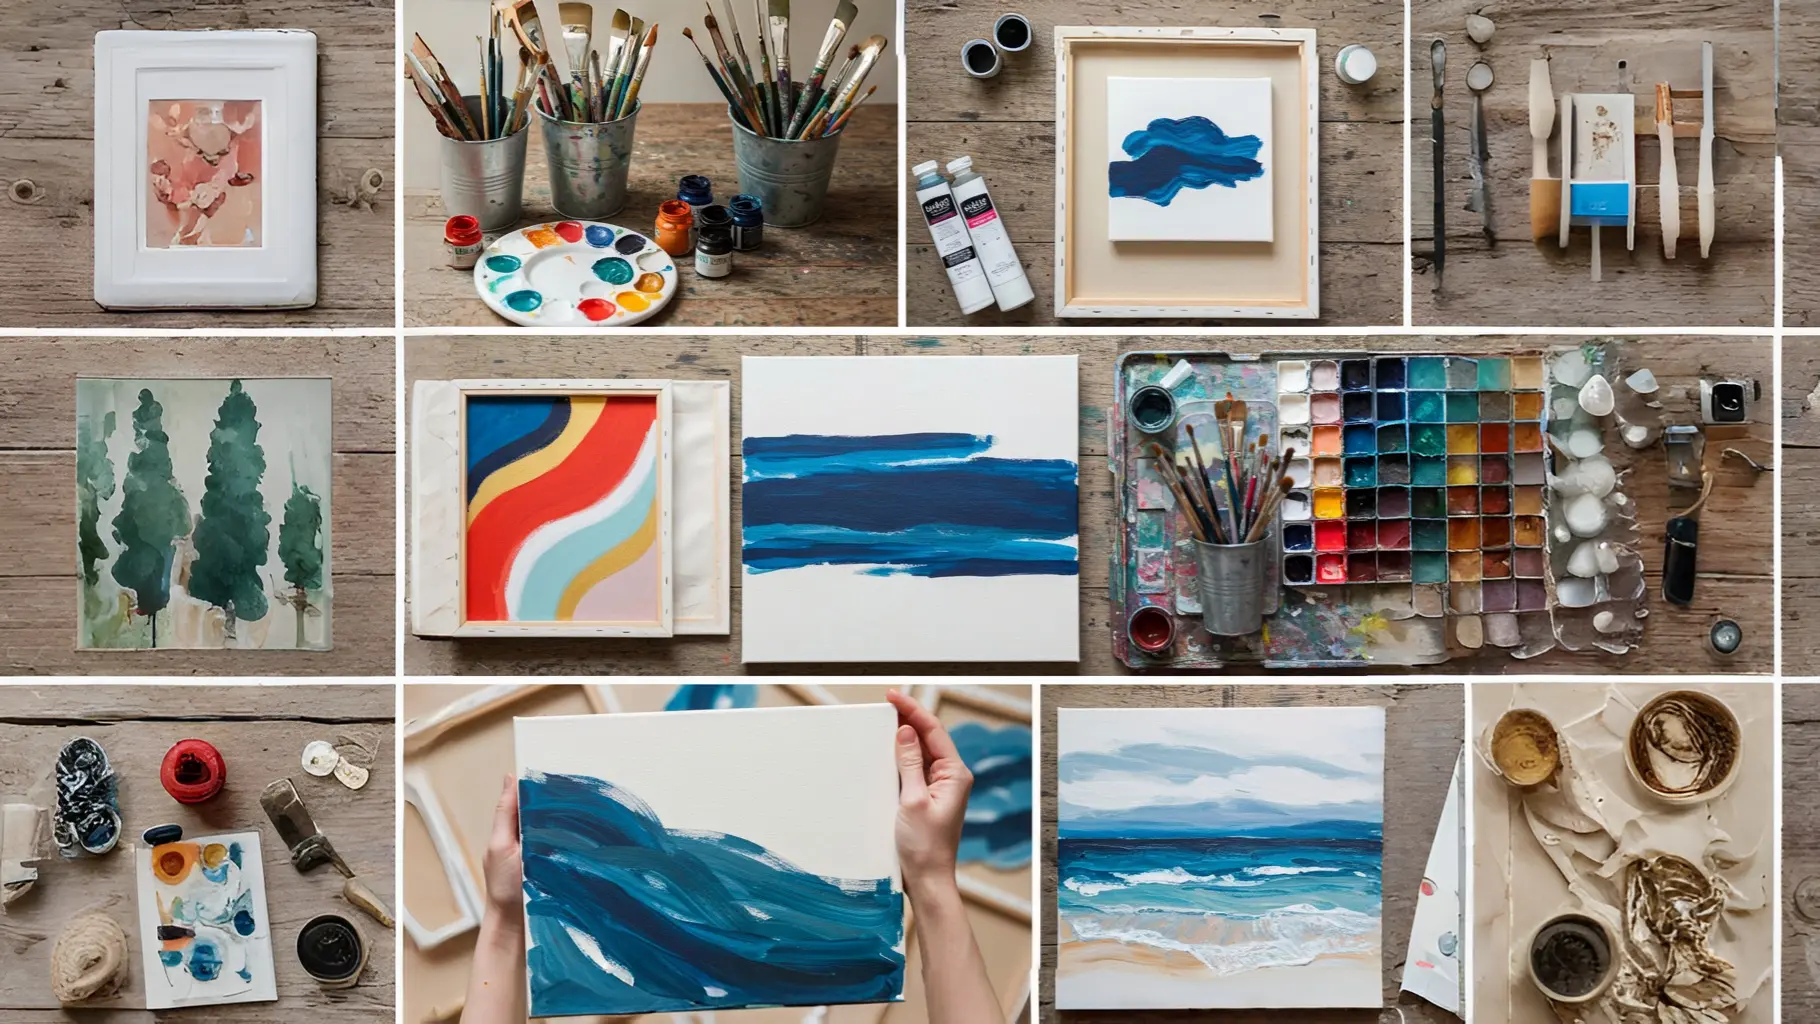
The Design Menu: Finding Your Signature Artistic Style
Here are the ingredients for your perfect canvas. Each one comes with a breakdown to help you create with confidence.
1. Acrylic Pouring Magic
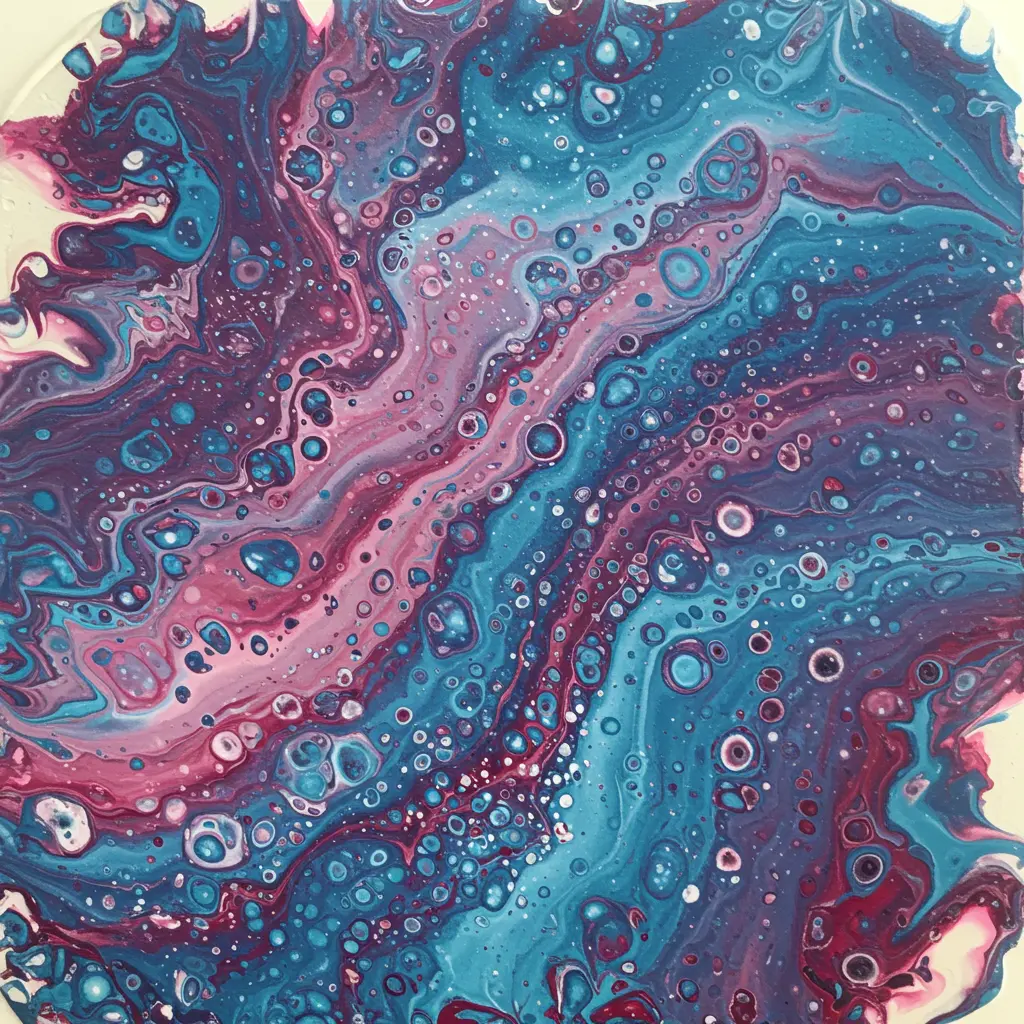
Best For: Creating mesmerizing, one-of-a-kind abstract art with zero brush skills required.
- Key Consideration: This technique is beautifully unpredictable, which is part of the fun! Don’t try to control it too much. Embrace the chaos and let the paint flow where it wants to.
- Pro-Tip: Elevate your canvas off your work surface by placing it on four disposable cups (one under each corner). This allows the excess paint to drip off the sides freely, creating beautiful edges.
- Styling Cue: A large-scale acrylic pour is the perfect statement piece to hang over a modern, minimalist sofa or credenza.
2. Palette Knife Texturing
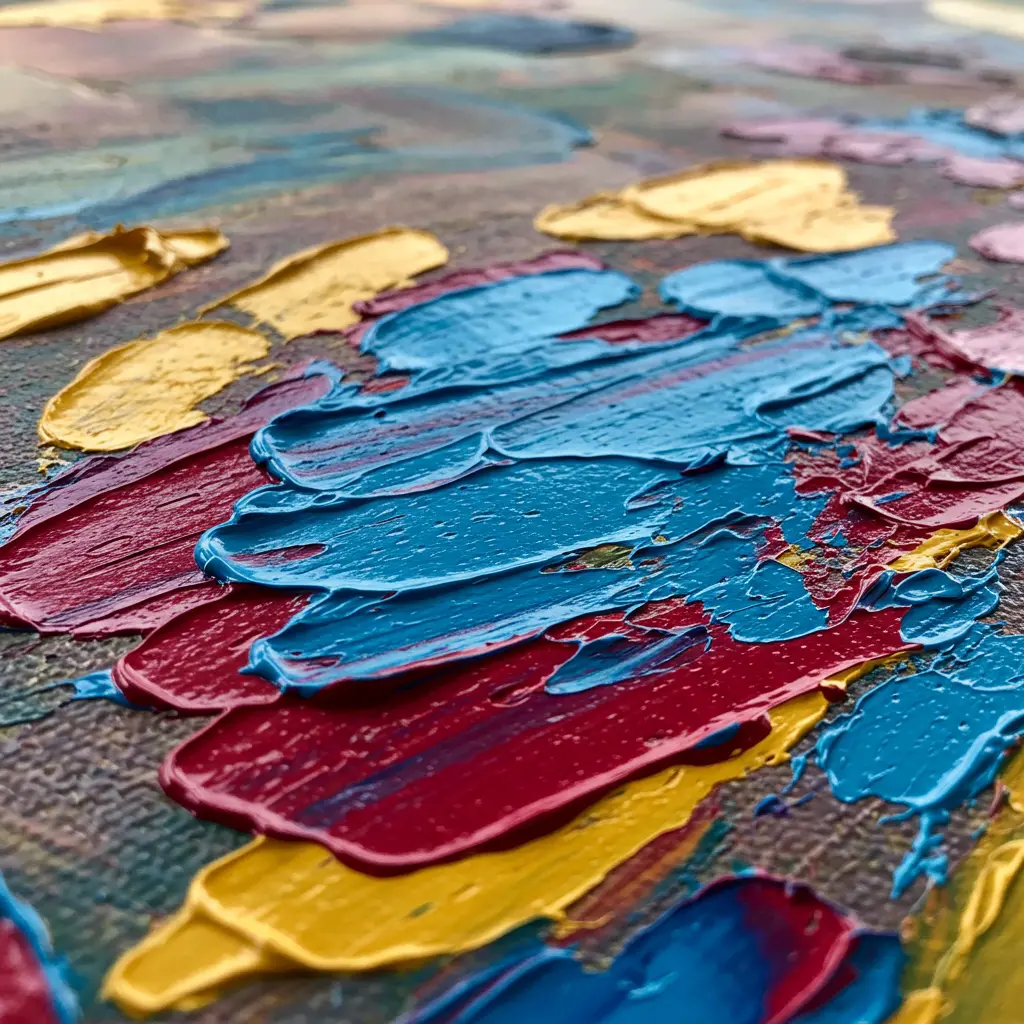
Best For: Adding bold, sculptural dimension and a dramatic, expressive feel to your art.
- Key Consideration: You need thick, “heavy body” acrylic paint for this. Fluid or craft paint won’t hold the stiff peaks and textures created by the knife.
- Pro-Tip: Don’t “over-mix” your colors on the canvas. Scrape the paint on and let the thick, unblended strokes create interest. The beauty is in the raw, immediate texture.
- Styling Cue: The thick texture begs to be seen up close. Hang it in an entryway or hallway where people will walk right past it.
3. Tape-Resist Geometry
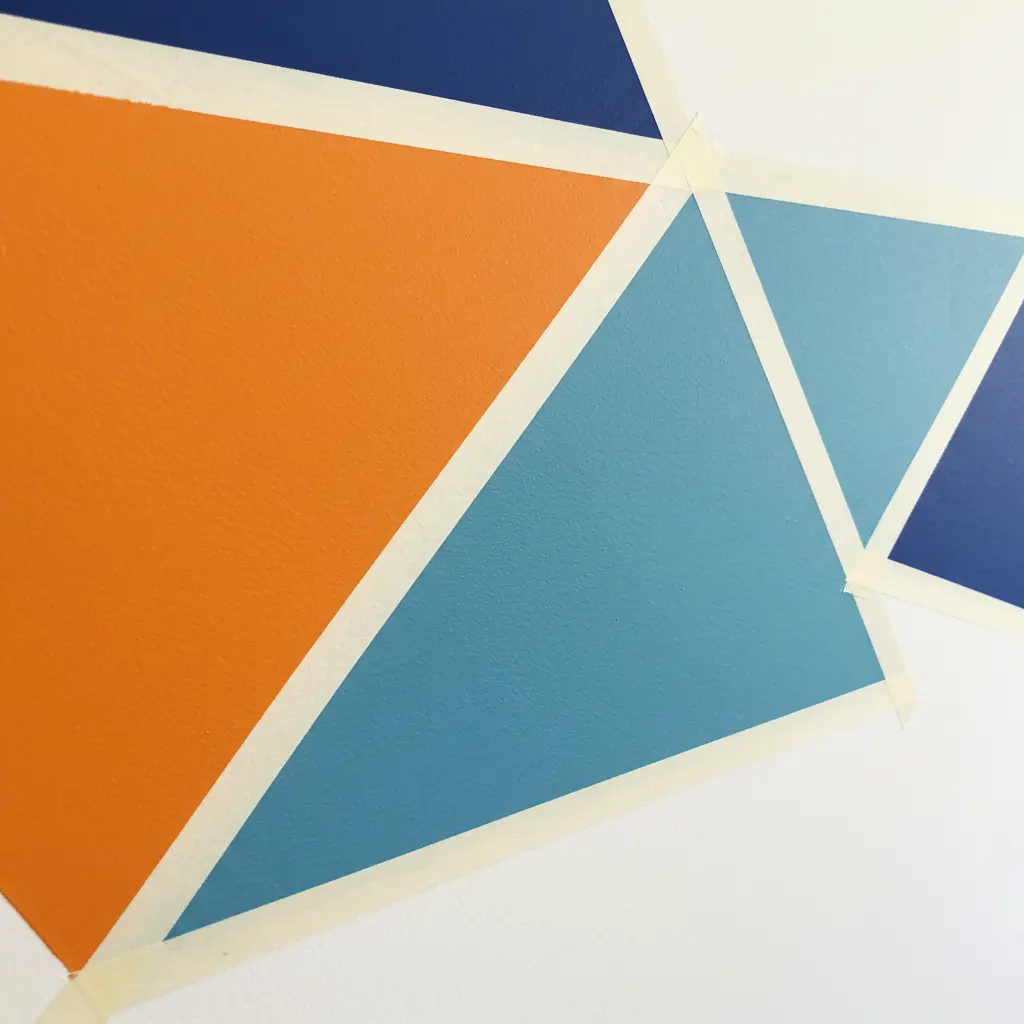
Best For: Lovers of crisp, clean lines, modern design, and graphic patterns.
- Key Consideration: Use high-quality painter’s tape (like FrogTape) for the sharpest lines. Cheap masking tape is more likely to let paint bleed underneath.
- Pro-Tip: After applying your tape, paint a thin layer of your background color or a clear medium (like Mod Podge) over the tape’s edge. This seals the edge, so any bleed-through will be invisible. Then, paint your main color over the top.
- Styling Cue: A geometric piece with metallic accents looks incredibly chic and high-end in a home office or dining room.
4. Splatter & Drip Art
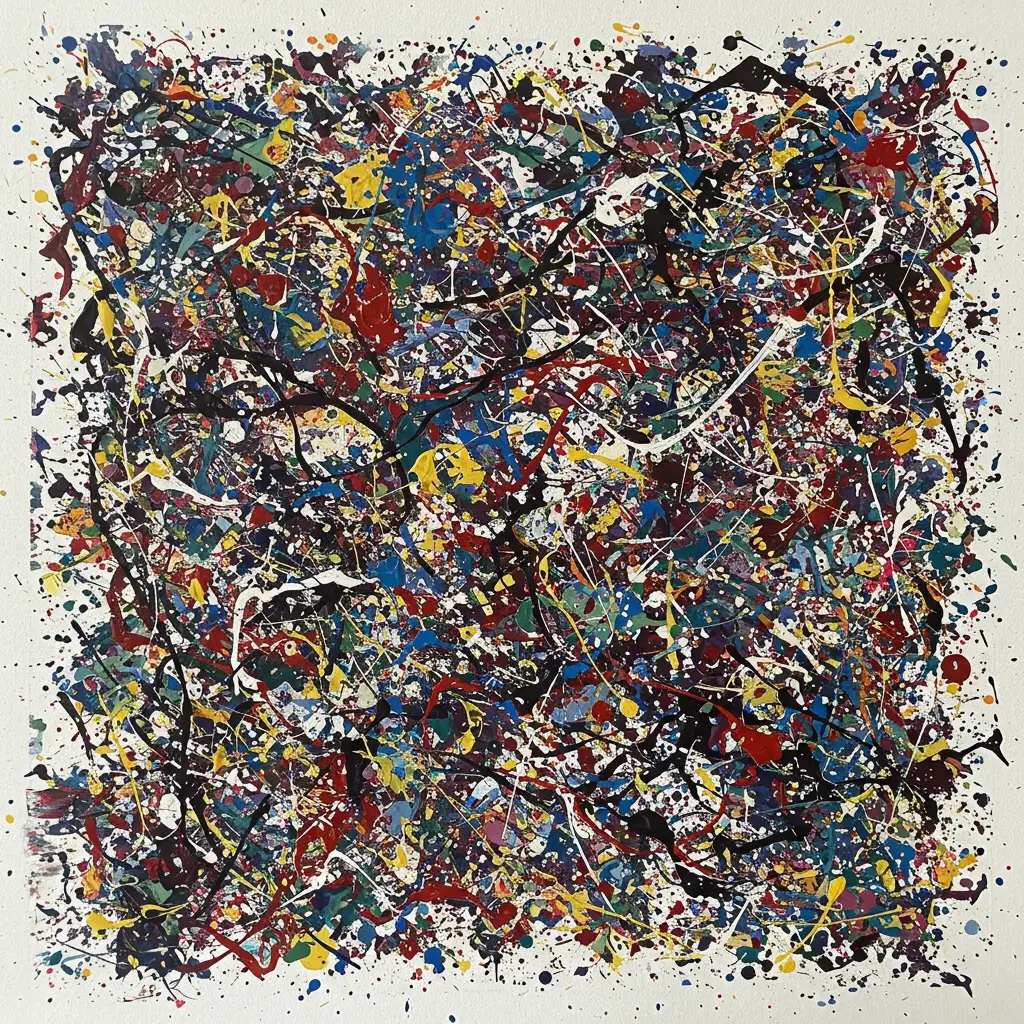
Best For: Releasing creative energy and crafting a dynamic, free-spirited masterpiece.
- Key Consideration: This gets messy! Work outside or cover your entire work area (and floor!) with a drop cloth or old sheets.
- Pro-Tip: The consistency of your paint determines the effect. Thicker paint creates fat, round drips. Thinner, more watery paint creates fine, energetic splatters when flicked from a stiff brush.
- Styling Cue: A large-scale splatter painting brings an incredible dose of energy and color to a neutral, minimalist room.
5. Galaxy & Nebula Art

Best For: Dreamers, space lovers, and creating an ethereal, otherworldly piece for a bedroom or den.
- Key Materials: Acrylic paints (deep blue, purple, black, pink, white), a sponge, an old toothbrush.
- Pro-Tip: Use a natural sea sponge to dab and blend the nebula colors. It creates a much more organic, cloud-like texture than a standard kitchen sponge.
- Styling Cue: The perfect piece for a bedroom, a home theater, or a kid’s room to inspire wonder.
6. Reverse Stencil Trick
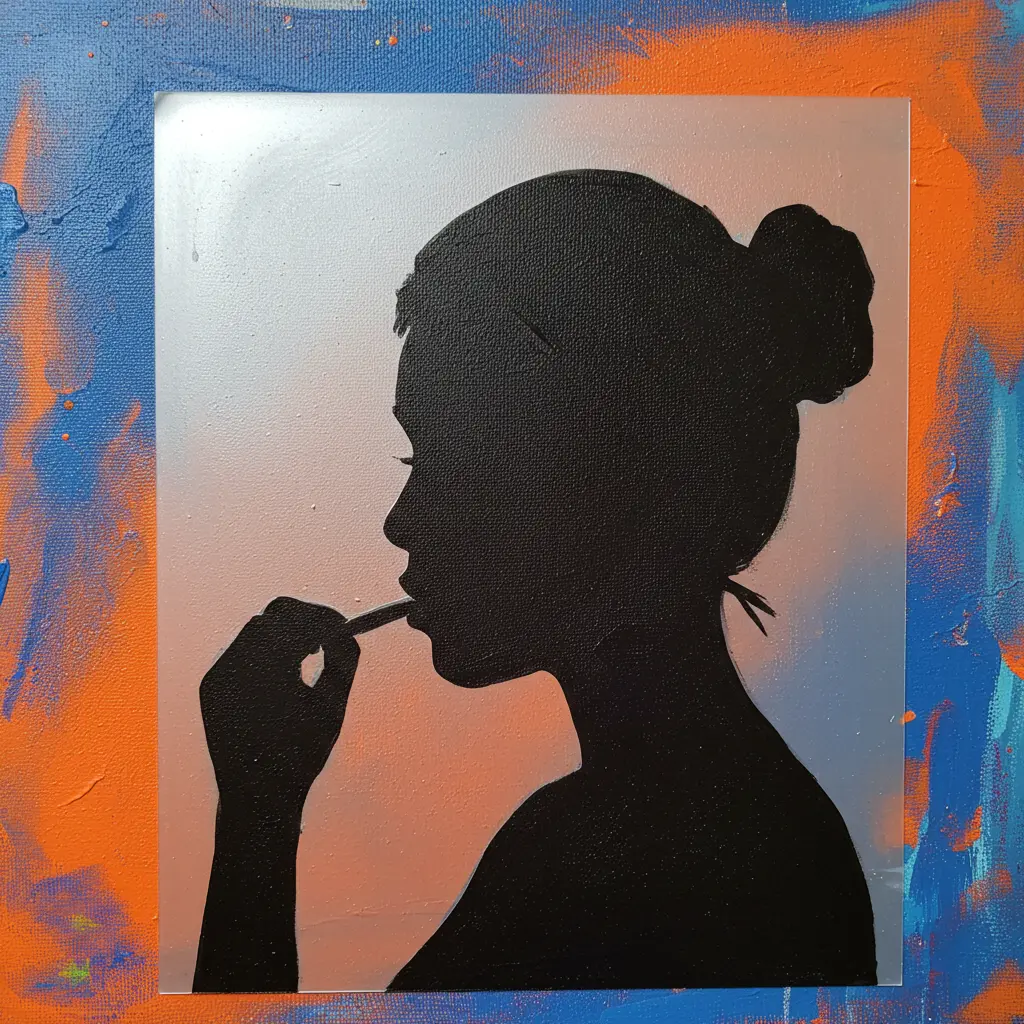
Best For: Creating a bold, graphic silhouette with minimal effort and high impact.
- Key Materials: A large piece of contact paper or vinyl, a craft knife.
- Pro-Tip: Draw your shape (a leaf, an animal, a letter) onto the contact paper, cut it out, and stick it firmly to your canvas. Paint your background over the entire canvas and the stencil. Once dry, carefully peel off the contact paper to reveal your perfectly clean silhouette.
- Styling Cue: A large-scale botanical silhouette looks stunning in a sunroom or a bathroom.
7. Newspaper & Book Page Collage
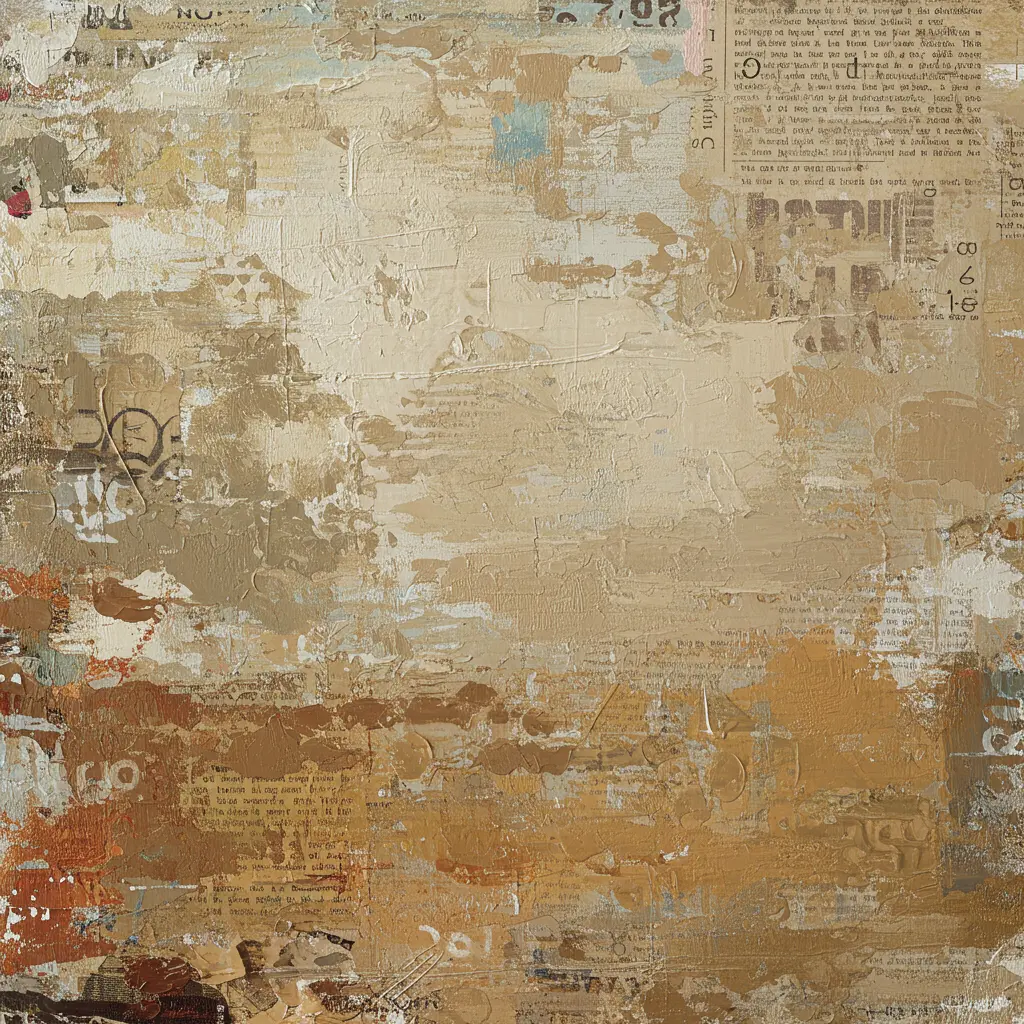
Best For: Adding a layer of vintage-inspired texture and hidden meaning to your background.
- Key Consideration: The text on the pages will likely be visible through the paint. Choose pages from a book or newspaper that are meaningful to you.
- Pro-Tip: Use a gel medium or Mod Podge to adhere the pages to the canvas. Apply a layer underneath the paper and another on top to seal it completely before you start painting.
- Styling Cue: This technique adds a rich, intellectual, and historic feel, perfect for a library, study, or reading nook.
8. Glow-in-the-Dark Paint Fun
Best For: Creating a magical piece of art that has a secret second life when the lights go out.
- Key Consideration: Glow-in-the-dark paint is often nearly transparent in the light. It’s best used as a top layer over an already-completed painting.
- Pro-Tip: Apply the glow paint most heavily to the lightest areas of your painting (like stars in a galaxy or the white caps of waves). This is where it will be most visible and “charge” the best.
- Styling Cue: The ultimate surprise for a child’s bedroom or a fun, unexpected twist in a home theater room.
9. Bubble Wrap Stamping

Best For: A fun, easy, and almost foolproof way to create a uniform, honeycomb-like texture.
- Key Materials: A sheet of bubble wrap, acrylic paint.
- Pro-Tip: Don’t press too hard! A light, even pressure will transfer the bubble pattern perfectly. Pressing too hard will just create a smudgy mess.
- Styling Cue: Use this technique with blue and green paints to create a beautiful, abstract “mermaid scale” or water-like background.
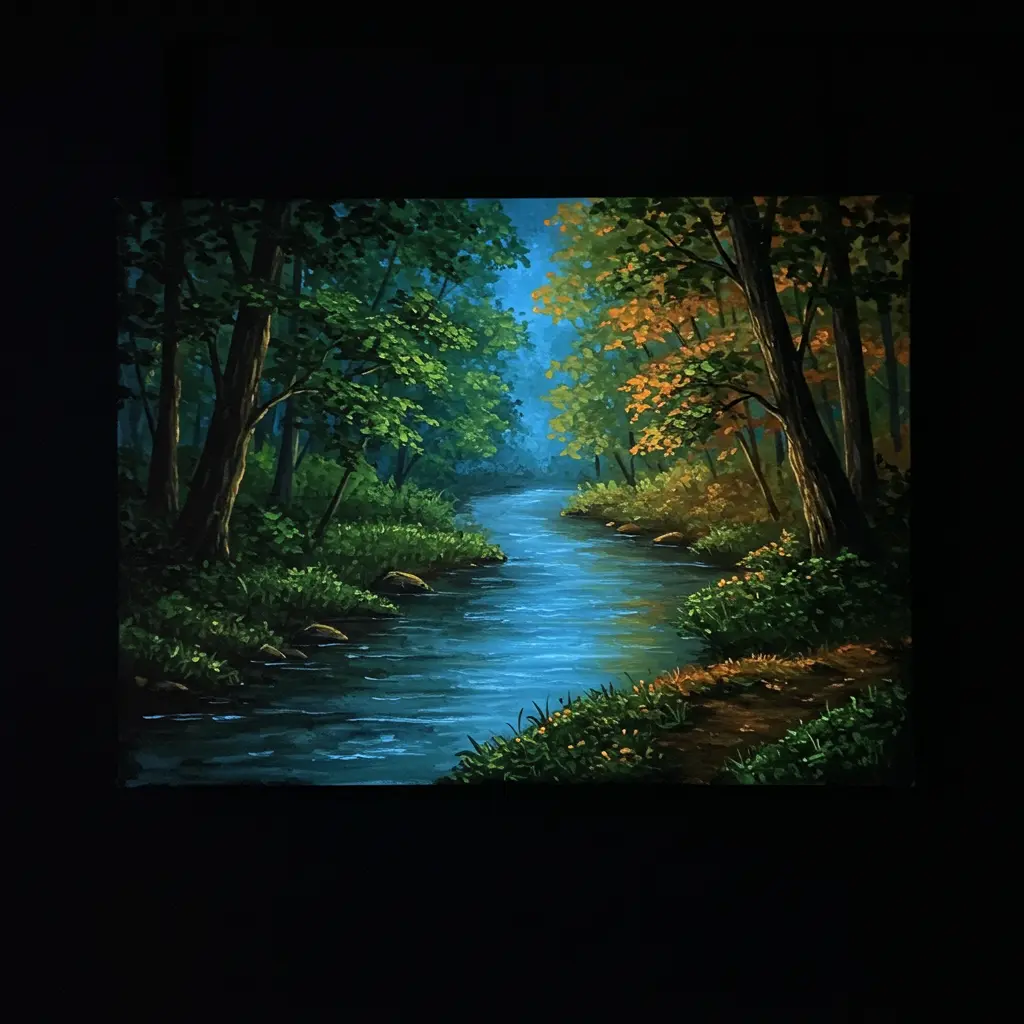
10. Layered Silhouettes

Best For: Creating a stunning sense of depth and a narrative landscape.
- Key Consideration: This requires patience. Each color layer of your background must be completely dry before you paint the next silhouette on top.
- Pro-Tip: Start with your lightest background color (the “sky”). Let it dry. Then paint your farthest silhouette layer (e.g., distant mountains). Let it dry. Continue working your way to the foreground for a realistic sense of depth.
- Styling Cue: A silhouette of a local mountain range or treeline makes for a deeply personal and beautiful piece of art.
11. Gold Leaf Luxe

Best For: Adding an instant touch of elegance, glamour, and a rich, light-catching quality to your art.
- Key Consideration: You need a special adhesive called “size” for gold leaf to stick properly. Apply a thin layer of size, wait for it to get tacky (usually 15-20 minutes), then gently apply the gold leaf sheets.
- Pro-Tip: Use a soft, dry brush to gently burnish the gold leaf onto the sized area and whisk away the excess flakes (save these “skewings” for other small projects!).
- Styling Cue: A touch of gold leaf can make a simple abstract painting look like it came from a high-end gallery. Pair it with deep navy, emerald green, or black for a regal effect.
12. Drip Effect Ombre
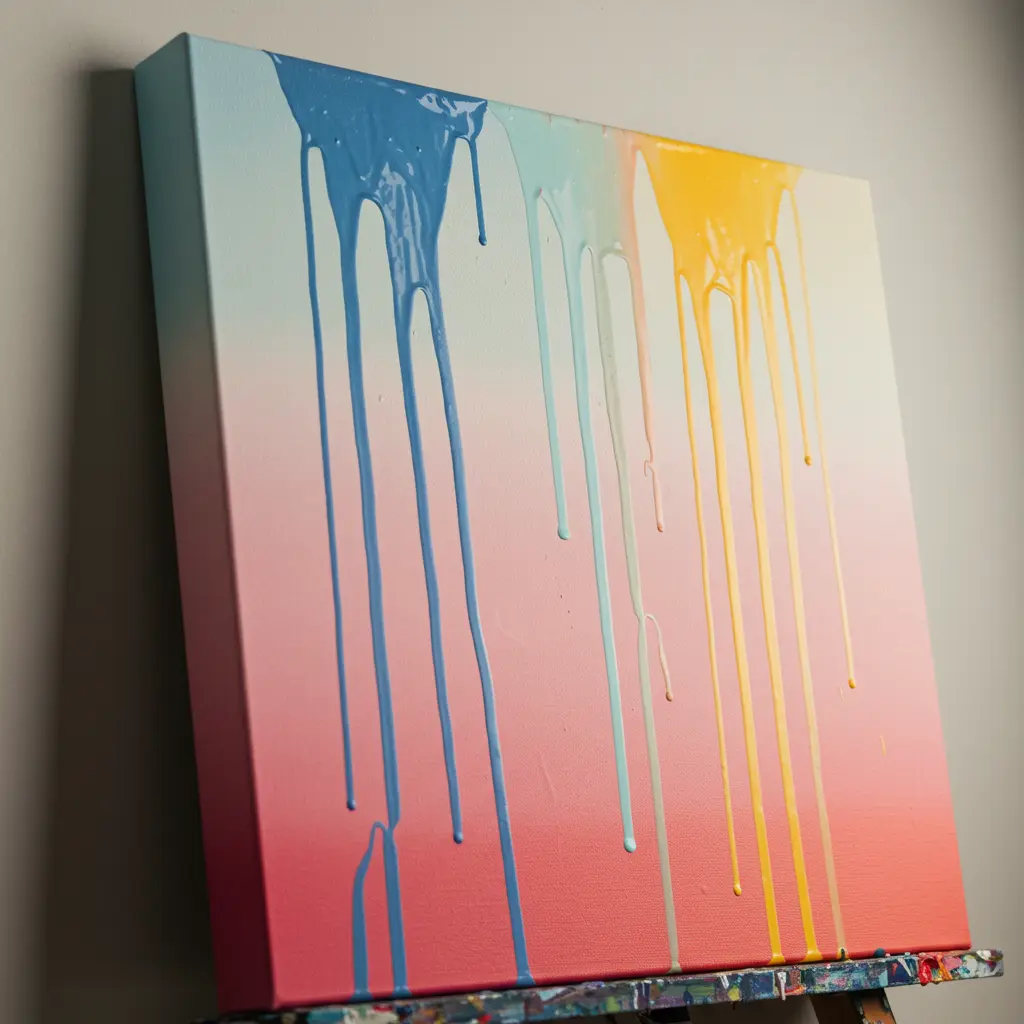
Best For: A dramatic, gravity-defying piece that blends colors beautifully.
- Key Materials: Fluid, watery acrylic paints or inks.
- Pro-Tip: Generously apply your colors in horizontal bands at the top of the canvas. Then, turn the canvas vertically and gently spritz it with a water bottle to encourage the colors to run down and blend together.
- Styling Cue: This creates a stunning, waterfall-like effect that looks fantastic on a tall, narrow canvas hung in a stairwell or on a slim wall.
13. Nature-Inspired Pressed Leaf Painting
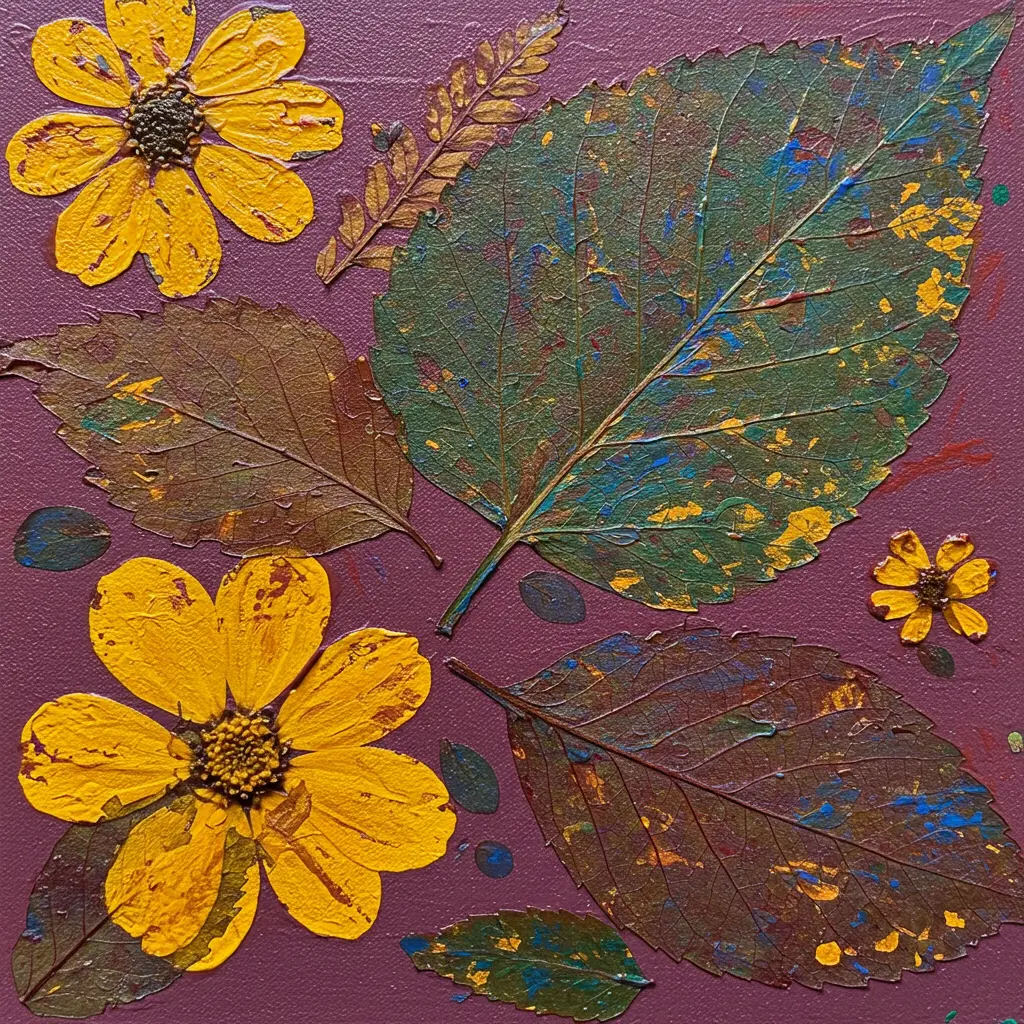
Best For: Creating an organic, earthy design that brings the beauty of nature indoors.
- Key Materials: Real leaves or flowers, acrylic paint, a brayer (roller).
- Pro-Tip: For the clearest print, paint a thin, even layer of paint onto the veiny side of the leaf. Carefully place it paint-side-down on your canvas, cover it with a piece of scrap paper, and press down firmly with a brayer or your hand.
- Styling Cue: A series of three smaller canvases, each with a different leaf print in the same color, makes a beautiful and serene triptych for a living room or bedroom.
14. Alcohol Ink Explosion

Best For: Creating vibrant, fluid, and mesmerizing patterns that look like stained glass.
- Key Consideration: Alcohol inks work best on a non-porous surface. You must seal your canvas with several coats of primer and a gloss varnish before you begin, or use a special synthetic paper like Yupo mounted to a board.
- Pro-Tip: Use 91% or higher isopropyl alcohol in a dropper or spray bottle to move the inks around, blend them, and create incredible lacy effects.
- Styling Cue: The vibrant, jewel-toned results of alcohol ink look incredible in a bright, sunlit room where the colors can truly shine.
15. DIY String Art Painting
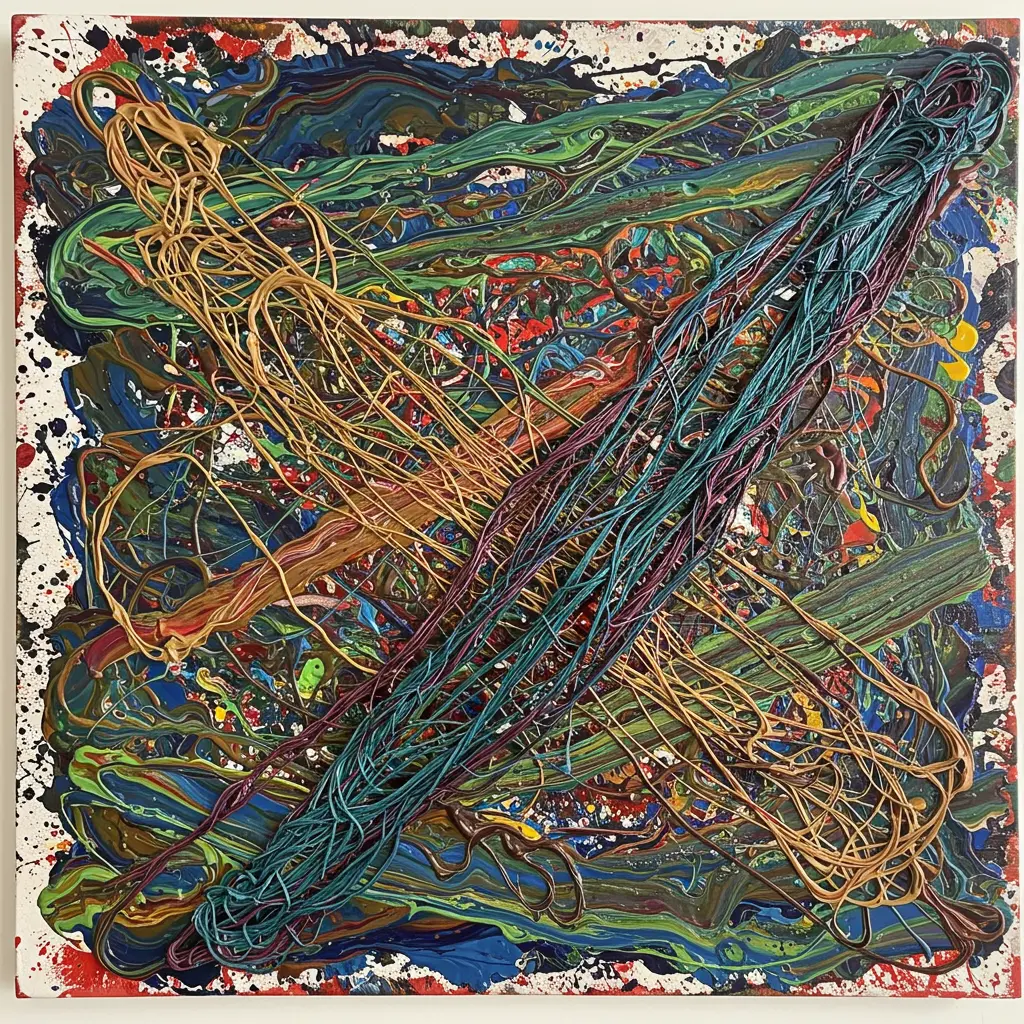
Best For: Creating beautifully fluid, unpredictable lines and patterns.
- Key Materials: A canvas, acrylic paint, and a piece of household string or yarn.
- Pro-Tip: Dip your string in a puddle of paint, then lay it on the canvas in a curvy, random pattern, leaving one end hanging off the edge. Place a piece of paper on top, press down with one hand, and use the other to pull the string out from under the paper.
- Styling Cue: This creates delicate, wispy, almost floral-like patterns. It’s perfect for a soft, romantic piece of art for a bedroom.
16. Fingerprint Art
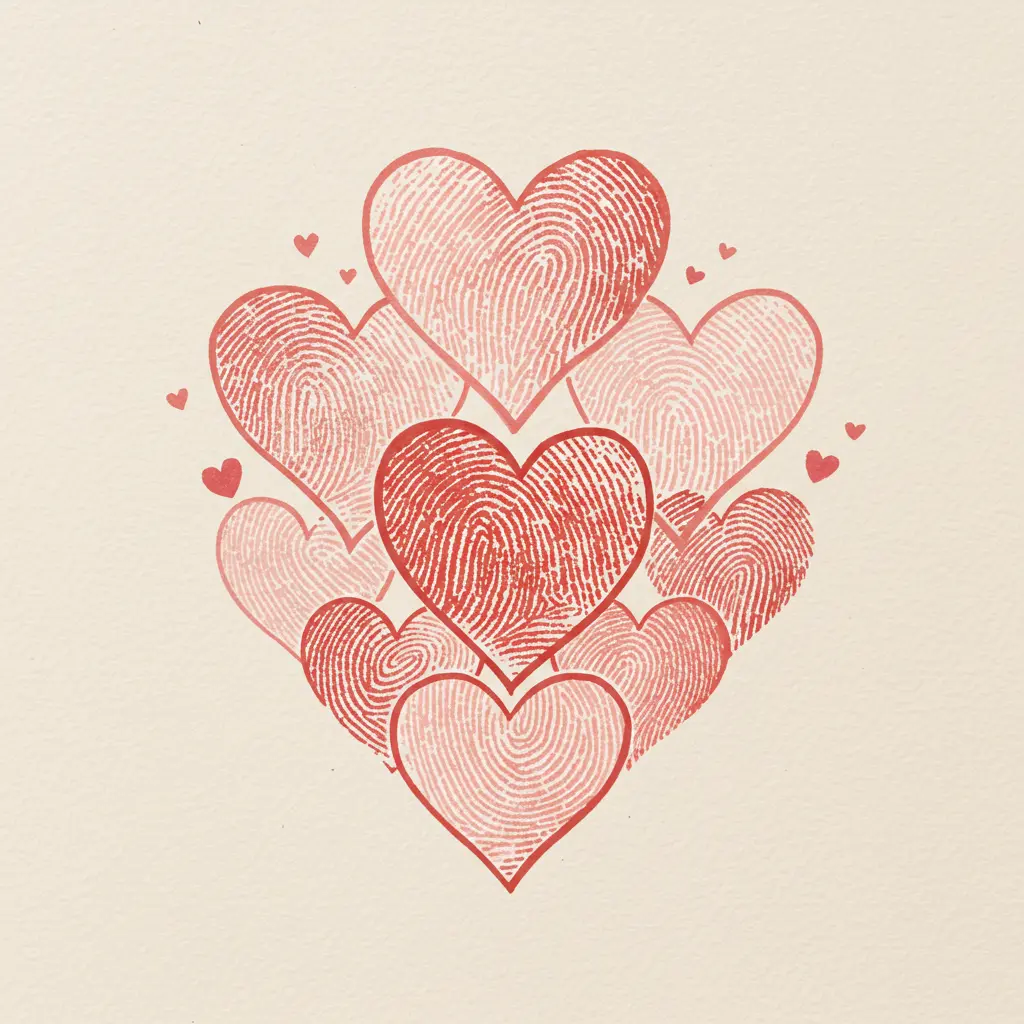
Best For: A heartwarming and deeply personal piece that is fun for the whole family to create together.
- Key Materials: Acrylic paint in various colors.
- Pro-Tip: Use a different finger for each color to avoid muddying your paints.
- Styling Cue: Create a “fingerprint tree.” Paint or draw a bare tree trunk and branches, then have family members use their fingerprints as the “leaves,” creating a beautiful and meaningful family tree artwork.
17. Negative Space Typography

Best For: Creating bold, personalized, and graphic word-based art.
- Key Materials: Large vinyl or sticker letters, acrylic paint.
- Pro-Tip: Firmly press down the edges of your sticker letters to ensure a good seal. After you paint your background, peel the stickers off while the paint is still slightly wet. This will give you the cleanest, sharpest edge.
- Styling Cue: A canvas with a single, powerful word like “LOVE,” “HOME,” or your family’s last name makes a beautiful and personal statement in an entryway.
18. Mood-Boosting Watercolor Blending

Best For: Creating a soothing, dreamy, and serene atmosphere with soft, blended colors.
- Key Consideration: Traditional watercolors won’t work well on a standard canvas. You need to use “fluid acrylics” or “high-flow acrylics” watered down to achieve a watercolor look that will be permanent on canvas when dry.
- Pro-Tip: Work on a wet canvas. Use a large brush or sponge to coat your canvas with a thin layer of water first. When you touch your watered-down acrylics to the wet surface, they will bloom and blend beautifully.
- Styling Cue: A soft, abstract watercolor-style painting is perfect for creating a calm, spa-like feel in a bathroom or bedroom.
Conclusion: Your Walls Are Waiting!
And just like that, you’re no longer just looking at a blank canvas you’re looking at a world of creative possibilities. You have the ideas, the inspiration, and the know-how to create artwork that is a true reflection of you. This isn’t just about filling a space; it’s about infusing your home with your own unique energy and style.
It all starts with a single choice. Pick a technique that made your heart skip a beat, grab your supplies, and take the first fearless step.
You’ve got this.
