
Is your coop floor feeling crowded? Are you finding eggs in inconvenient corners instead of in their designated boxes? You’re in the right place to change that.
A nesting box shouldn’t just be a place for a hen to lay an egg; it should be an efficient, space-saving sanctuary that encourages consistent laying, keeps eggs clean, and makes your life as a chicken keeper easier.
This is your creative playbook for transforming a corner of your coop into a feature that’s not only incredibly functional but brilliantly designed for your specific flock.
We’ll explore clever designs, decode the secrets of hen comfort, and walk through the practical steps to bring it all to life.
By the end, you’ll see your coop not as a space problem to be solved, but as a canvas for smart, productive design.
Before You Begin: The Hen’s-Eye View
The most effective nesting boxes start with a little bit of chicken psychology, not just a pile of spare parts. Before you build a single box, let’s lay the groundwork for a design that your hens will want to use.
The Secrets of Style: Simple Rules for the Perfect Nest
Nesting box design sounds simple, but these rules are what separate a neglected box from an egg-laying magnet.
- Dark, Quiet, and Private: Chickens instinctively seek a secluded, safe spot to lay. Your boxes should be located in the calmest, darkest corner of the coop, away from the main door and high-traffic areas. A simple curtain over the front can make a huge difference.
- The Golden Rule of Placement: Nesting boxes must be positioned lower than your roosting bars. Chickens naturally want to sleep in the highest spot available. If your nesting boxes are higher than the roosts, they will become bedrooms, which means they will be filled with poop every morning.
- Size and Number: The standard rule is to provide one nesting box for every 3 to 4 hens. (They will all probably fight over the same one, but you need to provide options.) A 12″x12″x12″ box is a perfect size for most standard breeds.
- Keep it Clean and Cozy: A deep, 4-6 inch layer of soft bedding (like pine shavings or straw) is essential. It keeps the eggs cushioned, clean, and makes the box inviting for the hen.
What’s the Real Cost? A No-Fuss Budget Breakdown
| The Approach | Estimated Cost | What Your Money Buys | The Little Extras (Don’t Skip These!) |
| The Upcycled Nest | $0 – $15 | • Repurposed crates, buckets, or baskets • Using scrap wood you already have | • Good, weatherproof screws • A drill with a basic bit set • Sandpaper to smooth rough edges |
| The Weekend Builder | $20 – $75 | • A sheet of plywood for a custom unit • 2x4s for framing & perches • Hinges for easy-access lids | • A quality saw & tape measure • A level for perfect placement • Exterior-grade paint or sealer |
| The Coop Pro | $80 – $200+ | • Materials for a large cabinet conversion • Pre-made roll-away nesting inserts • High-end hardware (soft-close hinges, drawer slides) | • A Kreg Jig for strong joints • A hole saw bit set • A staple gun for curtains |
The Design Menu: Finding Your Signature Nesting Style
Here are the ingredients for your perfect space-saving setup. Each one comes with a breakdown to help you build with confidence.
1. Stackable Nesting Boxes
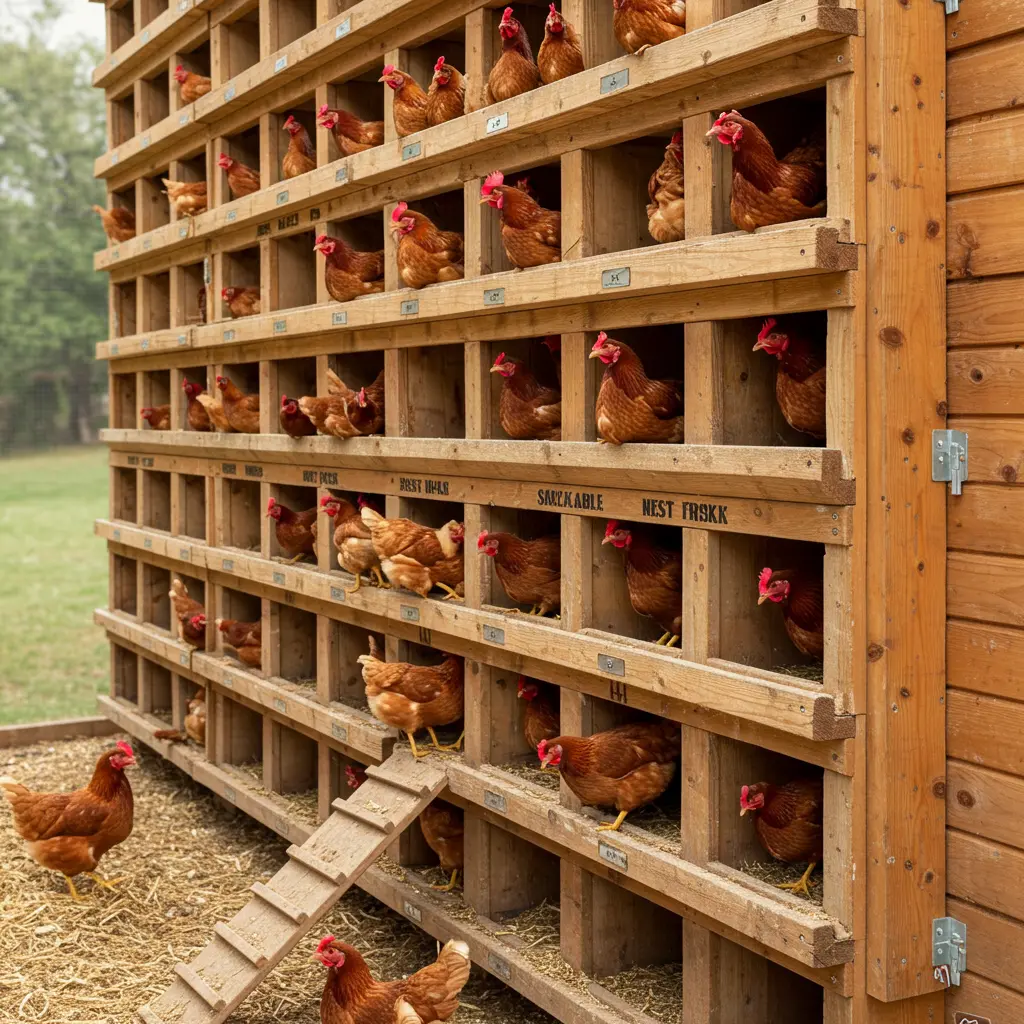
Best For: Co-ops with limited floor space but ample vertical height. The classic solution for maximizing your hen-to-square-foot ratio.
- Key Consideration: The entire unit must be extremely stable and securely fastened to the coop wall to prevent any risk of tipping.
- Pro-Tip: Build a continuous “ladder” or perch running along the front of all the boxes. This gives hens an easy landing strip to access both the top and bottom levels without a struggle.
- Placement Cue: Ideal for a tall, narrow wall space inside the coop, turning an unused vertical plane into a productive egg-laying station.
2. Corner Nesting Boxes
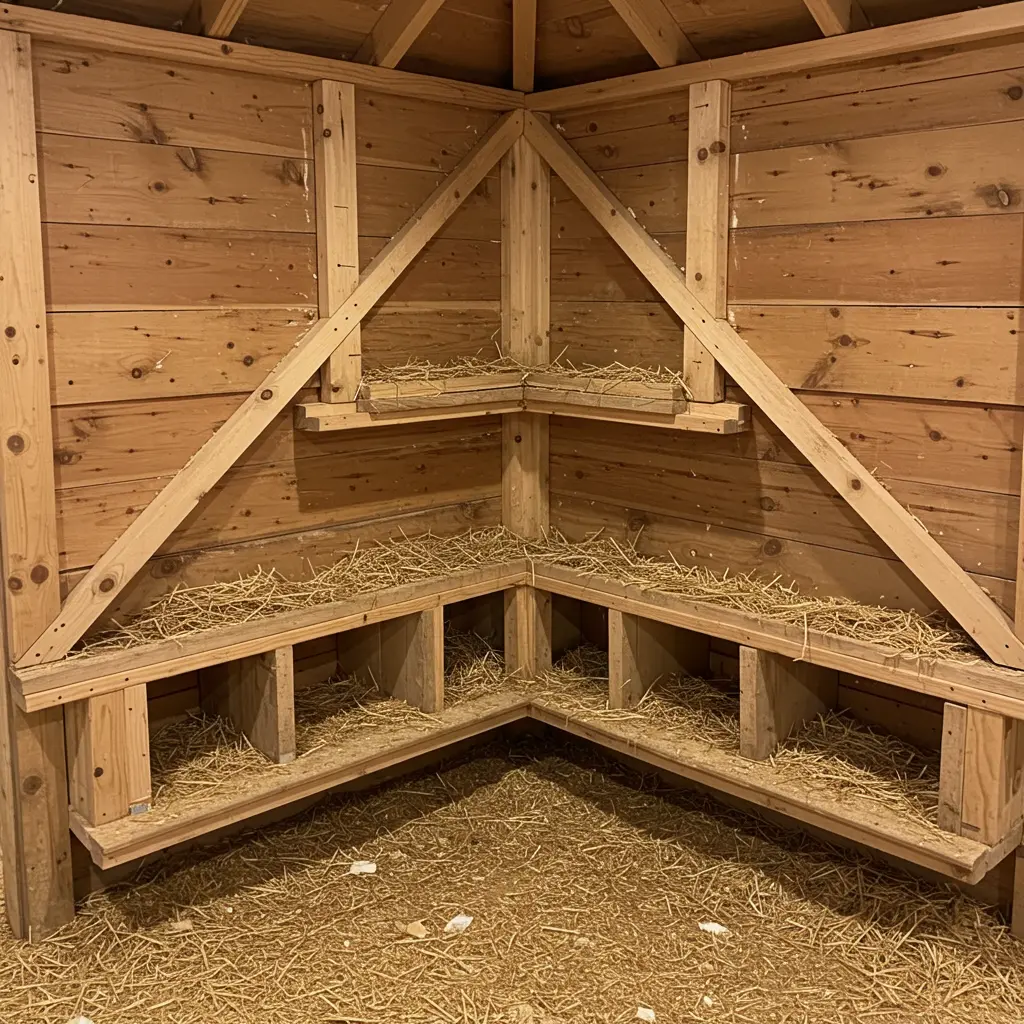
Best For: Utilizing awkward, often wasted, 90-degree corner space in any coop.
- Key Consideration: A triangular shape can be slightly harder to clean out than a square. Designing the box with a removable bottom panel can make cleaning much easier.
- Pro-Tip: Build the top of the corner box with a steep 45-degree slope. This makes it impossible for chickens to roost on top of it, keeping it clean.
- Placement Cue: Tucks perfectly into any corner of the coop, freeing up the main walls for roosts, feeders, or windows.
3. Wall-Mounted Foldable Nesting Boxes
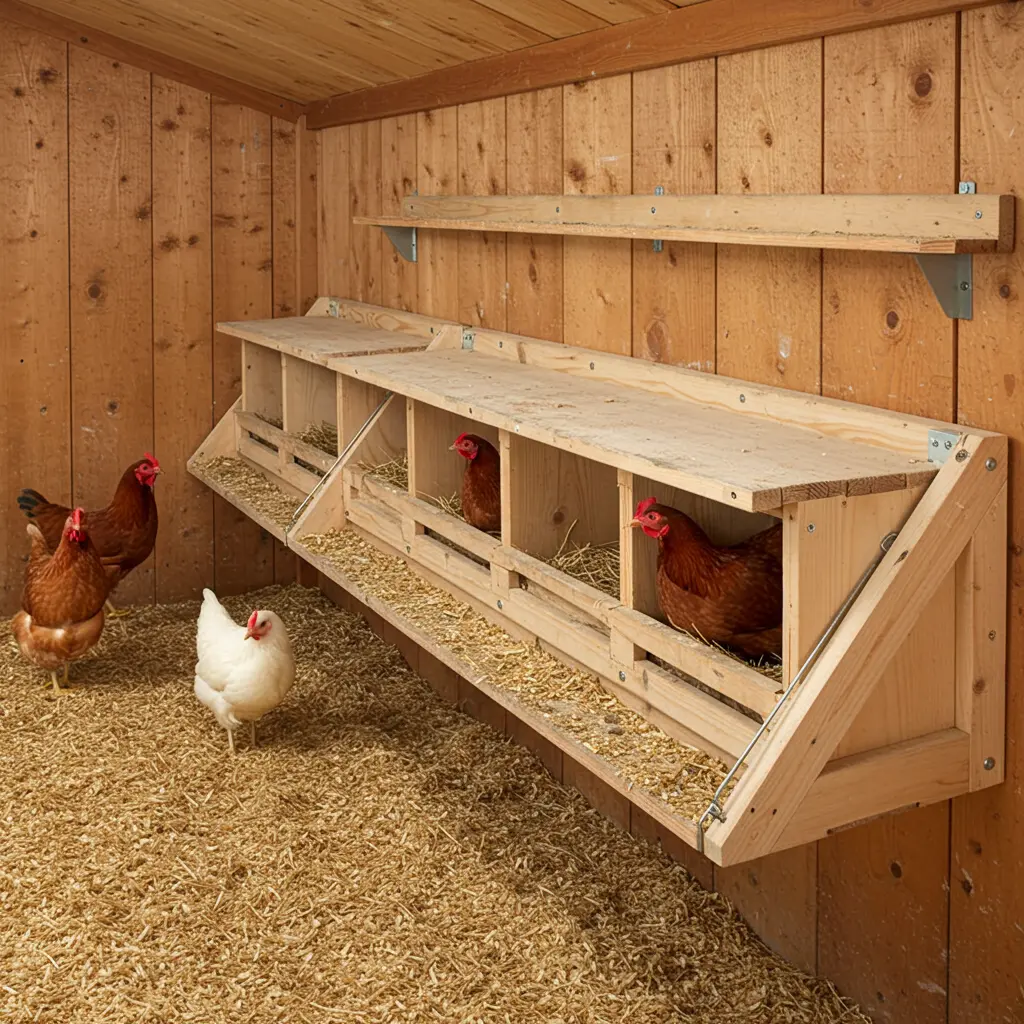
Best For: Micro-coops, chicken tractors, or multi-purpose spaces where floor space is at an absolute premium.
- Key Consideration: The hinge mechanism must be strong and reliable. Use heavy-duty hinges and a secure latch to keep the box locked in the “up” position.
- Pro-Tip: Install a small gas strut (like those used on car hoods or toolboxes) in the folding mechanism. This will allow the box to lower slowly and gently, preventing it from slamming down and startling the flock.
- Placement Cue: Mount them on the wall in a row. When folded up, they take up almost no space, allowing you to easily sweep and clean the entire coop floor.
4. Multi-Hen Community Nesting Box
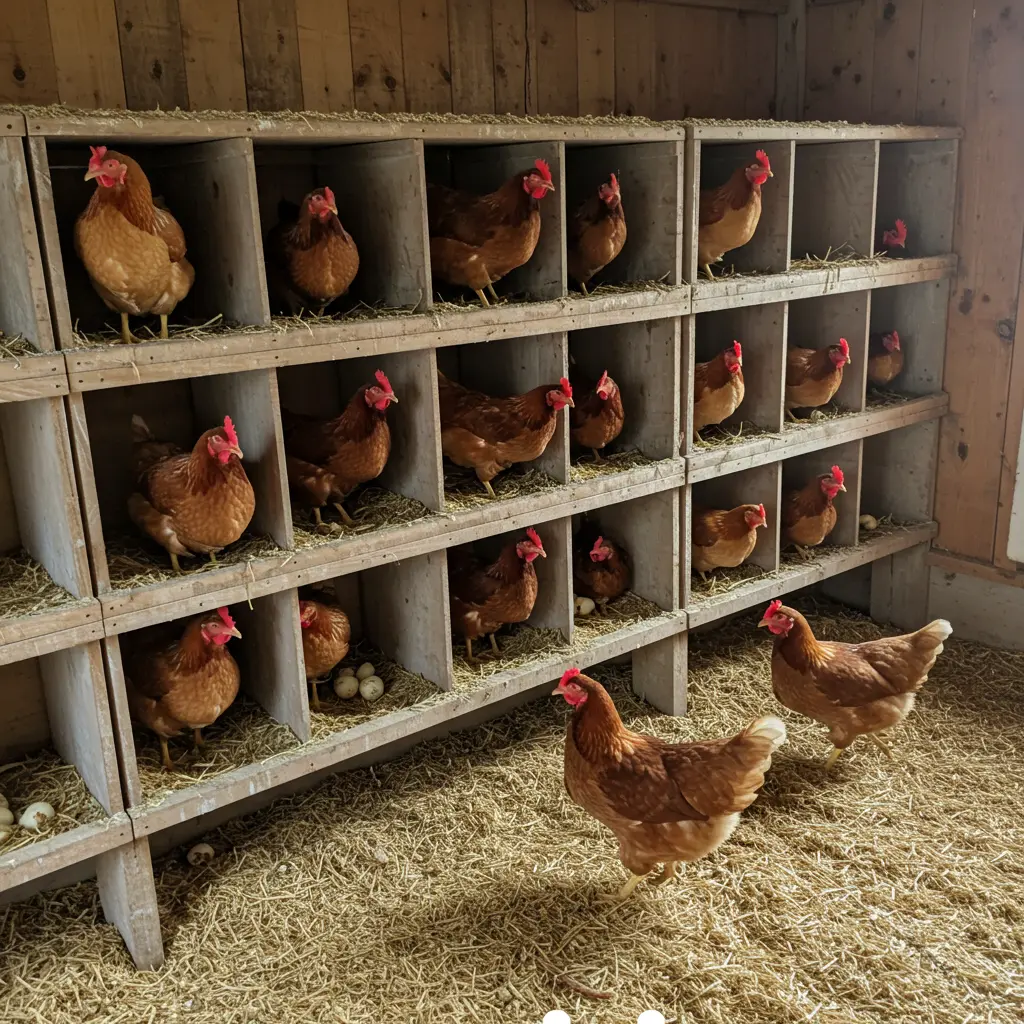
Best For: Mimicking natural flock behavior and simplifying construction. Hens often prefer to lay in the same spot anyway.
- Key Consideration: It needs to be large enough to comfortably fit 2-3 hens at once without causing squabbles (e.g., 12 inches deep by 36 inches long).
- Pro-Tip: Even in a community box, a little privacy goes a long way. Place simple, removable dividers inside the large box to give the hens the feeling of a private space, which can reduce stress and egg-eating.
- Placement Cue: A single, long community box built along a back wall is a very efficient use of materials and space.
5. Repurposed Crates & Bins
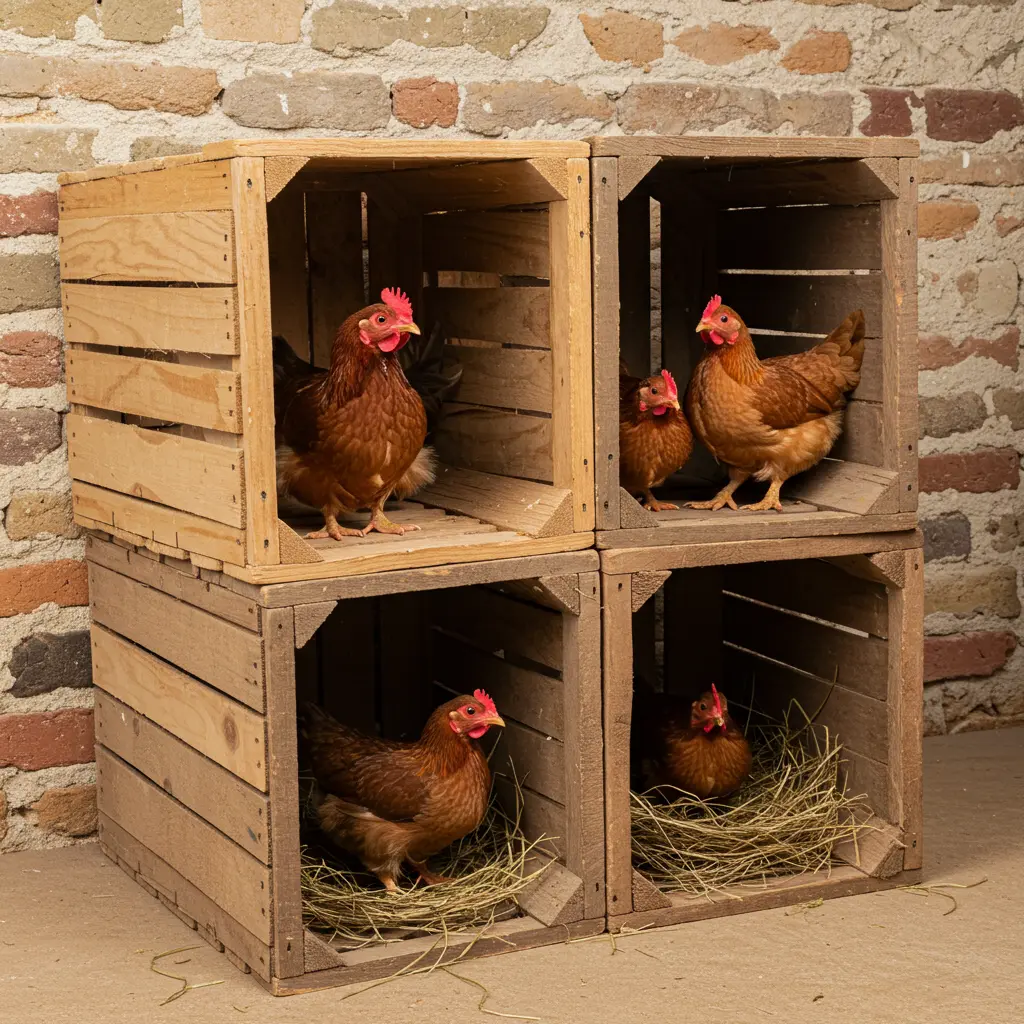
Best For: The budget-conscious chicken keeper who loves an eco-friendly, upcycled solution.
- Key Materials: 5-gallon buckets, kitty litter tubs, wooden wine crates, or milk crates.
- Pro-Tip: When using a 5-gallon bucket, lay it on its side and cut out the top third of the bucket. This creates a cozy, hooded nest that provides the darkness and security hens love.
- Placement Cue: Securely fasten your repurposed containers to a low shelf or directly to the wall to prevent them from rolling or tipping over.
6. PVC Pipe Nesting Pods
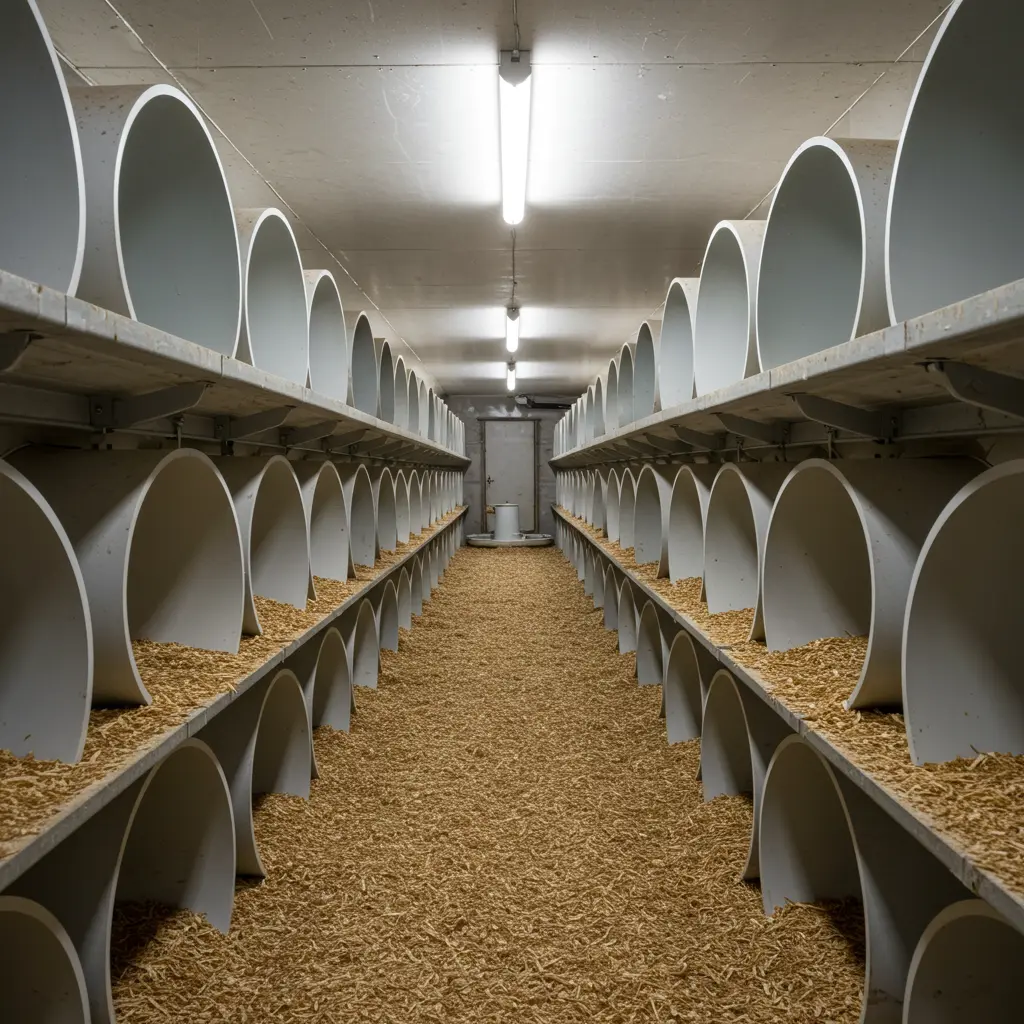
Best For: A modern, minimalist aesthetic and for owners who prioritize ease of cleaning above all else.
- Key Consideration: A hard plastic surface isn’t naturally inviting. A very deep, cozy layer of soft bedding is essential to encourage hens to use them.
- Pro-Tip: Use a large diameter pipe (10-12 inches) for standard-sized hens. Cut the pipe into 12-114-inch lengths, then cap one end. The smooth, non-porous surface can be hosed out and sanitized in seconds.
- Placement Cue: Create a “honeycomb” effect by stacking these pods inside a simple wooden frame, creating a visually interesting and highly functional wall.
7. Under-the-Roost Nesting Drawers
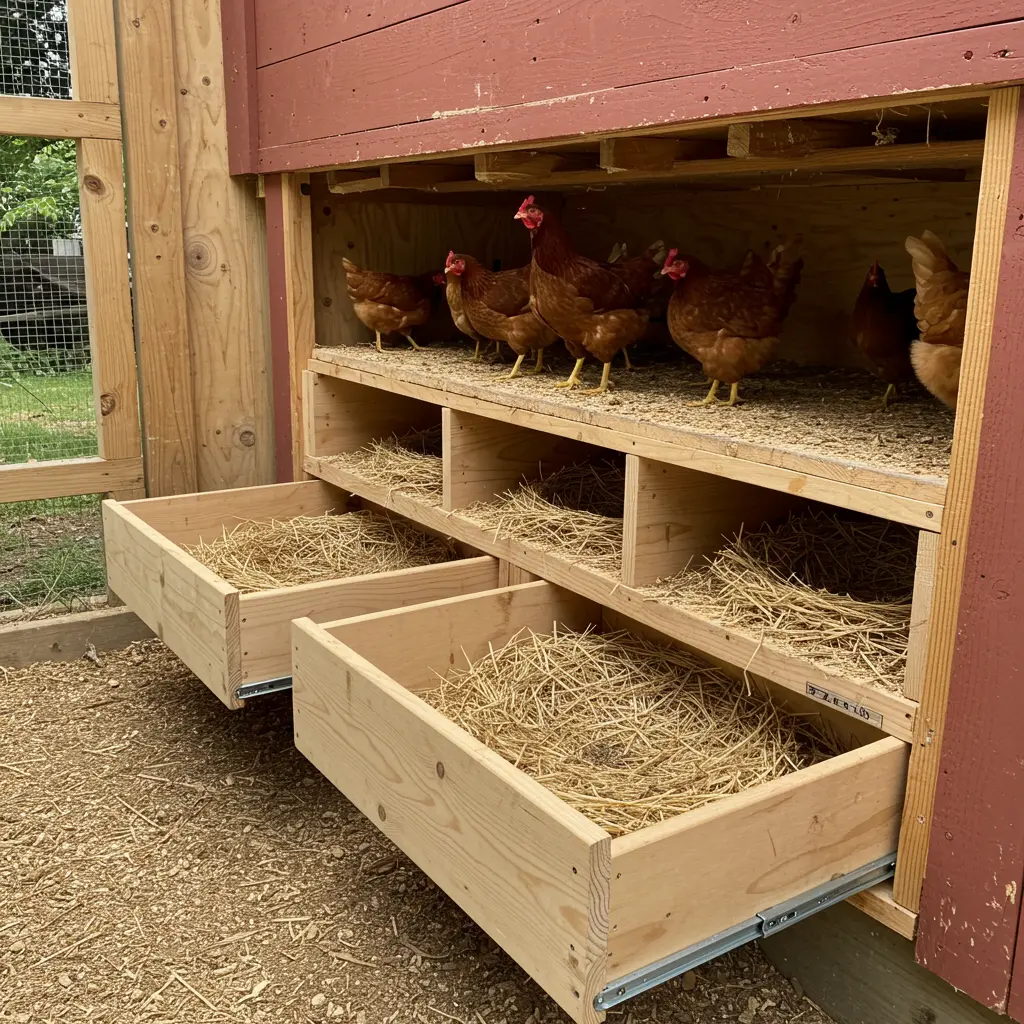
Best For: The ultimate space-hacker. It utilizes the “dead space” under the droppings board that is otherwise wasted.
- Key Consideration: This design only works if you have a well-designed, elevated droppings board that catches all the nightly manure, keeping the nesting drawers below completely clean.
- Pro-Tip: Install full-extension drawer slides. This allows the drawers to pull all the way out, making egg collection and bedding changes incredibly easy without having to reach into a dark coop.
- Placement Cue: This is an integrated design. Frame it out below your roosts and droppings board, essentially creating a built-in “cabinet” for your nests.
8. Roll-Away Nesting Boxes
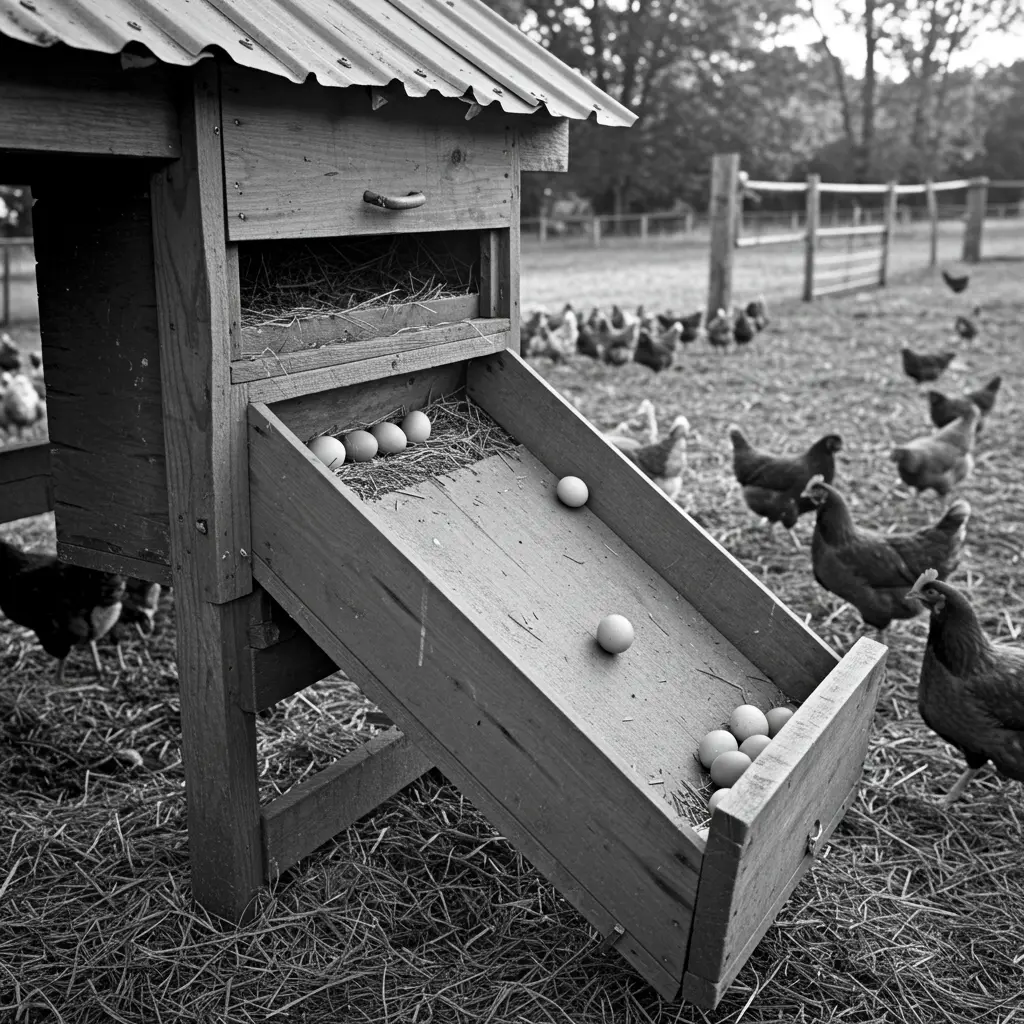
Best For: Anyone obsessed with perfectly clean eggs or who has a problem with egg-eating hens.
- Key Consideration: The angle of the floor is critical. A slope of about 8-10 degrees is the sweet spot, steep enough for the egg to roll away, but not so steep that it rolls too fast and cracks.
- Pro-Tip: Use a commercial roll-away nest insert or a material like an artificial grass mat for the floor. This provides cushioning and grip, encouraging hens to use the box while still allowing the egg to roll safely.
- Placement Cue: Design these with an external collection tray. The ability to gather pristine eggs without even opening the coop door is a game-changing luxury.
9. Hanging Basket Nesting Boxes
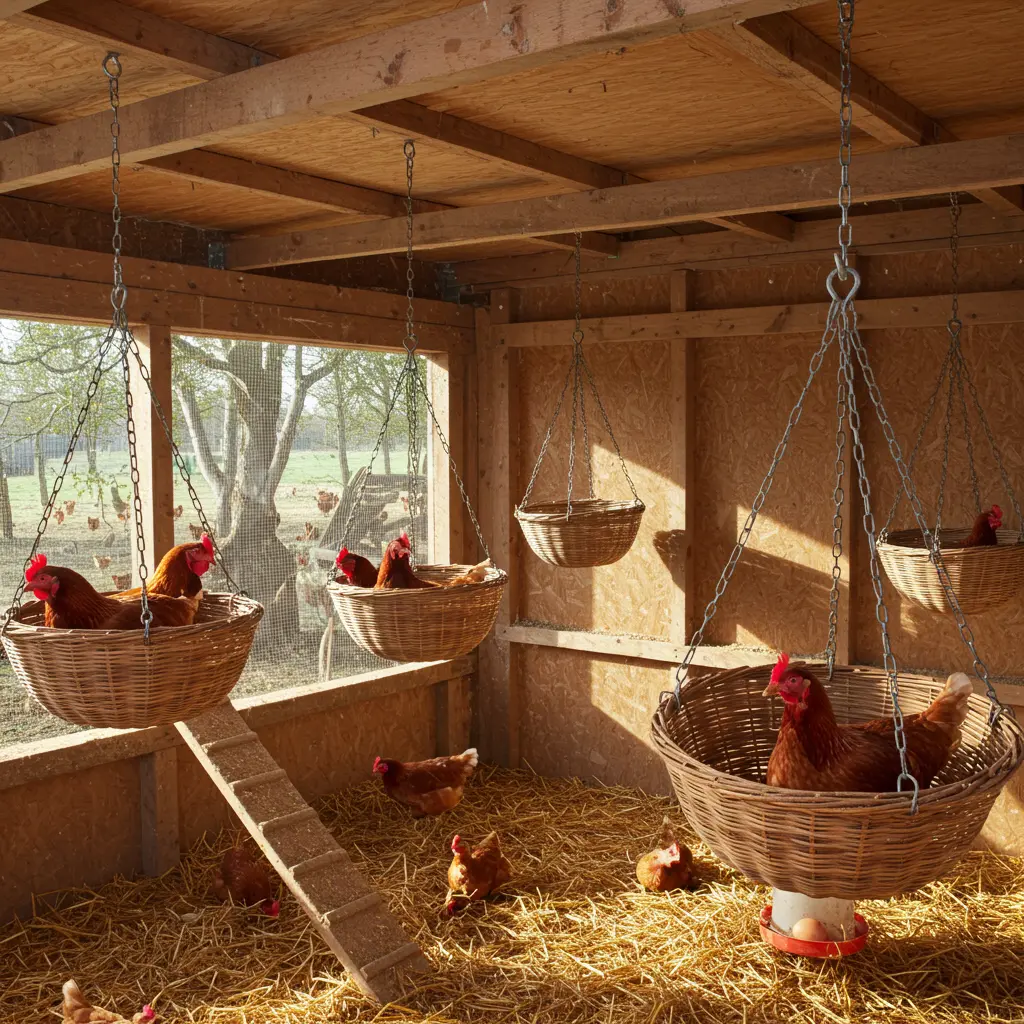
Best For: A quirky, bohemian look, and for cco-ops where wall and floor space is completely unavailable.
- Key Consideration: The basket must be hung from a very sturdy structural element, like a ceiling rafter or support beam. Use a strong rope or a chain that can easily support the weight of a hen.
- Pro-Tip: Use a deep basket and line it with a thick layer of coco coir liner before adding straw. This creates a solid, secure base and prevents eggs from accidentally falling through any gaps in the wicker.
- Placement Cue: Hang them in a quiet corner of the coop, ensuring they don’t swing too much and are low enough for a hen to comfortably hop into.
10. Cabinet-Style Nesting Units
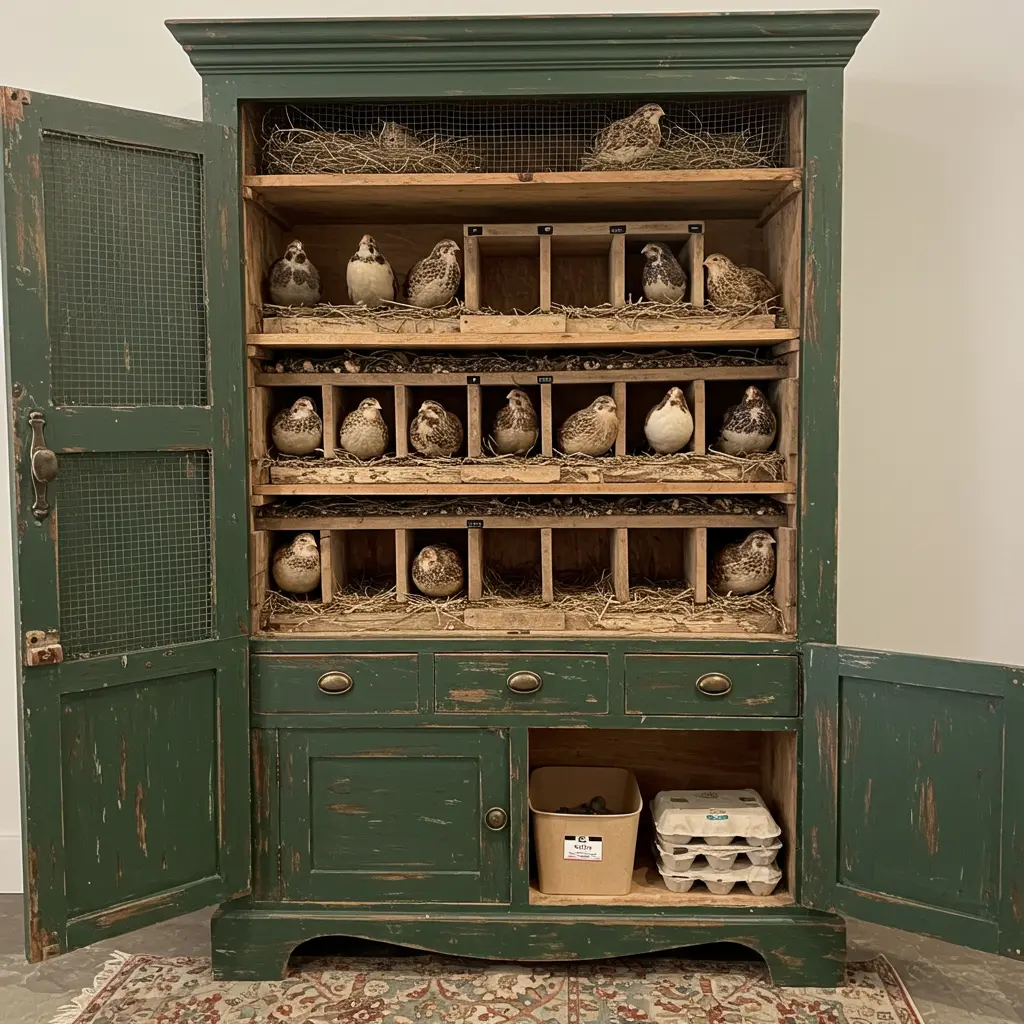
Best For: The design-conscious chicken keeper who wants a beautiful, furniture-like piece that is hyper-functional.
- Key Materials: An old dresser, a small cabinet, or a custom-built plywood unit.
- Pro-Tip: Remove the drawers and use the openings as the entry to the nesting boxes. Build a large, hinged door on the back or side of the cabinet for easy access to all the boxes at once for cleaning and egg collection.
- Placement Cue: This standalone “piece of furniture” can be placed anywhere in the coop and often provides the bonus of a flat top surface for storing supplies.
Conclusion: Your Coop’s Next Level
And just like that, you’re no longer just looking at a crowded coop, you’re looking at a world of smart, space-saving possibilities. You have the ideas, the inspiration, and the know-how to build a nesting system that works for you and your flock. This isn’t just about building boxes; it’s about creating an efficient, clean, and productive egg-laying haven.
It all starts with a single choice. Pick the idea that solves your biggest space problem, and take the first small step.
You’ve got this.
